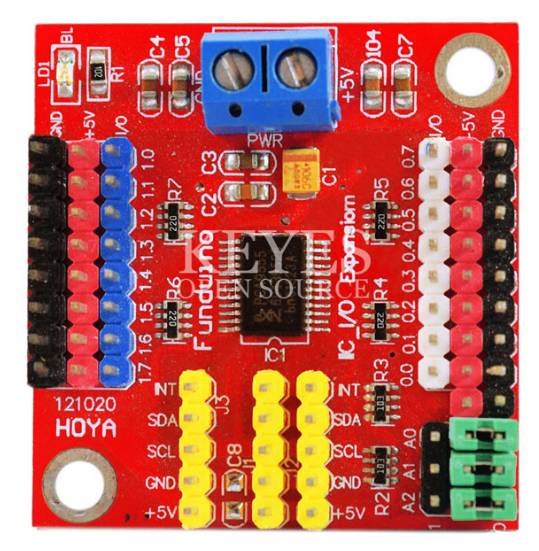
Arduino Uno 大概是用途最广泛的型号了,美中不足的是它的GPIO 有限,这里介绍一个GPIO的扩展模块。基于 PCA9555芯片的 GPIO模块。
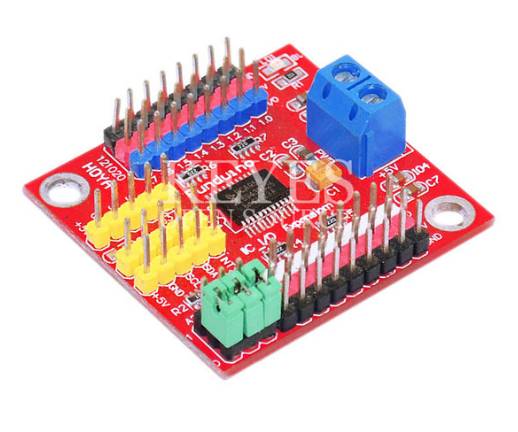
简单的说,这个模块是将I2C转换为 GPIO,一共支持16个GPIO。板子上通过跳线的方式可以选择当前的地址0x20-0x27一共8个,理论上可以级联出来8(个模块)*16(个GPIO)=128个GPIO。
特地我去查了一下电气特性【参考1】:
电源支持2.3到5.5v(正常工作范围),IO 输入5V,支持每一个输出最大50mA,输入时每个最大20mA。电源供电最大输入 160mA(这意味着不能同时有3以上的 GPIO输出50mA,在使用的时候一定要特别注意,最好把它当作只能提供电平的控制模块)。
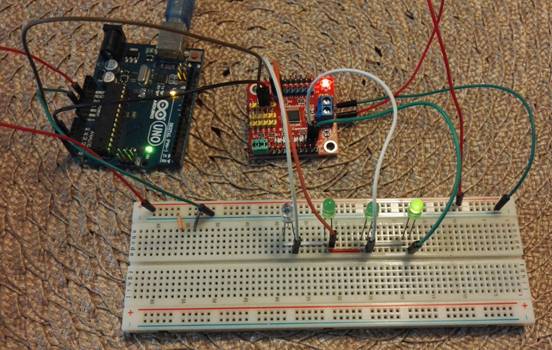
简单实验这个模块,用4个LED,负极通过一个1K电阻接地,虽然这样会让LED看起来很暗,但是我能够确定不会有过流的问题。然后用扩展版上的 P0.6,P0.7 ,P1.6和P1.7连接LED正极进行供电控制。
运行的代码来自 DFRobot【参考2】(看起来他们在很久之前做过一块类似的板子,但是目前已经停产了)。当I2C地址选择三个Pin都为0时,模块地址是0x20。另外,I2C访问部分,我修改为Wire.write 之前的Wire.send 函数已经取消了。
/******************************************************************************
Test Program for the 12C PCA9555 Board part number DFR0013 IIC TO GPIO module from dfrobot.com
16 outputs that I used to drive this relay board made in Bulgaria
http://www.denkovi.com/product/21/16-relay-board-for-your-pic-avr-project-12v.html
it's a great little expansion board that can be used to drive LEDs or anything you want.
made by peter@testelectronics.com
January 07th 2011
My biggest problem was figuring out the I2C address of the PCA9555.
If there are no jumpers the address is 1 0 0 '1 1 1'
Jumpers make the address 1 0 0 '0 0 0'. This is opposite of what I expected.
******************************************************************************/

#include <Wire.h>

//  with no jumpers the full address is   1 0 0 1 1 1    1 0 0 A2 A1 A0  0x27 is the default address for the DFR0013 board with no jumpers.
#define PCA9555 0x20 // 0x27 is default address for the DFR0013 board with no jumpers.
                     // 0x20 is address for the DFR0013 board with all jumpers.
// COMMAND BYTE TO REGISTER RELATIONSHIP FROM PCA9555 DATA SHEET
// At reset, the device's ports are inputs with a high value resistor pull-ups to VDD
// If relays turning on during power up are a problem. Add a pull down resistor to each relay transistor base.

#define IN_P0 0x00 // Read Input port0
#define IN_P1 0x01 // Read Input port1
#define OUT_P0 0x02 // Write Output port0
#define OUT_P1 0x03 // Write Output port1
#define INV_P0 0x04 // Input Port Polarity Inversion port0 if B11111111 is written input polarity is inverted
#define INV_P1 0x05 // Input Port Polarity Inversion port1 if B11111111 is written input polarity is inverted
#define CONFIG_P0 0x06 // Configuration port0 configures the direction of the I/O pins 0 is output 1 is input
#define CONFIG_P1 0x07 // Configuration port1 configures the direction of the I/O pins 0 is output 1 is input

#define PAUSE 200

void setup()
{
  Wire.begin(PCA9555); // join i2c bus (address optional for master) tried to get working
  write_io (CONFIG_P0, B00000000); //defines all pins on Port0 are outputs
  write_io (CONFIG_P1, B00000000); //defines all pins on Port1 are outputs
  write_io (OUT_P0, B00000000); //clears all relays
  write_io (OUT_P1, B00000000); //clears all relays
  delay (PAUSE);
}


void loop()
{
  write_io (OUT_P0, B00000001);
  delay (PAUSE);
  write_io (OUT_P0, B00000010);
  delay (PAUSE);
  write_io (OUT_P0, B00000100);
  delay (PAUSE);
  write_io (OUT_P0, B00001000);
  delay (PAUSE);
  write_io (OUT_P0, B00010000);
  delay (PAUSE);
  write_io (OUT_P0, B00100000);
  delay (PAUSE);
  write_io (OUT_P0, B01000000);
  delay (PAUSE);
  write_io (OUT_P0, B10000000);
  delay (PAUSE);
  write_io (OUT_P0, B00000000);


  write_io (OUT_P1, B00000001);
  delay (PAUSE);
  write_io (OUT_P1, B00000010);
  delay (PAUSE);
  write_io (OUT_P1, B00000100);
  delay (PAUSE);
  write_io (OUT_P1, B00001000);
  delay (PAUSE);
  write_io (OUT_P1, B00010000);
  delay (PAUSE);
  write_io (OUT_P1, B00100000);
  delay (PAUSE);
  write_io (OUT_P1, B01000000);
  delay (PAUSE);
  write_io (OUT_P1, B10000000);
  delay (PAUSE);
  write_io (OUT_P1, B00000000);

}


 void write_io(int command, int value)
{
  Wire.beginTransmission(PCA9555);
  Wire.write(command),Wire.write(value);
  Wire.endTransmission();
}
最终工作的样子:
最后补充一些:
1. 这个模块在淘宝价格20左右,DFRobot新的替代品的价格在65左右;
2. 模块做工不错,看起来挺舒服,应该是机器焊接的(老婆偶然看到,竟然觉得挺精致)
3. Github 上有人提供了一个库,有兴趣的朋友可以试试。如果能够简化编程,都值得实验 https://github.com/nicoverduin/PCA9555
参考:
1. http://www.nxp.com/documents/data_sheet/PCA9555.pdf
2. http://wiki.dfrobot.com.cn/index.php/(SKU:DFR0013)IIC_TO_GPIO%E6%A8%A1%E5%9D%97
这个东东在哪里可以买到,搜不到呀?
这个
https://item.taobao.com/item.htm?spm=a230r.1.14.168.442e6b28h8OIps&id=40609671491&ns=1&abbucket=9#detail
DFROBOT 有的 https://item.taobao.com/item.htm?spm=a230r.1.14.256.442e6b28h8OIps&id=545600275662&ns=1&abbucket=9#detail