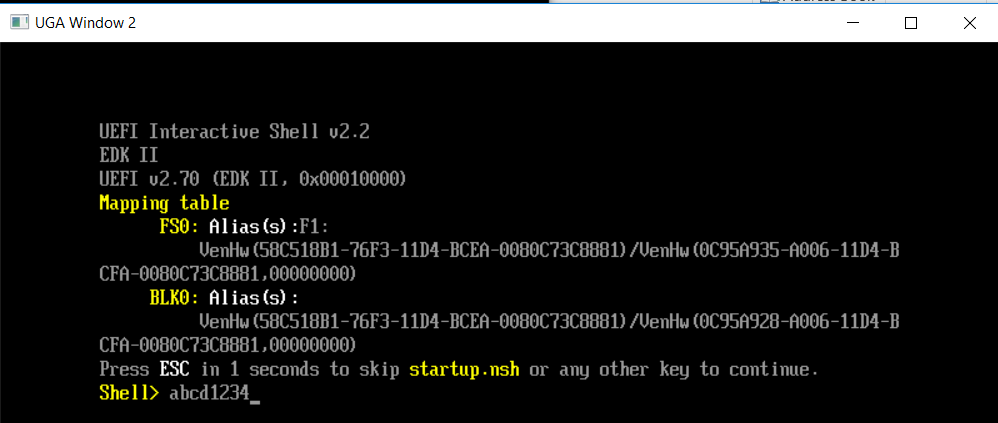
NT32Pkg 是简单方便的虚拟机,很多情况下可以帮助我们验证一些功能。最近研究了一下这个虚拟机中按键功能的实现。
在 \Nt32Pkg\WinNtGopDxe\WinNtGopInput.c 的WinNtGopInitializeSimpleTextInForWindow 函数中可以看到如下代码:
  //
  // Initialize Simple Text In protoocol
  //
  Private->SimpleTextIn.Reset         = WinNtGopSimpleTextInReset;
  Private->SimpleTextIn.ReadKeyStroke = WinNtGopSimpleTextInReadKeyStroke;

  Status = gBS->CreateEvent (
                  EVT_NOTIFY_WAIT,
                  TPL_NOTIFY,
                  WinNtGopSimpleTextInWaitForKey,
                  Private,
                  &Private->SimpleTextIn.WaitForKey
                  );


  Private->SimpleTextInEx.Reset               = WinNtGopSimpleTextInExResetEx;
  Private->SimpleTextInEx.ReadKeyStrokeEx     = WinNtGopSimpleTextInExReadKeyStrokeEx;
  Private->SimpleTextInEx.SetState            = WinNtGopSimpleTextInExSetState;
  Private->SimpleTextInEx.RegisterKeyNotify   = WinNtGopSimpleTextInExRegisterKeyNotify;
  Private->SimpleTextInEx.UnregisterKeyNotify = WinNtGopSimpleTextInExUnregisterKeyNotify;
就是说SimpleTextIn.ReadKeyStroke是在 WinNtGopSimpleTextInReadKeyStroke 实现的;SimpleTextInEx.ReadKeyStrokeEx 是通过WinNtGopSimpleTextInExReadKeyStrokeEx 实现的。SimpleTextIn和SimpleTextInEx是UEFI 下实现键盘功能的基础。继续研究这两个 Protocol 的具体实现。
- WinNtGopSimpleTextInReadKeyStroke 同样在上面WinNtGopInput.c的文件中实现。具体是通过GopPrivateReadKeyStrokeWorker (Private, &KeyData); 来读取按键信息的;
- 同样,WinNtGopSimpleTextInExReadKeyStrokeEx 也是在上面WinNtGopInput.c。最终也是通过 GopPrivateReadKeyStrokeWorker (Private, KeyData); 来读取按键信息的。
接下来查看这个函数:
EFI_STATUS
GopPrivateReadKeyStrokeWorker (
  IN GOP_PRIVATE_DATA                   *Private,
  OUT EFI_KEY_DATA                      *KeyData
  )
/*++

  Routine Description:
    Reads the next keystroke from the input device. The WaitForKey Event can
    be used to test for existance of a keystroke via WaitForEvent () call.

  Arguments:
    Private    - The private structure of WinNt Gop device.
    KeyData    - A pointer to a buffer that is filled in with the keystroke
                 state data for the key that was pressed.

  Returns:
    EFI_SUCCESS           - The keystroke information was returned.
    EFI_NOT_READY         - There was no keystroke data availiable.
    EFI_DEVICE_ERROR      - The keystroke information was not returned due to
                            hardware errors.
    EFI_INVALID_PARAMETER - KeyData is NULL.

--*/
{
  EFI_STATUS                      Status;
  EFI_TPL                         OldTpl;

  if (KeyData == NULL) {
    return EFI_INVALID_PARAMETER;
  }

  //
  // Enter critical section
  //
  OldTpl  = gBS->RaiseTPL (TPL_NOTIFY);

  //
  // Call hot key callback before telling caller there is a key available
  //
  WinNtGopSimpleTextInTimerHandler (NULL, Private);

  ZeroMem (&KeyData->Key, sizeof (KeyData->Key));
  InitializeKeyState (Private, &KeyData->KeyState);

  Status  = GopPrivateCheckQ (&Private->QueueForRead);
  if (!EFI_ERROR (Status)) {
    //
    // If a Key press exists try and read it.
    //
    Status = GopPrivateDeleteQ (Private, &Private->QueueForRead, KeyData);
    if (!EFI_ERROR (Status)) {
      //
      // If partial keystroke is not enabled, check whether it is value key. If not return
      // EFI_NOT_READY.
      //
      if (!Private->IsPartialKeySupport) {
        if (KeyData->Key.ScanCode == SCAN_NULL && KeyData->Key.UnicodeChar == CHAR_NULL) {
          Status = EFI_NOT_READY;
        }
      }
    }
  }

  //
  // Leave critical section and return
  //
  gBS->RestoreTPL (OldTpl);

  return Status;

}
简单的说,这个函数通过GopPrivateCheckQ 来检查Private->QueueForRead,如果有数据就取出按键信息,然后把数据从Buffer 中删除。接下来的问题就是:谁在填写这个 Buffer。找到了下面这个函数
EFI_STATUS
GopPrivateAddKey (
  IN  GOP_PRIVATE_DATA    *Private,
  IN  EFI_INPUT_KEY       Key
  );
代码中有几处使用上面这个函数。最终确定在 WinNtGopThreadWindowProc 函数中:
case WM_CHAR:
//
// The ESC key also generate WM_CHAR.
//
if (wParam == 0x1B) {
return 0;
}
if (AltIsPress == TRUE) {
//
// If AltIsPress is true that means the Alt key is pressed.
//
Private->LeftAlt = TRUE;
}
for (Index = 0; Index < (lParam & 0xffff); Index++) {
if (wParam != 0) {
Key.UnicodeChar = (CHAR16) wParam;
Key.ScanCode = SCAN_NULL;
GopPrivateAddKey (Private, Key);
}
}
if (AltIsPress == TRUE) {
//
// When Alt is released there is no windoes message, so
// clean it after using it.
//
Private->LeftAlt = FALSE;
Private->RightAlt = FALSE;
}
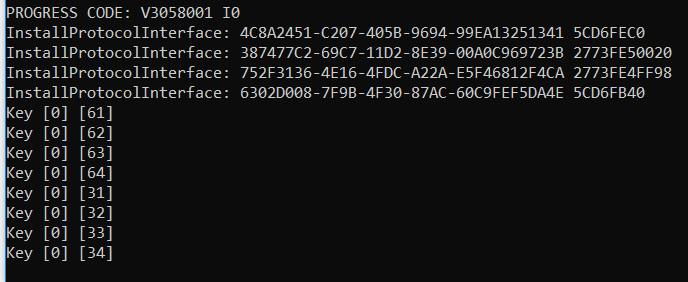
DEBUG ((EFI_D_INFO, "Key [%X] [%X]\n",Key.ScanCode,Key.UnicodeChar)); //LABZ_DEBUG
return 0;
就是说,Windows将WM_CHAR消息发送到了WinNtGopThreadWindowProc 进行处理,代码从中解析出了具体的按键信息。我们在上面加入了一行DEBUG信息可以看到按键的具体信息,试验结果如下:
有了上面的知识,有兴趣的朋友还可以试试将键盘上的某两个键对换,比如按下 “P”打出来的是“Q”。
修改后的 \Nt32Pkg\WinNtGopDxe\WinNtGopScreen.c 代码,可以在这里下载
能不能把完整的code丢到网页里?谢谢
找到了,放在文章最下面了。
感谢