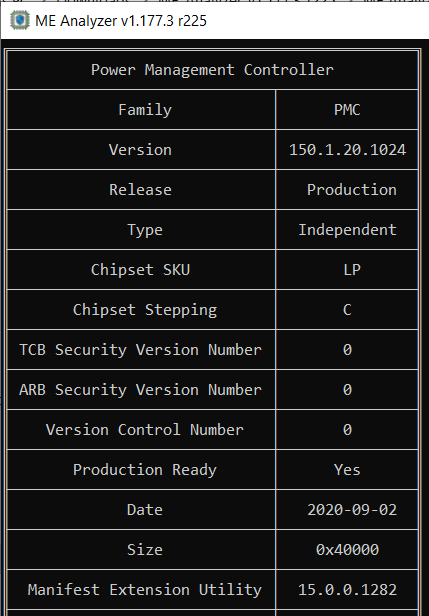
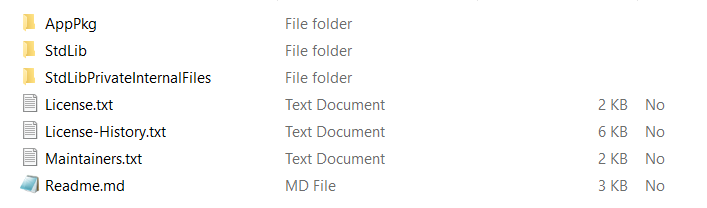
LibC 是 EDK2 的一个库,提供了标准 C 库的支持。这个库在 VS2015 + EDK202008 的组合下工作正常,但是在 VS2019 下就会遇到一些问题,本文将介绍如何解决之。完成的目标是:完整编译 LibC 提供的 AppPkg 。LibC 可以在 https://github.com/tianocore/edk2-libc 下载到,打开之后内容如下:
解压三个目标到 EDK202008 后即可开始编译。
使用 “x86 Native Tools Command Prompt for VS2019”
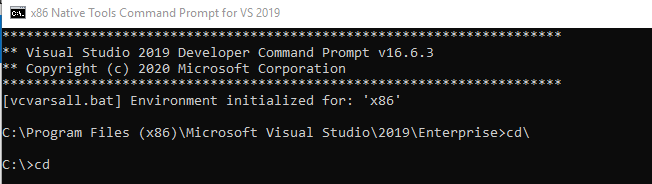
命令
- edksetup
- build -a X64 -p AppPkg\AppPkg.dsc -t VS2019 (特别注意, VS2019 必须大写)
之后就遇到了第一个错误:
“Socket.c
c:\buildbs\edk202008\StdLib\EfiSocketLib\Socket.c(573): error C2220: the following warning is treated as an error
c:\buildbs\edk202008\StdLib\EfiSocketLib\Socket.c(573): warning C4459: declaration of 'errno' hides global declaration
c:\buildbs\edk202008\StdLib\Include\errno.h(43): note: see declaration of 'errno'
c:\buildbs\edk202008\StdLib\EfiSocketLib\Socket.c(1337): warning C4459: declaration of 'errno' hides global declaration
c:\buildbs\edk202008\StdLib\Include\errno.h(43): note: see declaration of 'errno'
c:\buildbs\edk202008\StdLib\EfiSocketLib\Socket.c(1480): warning C4459: declaration of 'errno' hides global declaration
c:\buildbs\edk202008\StdLib\Include\errno.h(43): note: see declaration of 'errno'
c:\buildbs\edk202008\StdLib\EfiSocketLib\Socket.c(1892): warning C4459: declaration of 'errno' hides global declaration
c:\buildbs\edk202008\StdLib\Include\errno.h(43): note: see declaration of 'errno'
c:\buildbs\edk202008\StdLib\EfiSocketLib\Socket.c(2754): warning C4459: declaration of 'errno' hides global declaration
c:\buildbs\edk202008\StdLib\Include\errno.h(43): note: see declaration of 'errno'
c:\buildbs\edk202008\StdLib\EfiSocketLib\Socket.c(2974): warning C4459: declaration of 'errno' hides global declaration
c:\buildbs\edk202008\StdLib\Include\errno.h(43): note: see declaration of 'errno'
NMAKE : fatal error U1077: '"C:\Program Files (x86)\Microsoft Visual Studio\2019\Enterprise\VC\Tools\MSVC\14.26.28801\bin\Hostx86\x64\cl.exe"' : return code '0x2'
Stop.”
解决方法是:在 StdLib.inc 末尾添加下面的内容:
# Temporarily restrict compiler warnings to those produced by VS2012.
  # Code that fails when these flags are removed will have to be rewritten
  # in order to pass.  This may be as simple as renaming an object, but may
  # require more significant changes.
    MSFT:*_VS2015_*_CC_FLAGS          = /Wv:11
    MSFT:*_VS2015x86_*_CC_FLAGS       = /Wv:11
    MSFT:*_VS2015xASL_*_CC_FLAGS      = /Wv:11
    MSFT:*_VS2015x86xASL_*_CC_FLAGS   = /Wv:11

#LABZ_Start
  # Temporarily restrict compiler warnings to those produced by VS2012.
  # Code that fails when these flags are removed will have to be rewritten
  # in order to pass.  This may be as simple as renaming an object, but may
  # require more significant changes.
    MSFT:*_VS2019_*_CC_FLAGS          = /Wv:11
    MSFT:*_VS2019x86_*_CC_FLAGS       = /Wv:11
    MSFT:*_VS2019xASL_*_CC_FLAGS      = /Wv:11
    MSFT:*_VS2019x86xASL_*_CC_FLAGS   = /Wv:11
#LABZ_End
再次编译会遇到下面这个这个错误:
        "C:\Program Files (x86)\Microsoft Visual Studio\2019\Enterprise\VC\Tools\MSVC\14.26.28801\bin\Hostx86\x64\link.exe" /OUT:c:\buildbs\edk202008\Build\AppPkg\DEBUG_VS2019\X64\AppPkg\Applications\Sockets\OobTx\OobTx\DEBUG\OobTx.dll /NOLOGO /NODEFAULTLIB /IGNORE:4001 /IGNORE:4281 /OPT:REF /OPT:ICF=10 /MAP /ALIGN:32 /SECTION:.xdata,D /SECTION:.pdata,D /Machine:X64 /LTCG /DLL /ENTRY:_ModuleEntryPoint /SUBSYSTEM:EFI_BOOT_SERVICE_DRIVER /SAFESEH:NO /BASE:0 /DRIVER /DEBUG /WHOLEARCHIVE  @c:\buildbs\edk202008\Build\AppPkg\DEBUG_VS2019\X64\AppPkg\Applications\Sockets\OobTx\OobTx\OUTPUT\static_library_files.lst
LibGdtoa.lib(ldtoa.obj) : error LNK2001: unresolved external symbol __fpclassifyd
BsdSocketLib.lib(res_send.obj) : error LNK2001: unresolved external symbol inet_ntoa
BsdSocketLib.lib(res_mkupdate.obj) : error LNK2001: unresolved external symbol inet_aton
BsdSocketLib.lib(ns_print.obj) : error LNK2001: unresolved external symbol inet_ntop
BsdSocketLib.lib(getnetbyht.obj) : error LNK2001: unresolved external symbol inet_network
c:\buildbs\edk202008\Build\AppPkg\DEBUG_VS2019\X64\AppPkg\Applications\Sockets\OobTx\OobTx\DEBUG\OobTx.dll : fatal error LNK1120: 5 unresolved externals
NMAKE : fatal error U1077: '"C:\Program Files (x86)\Microsoft Visual Studio\2019\Enterprise\VC\Tools\MSVC\14.26.28801\bin\Hostx86\x64\link.exe"' : return code '0x460'
Stop.
build.py...
 : error 7000: Failed to execute command
        C:\Program Files (x86)\Microsoft Visual Studio\2019\Enterprise\VC\Tools\MSVC\14.26.28801\bin\Hostx86\x86\nmake.exe /nologo tbuild [c:\buildbs\edk202008\Build\AppPkg\DEBUG_VS2019\X64\AppPkg\Applications\Sockets\OobTx\OobTx]


build.py...
 : error 7000: Failed to execute command
        C:\Program Files (x86)\Microsoft Visual Studio\2019\Enterprise\VC\Tools\MSVC\14.26.28801\bin\Hostx86\x86\nmake.exe /nologo tbuild [c:\buildbs\edk202008\Build\AppPkg\DEBUG_VS2019\X64\AppPkg\Applications\Sockets\DataSink\DataSink]


build.py...
 : error F002: Failed to build module
        c:\buildbs\edk202008\AppPkg\Applications\Sockets\OobTx\OobTx.inf [X64, VS2019, DEBUG]
解决方法是修改Conf/tools_def.txt 文件,注释掉一行。对于/WHOLEARCHIVE 这个参数的解释,可以在【参考1】看到,似乎是要求编译过程中把所有的可能的 OBJ 都编译一次?
*_VS2019_*_MAKE_FLAGS      = /nologo
*_VS2019_*_SLINK_FLAGS     = /NOLOGO /LTCG
*_VS2019_*_APP_FLAGS       = /nologo /E /TC
*_VS2019_*_PP_FLAGS        = /nologo /E /TC /FIAutoGen.h
*_VS2019_*_VFRPP_FLAGS     = /nologo /E /TC /DVFRCOMPILE /FI$(MODULE_NAME)StrDefs.h
#LABZ *_VS2019_*_DLINK2_FLAGS    = /WHOLEARCHIVE
*_VS2019_*_ASM16_PATH      = DEF(VS2019_BIN_IA32)\ml.exe
*_VS2019_*_DEPS_FLAGS      = DEF(MSFT_DEPS_FLAGS)
##################
# ASL definitions
##################
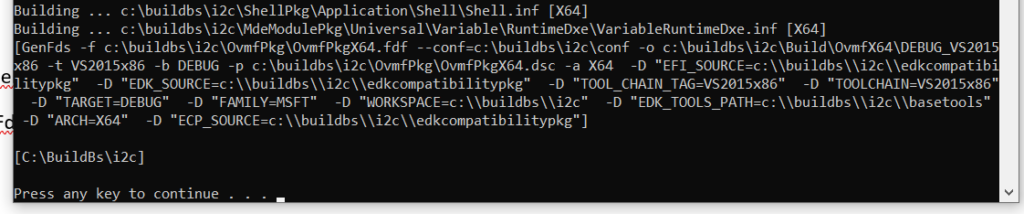
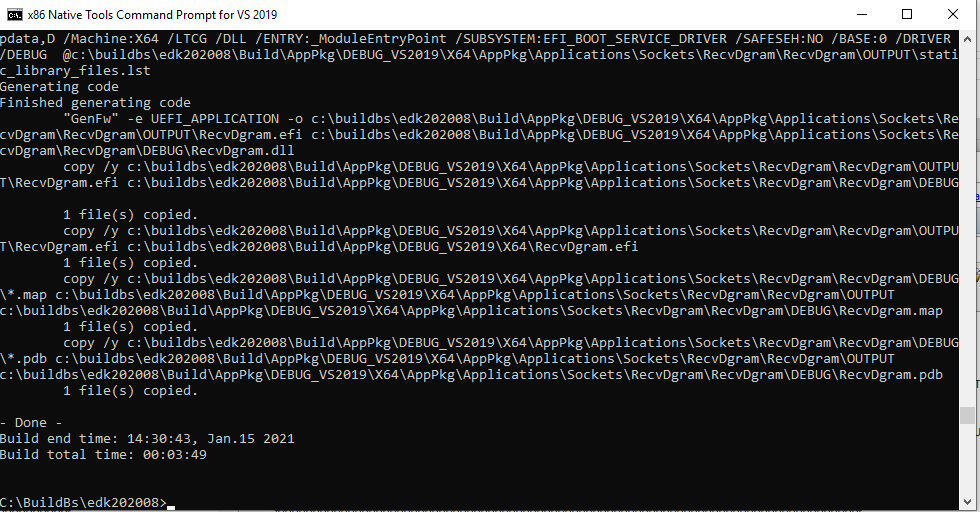
再次编译,就可以正常通过得到结果:
修改后的 Libc 可以在这里下载
链接: https://pan.baidu.com/s/1xCjiZ6_Shsa0tWOdRCjGrg 提取码: k6n2
感觉目前 EDK2 对于 VS2019 的支持还是有问题的,对于有编译需求的朋友,我依然建议使用 VS2015。
参考:
/WHOLEARCHIVE (Include All Library Object Files)
Force the linker to include all object files in the static library in the linked executable.
Syntax
/WHOLEARCHIVE
/WHOLEARCHIVE:library
Arguments
library
An optional pathname to a static library. The linker includes every object file from this library.
Remarks
The /WHOLEARCHIVE option forces the linker to include every object file from either a specified static library, or if no library is specified, from all static libraries specified to the LINK command. To specify the /WHOLEARCHIVE option for multiple libraries, you can use more than one /WHOLEARCHIVE switch on the linker command line. By default, the linker includes object files in the linked output only if they export symbols referenced by other object files in the executable. The /WHOLEARCHIVE option makes the linker treat all object files archived in a static library as if they were specified individually on the linker command line.
The /WHOLEARCHIVE option can be used to re-export all the symbols from a static library. This allows you to make sure that all of your library code, resources, and metadata are included when you create a component from more than one static library. If you see warning LNK4264 when you create a static library that contains Windows Runtime components for export, use the /WHOLEARCHIVE option when linking that library into another component or app.
The /WHOLEARCHIVE option was introduced in Visual Studio 2015 Update 2.