起因:有网友抱怨,因为陪着孩子在家玩,漏接了公司的重要电话,被罚款500(如果真的是人民币的话,我相信他一定乐于看到这个产品)
看到这个需求,我忽然想是否可以用 Arduino来打造一个能够提醒的盒子呢? 当然,解决方法还有很多,严小姐听了我的目标之后第一个反应是为什么不换一个山寨机,大屏幕啊有没有,超长待机啊有没有,八个喇叭啊有没有,只要499啊有没有。我回答有很多人喜欢老物件有感情而已。她又在问为什么,终于被我意味深长的眼神说服了。
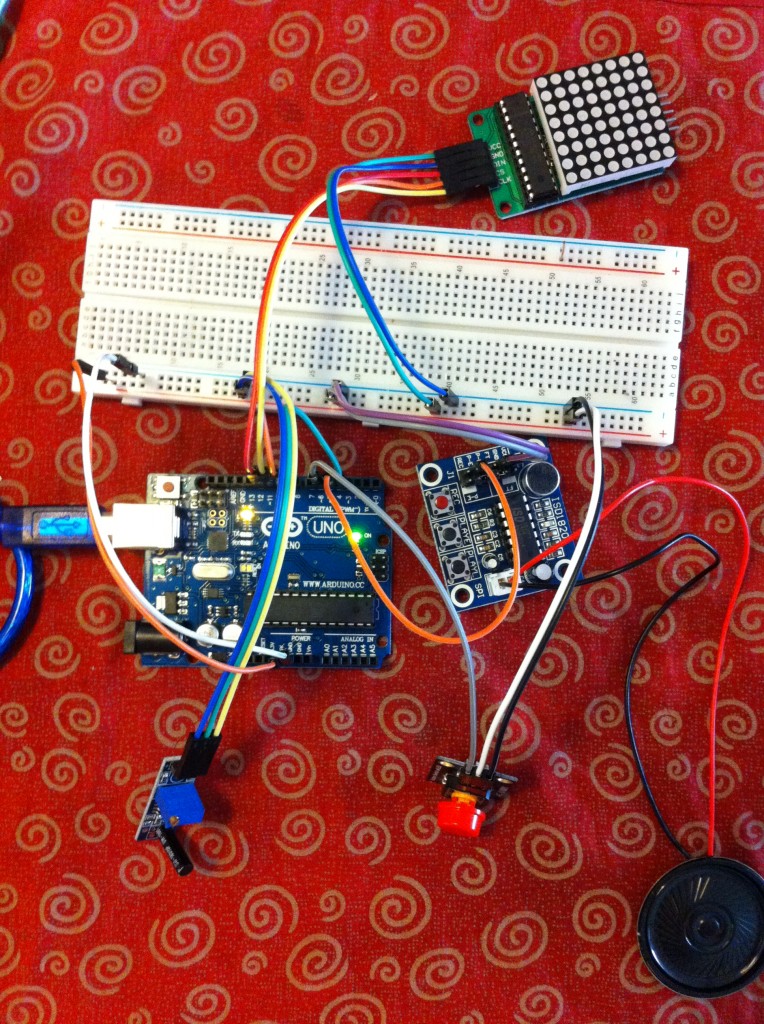
下面就开始动手实做了。从触发的角度来说最稳妥的办法还是安装APP,Android和iOS都是可行的,只是…….默默的轻抚了一下自己的 Nokia E72,放弃了这个方案。翻翻元件箱,里面有振动开关,那就凑合着用吧。提示方面,最近入手了一个具有录音放音功能的模块ISD1820,使用非常简单,GPIO足以搞定(多说一句,上面有麦克风和一个录音按钮,按下这个按钮对着它高歌一曲即记录在芯片中。时间比较短,只能记录10秒)。选用了 8×8 LED模块作为提示灯光,它在之前的《电子骰子系列》登场过。
原理上很简单,就是检测连续振动确定是振铃–>触发装置,每隔10秒提示一次–>如果有人按下Stop按钮就停止提示。
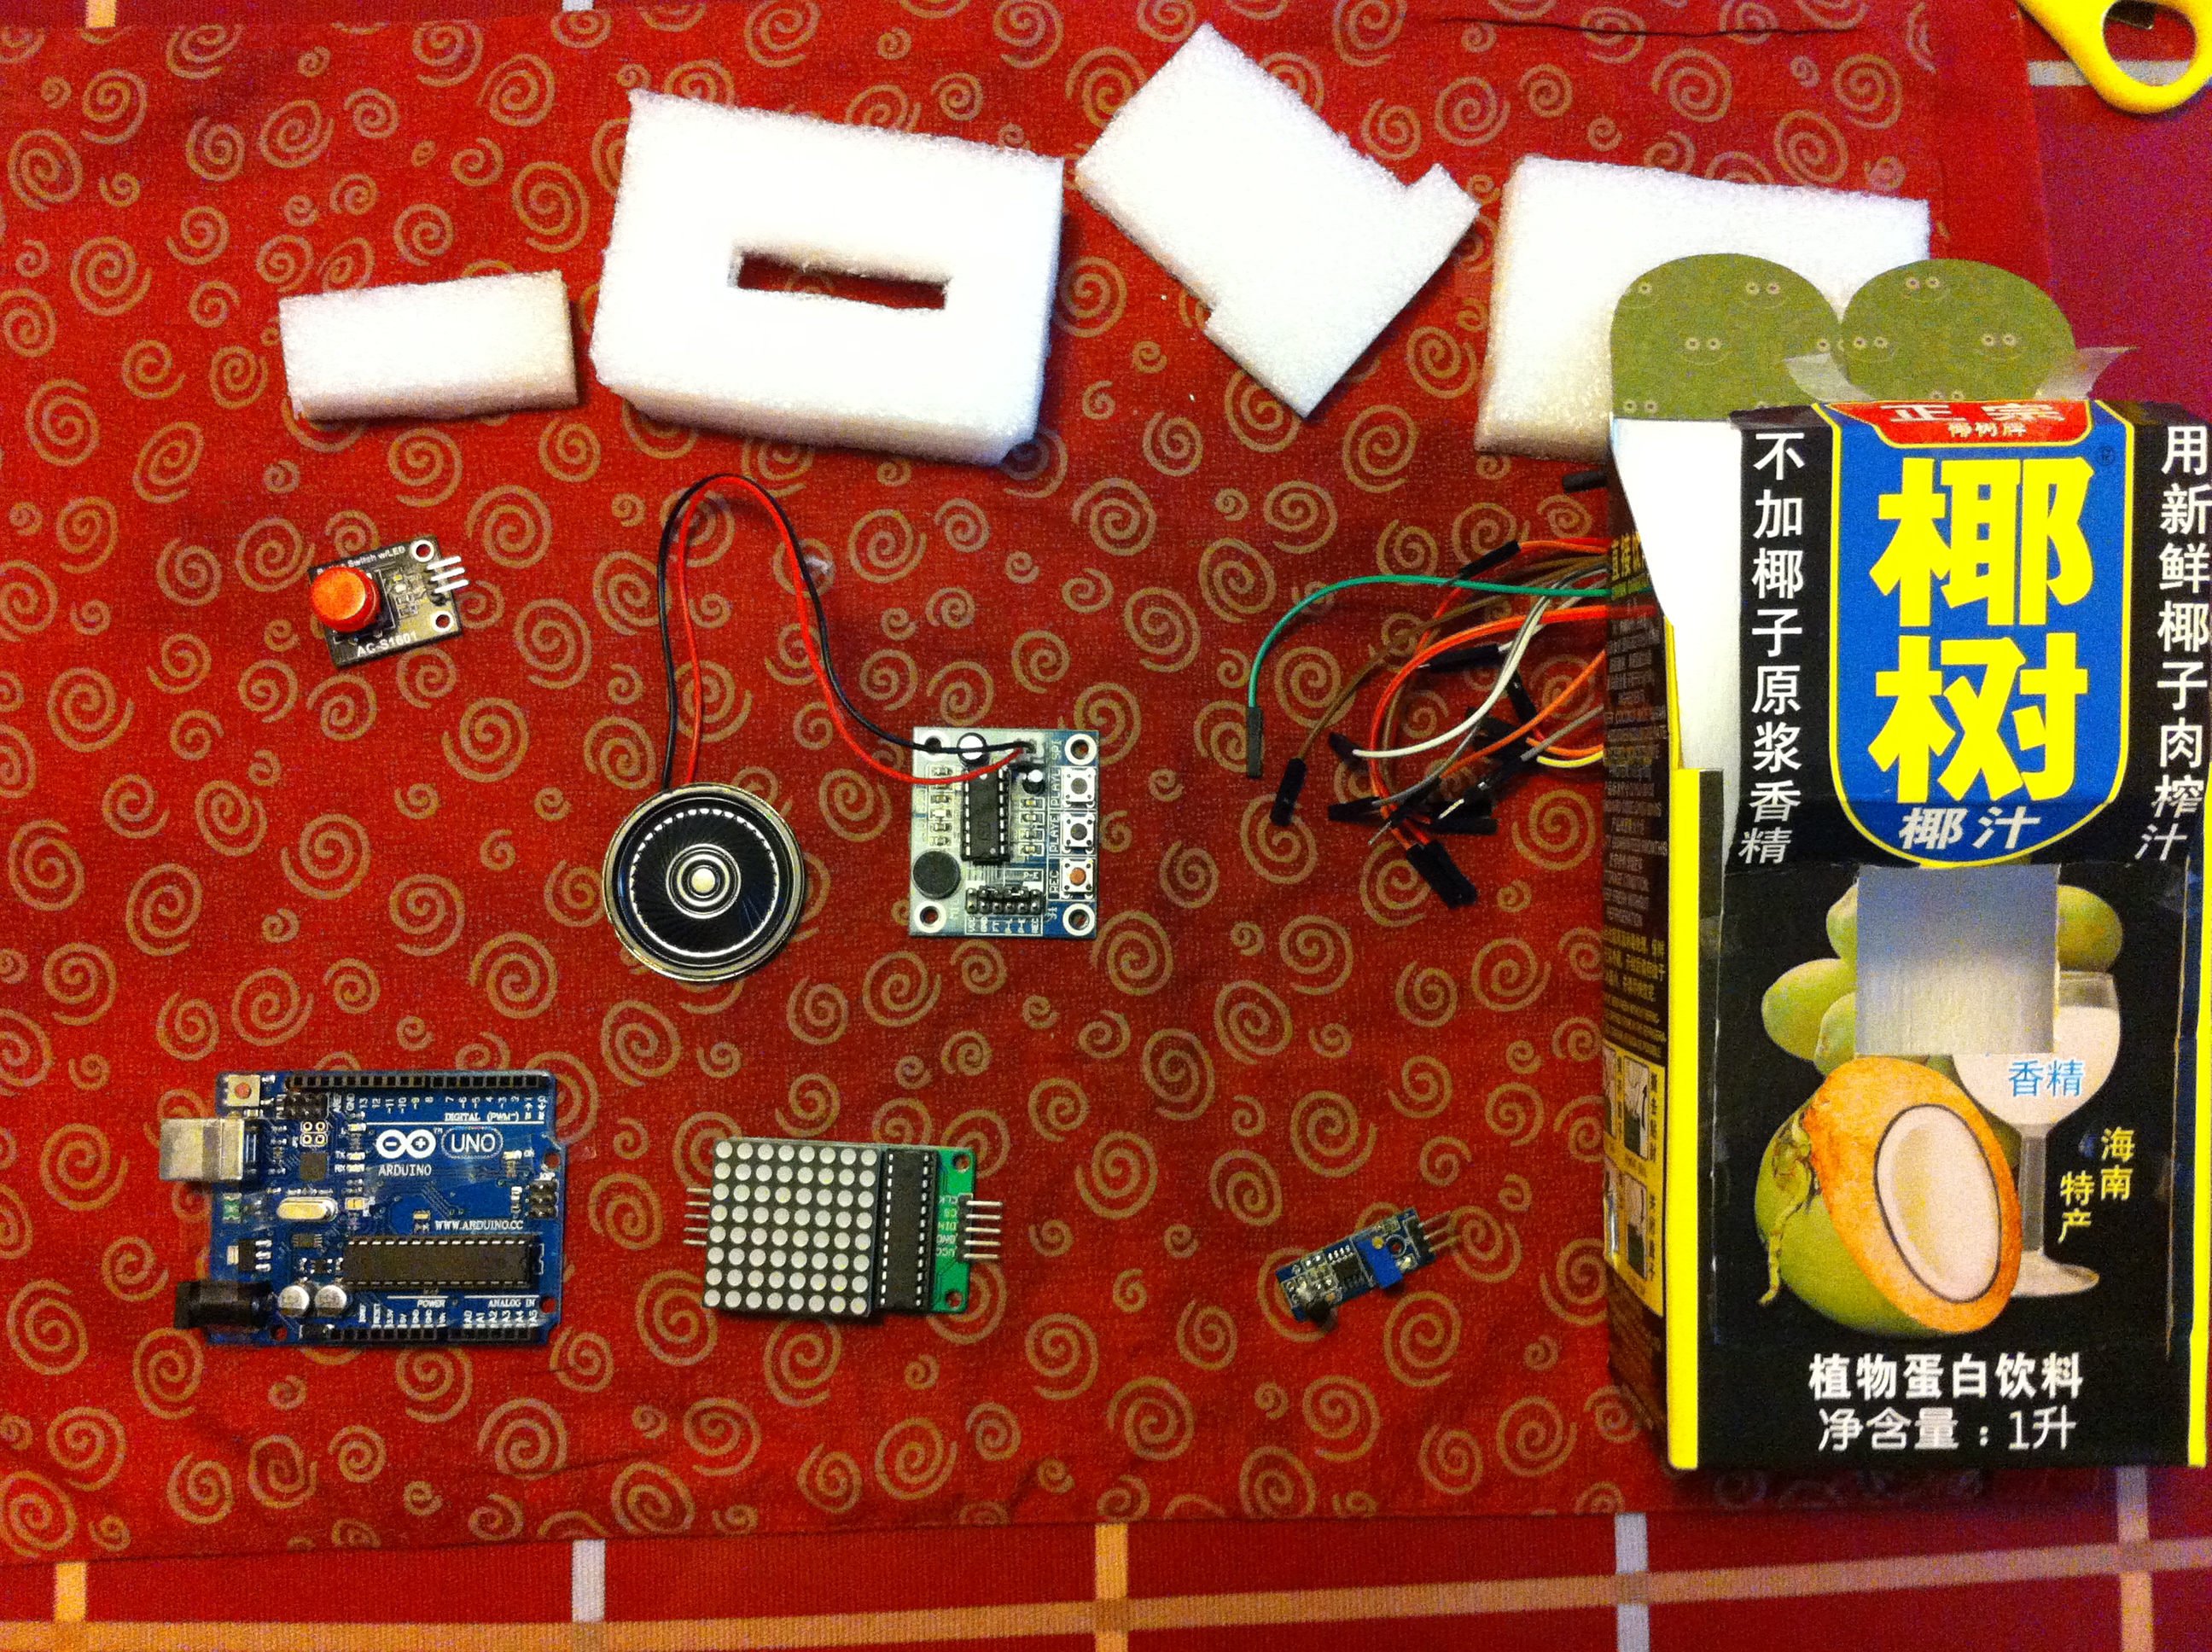
用到的配件

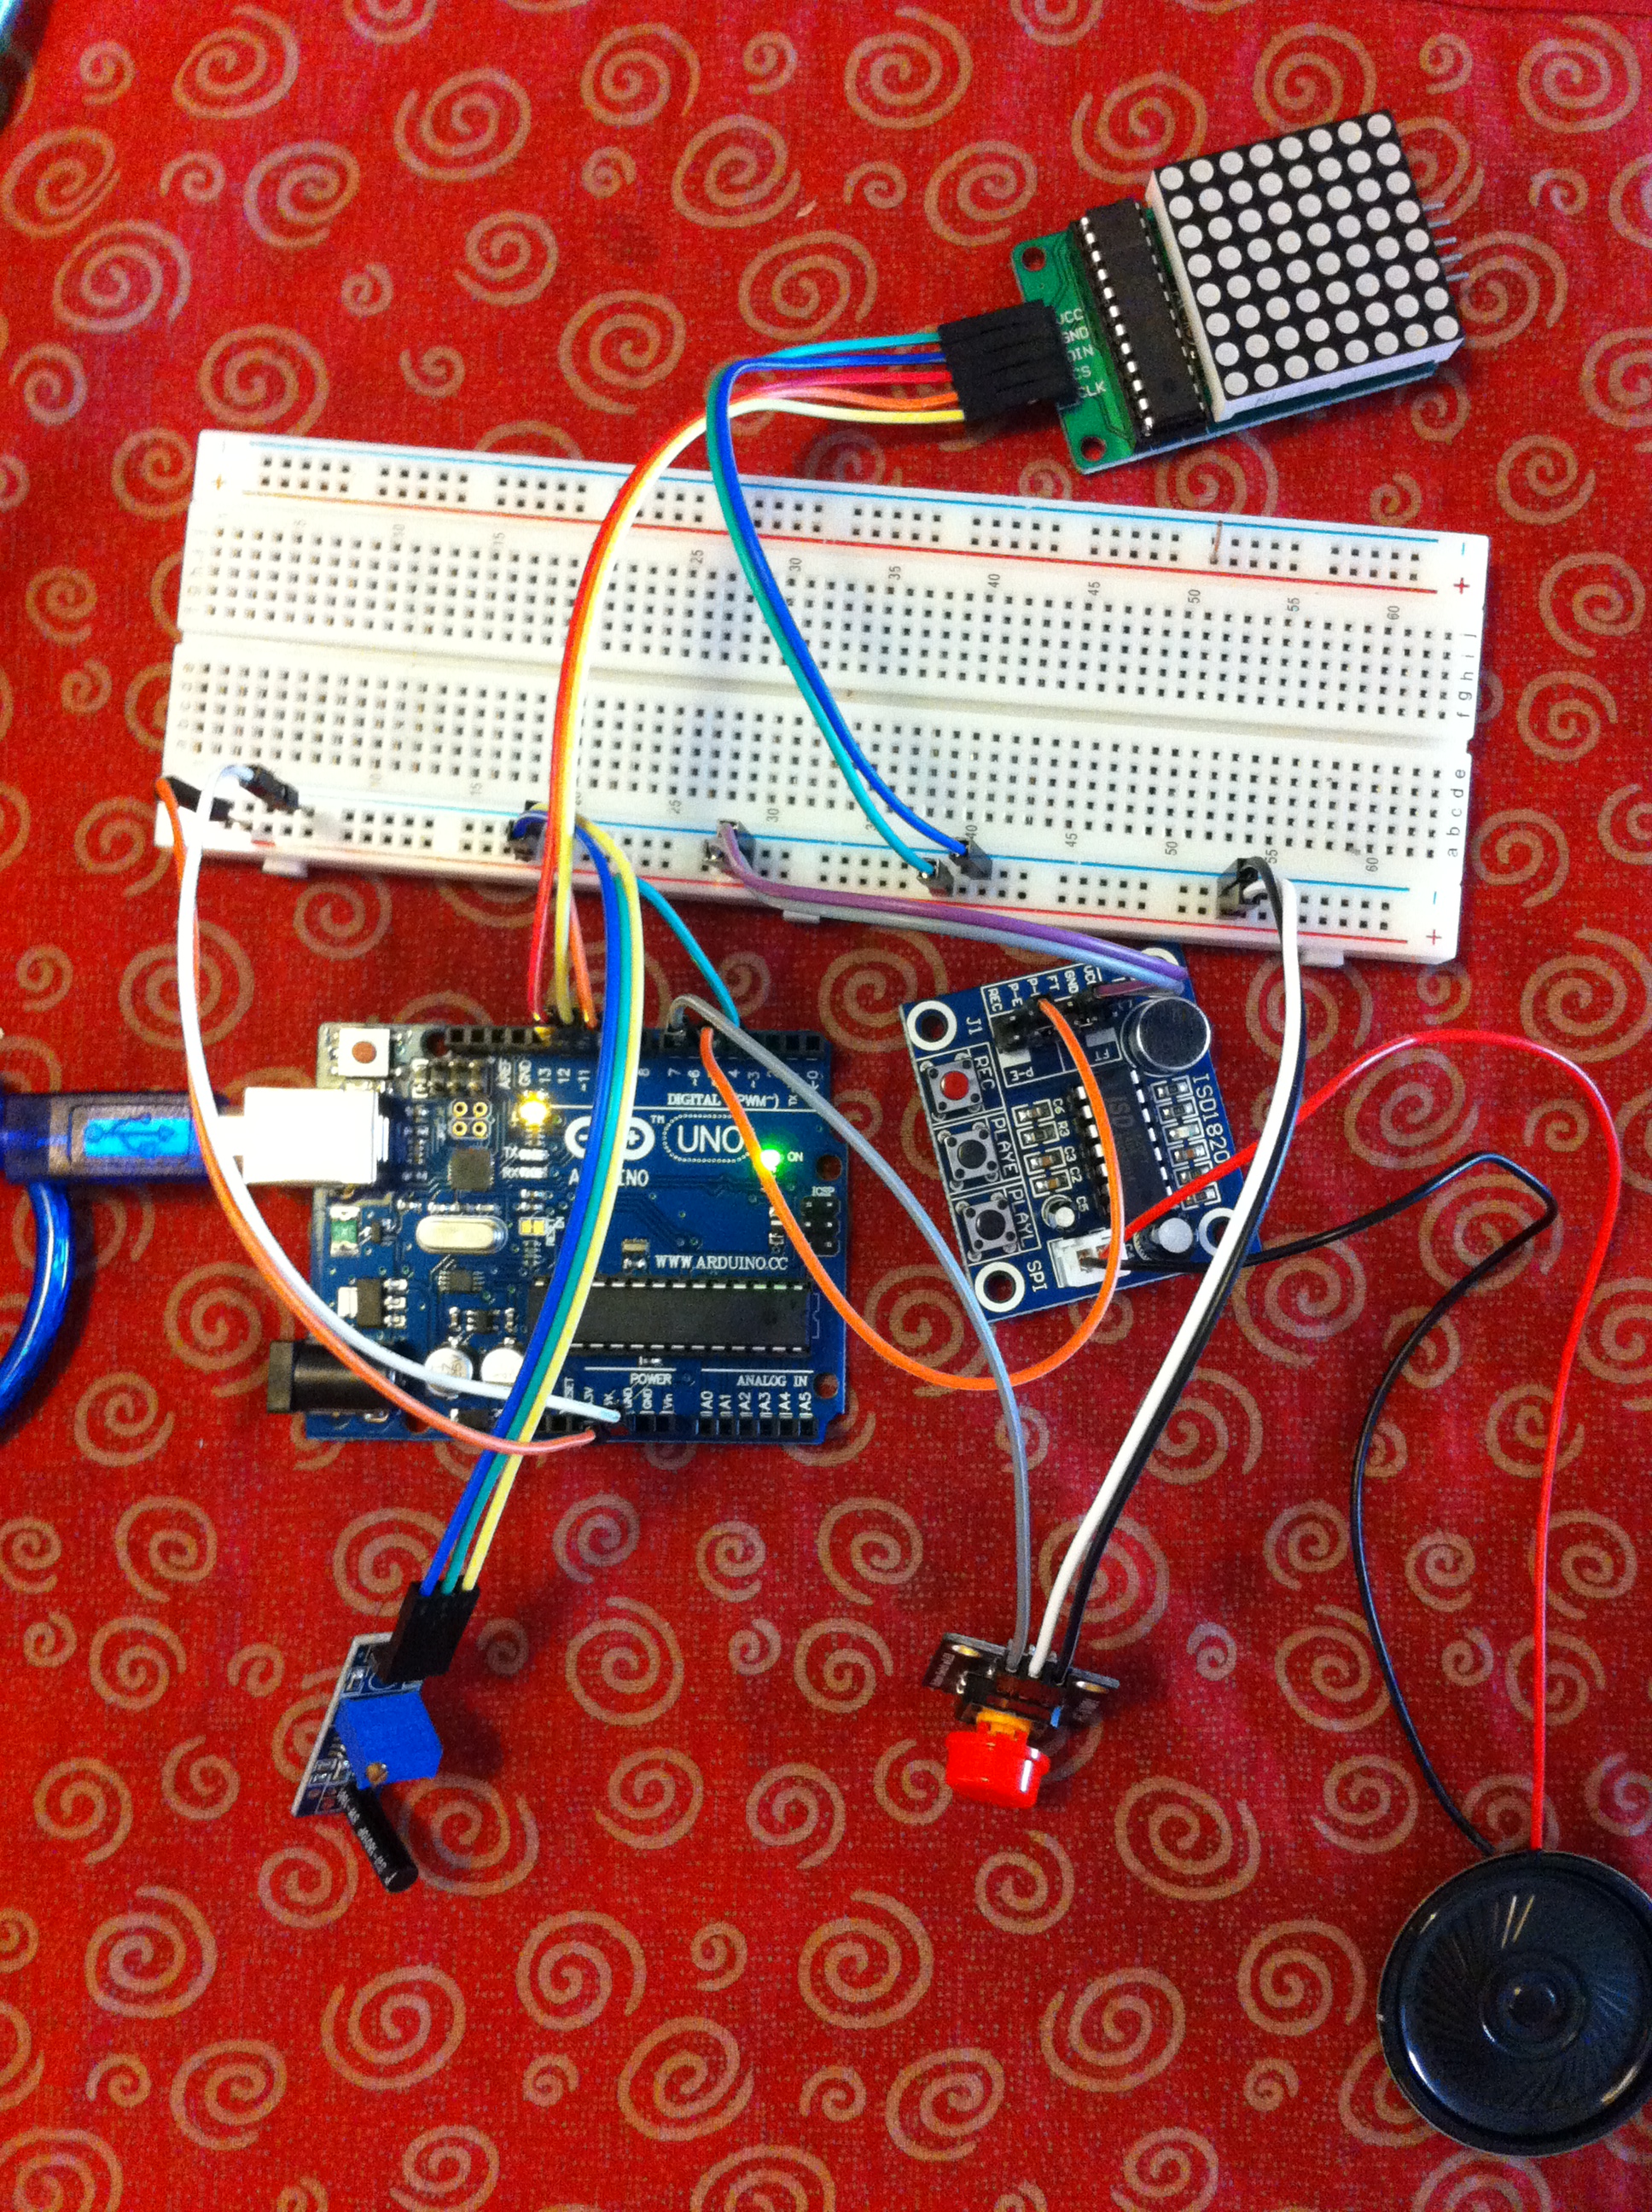
用面包板来验证电路
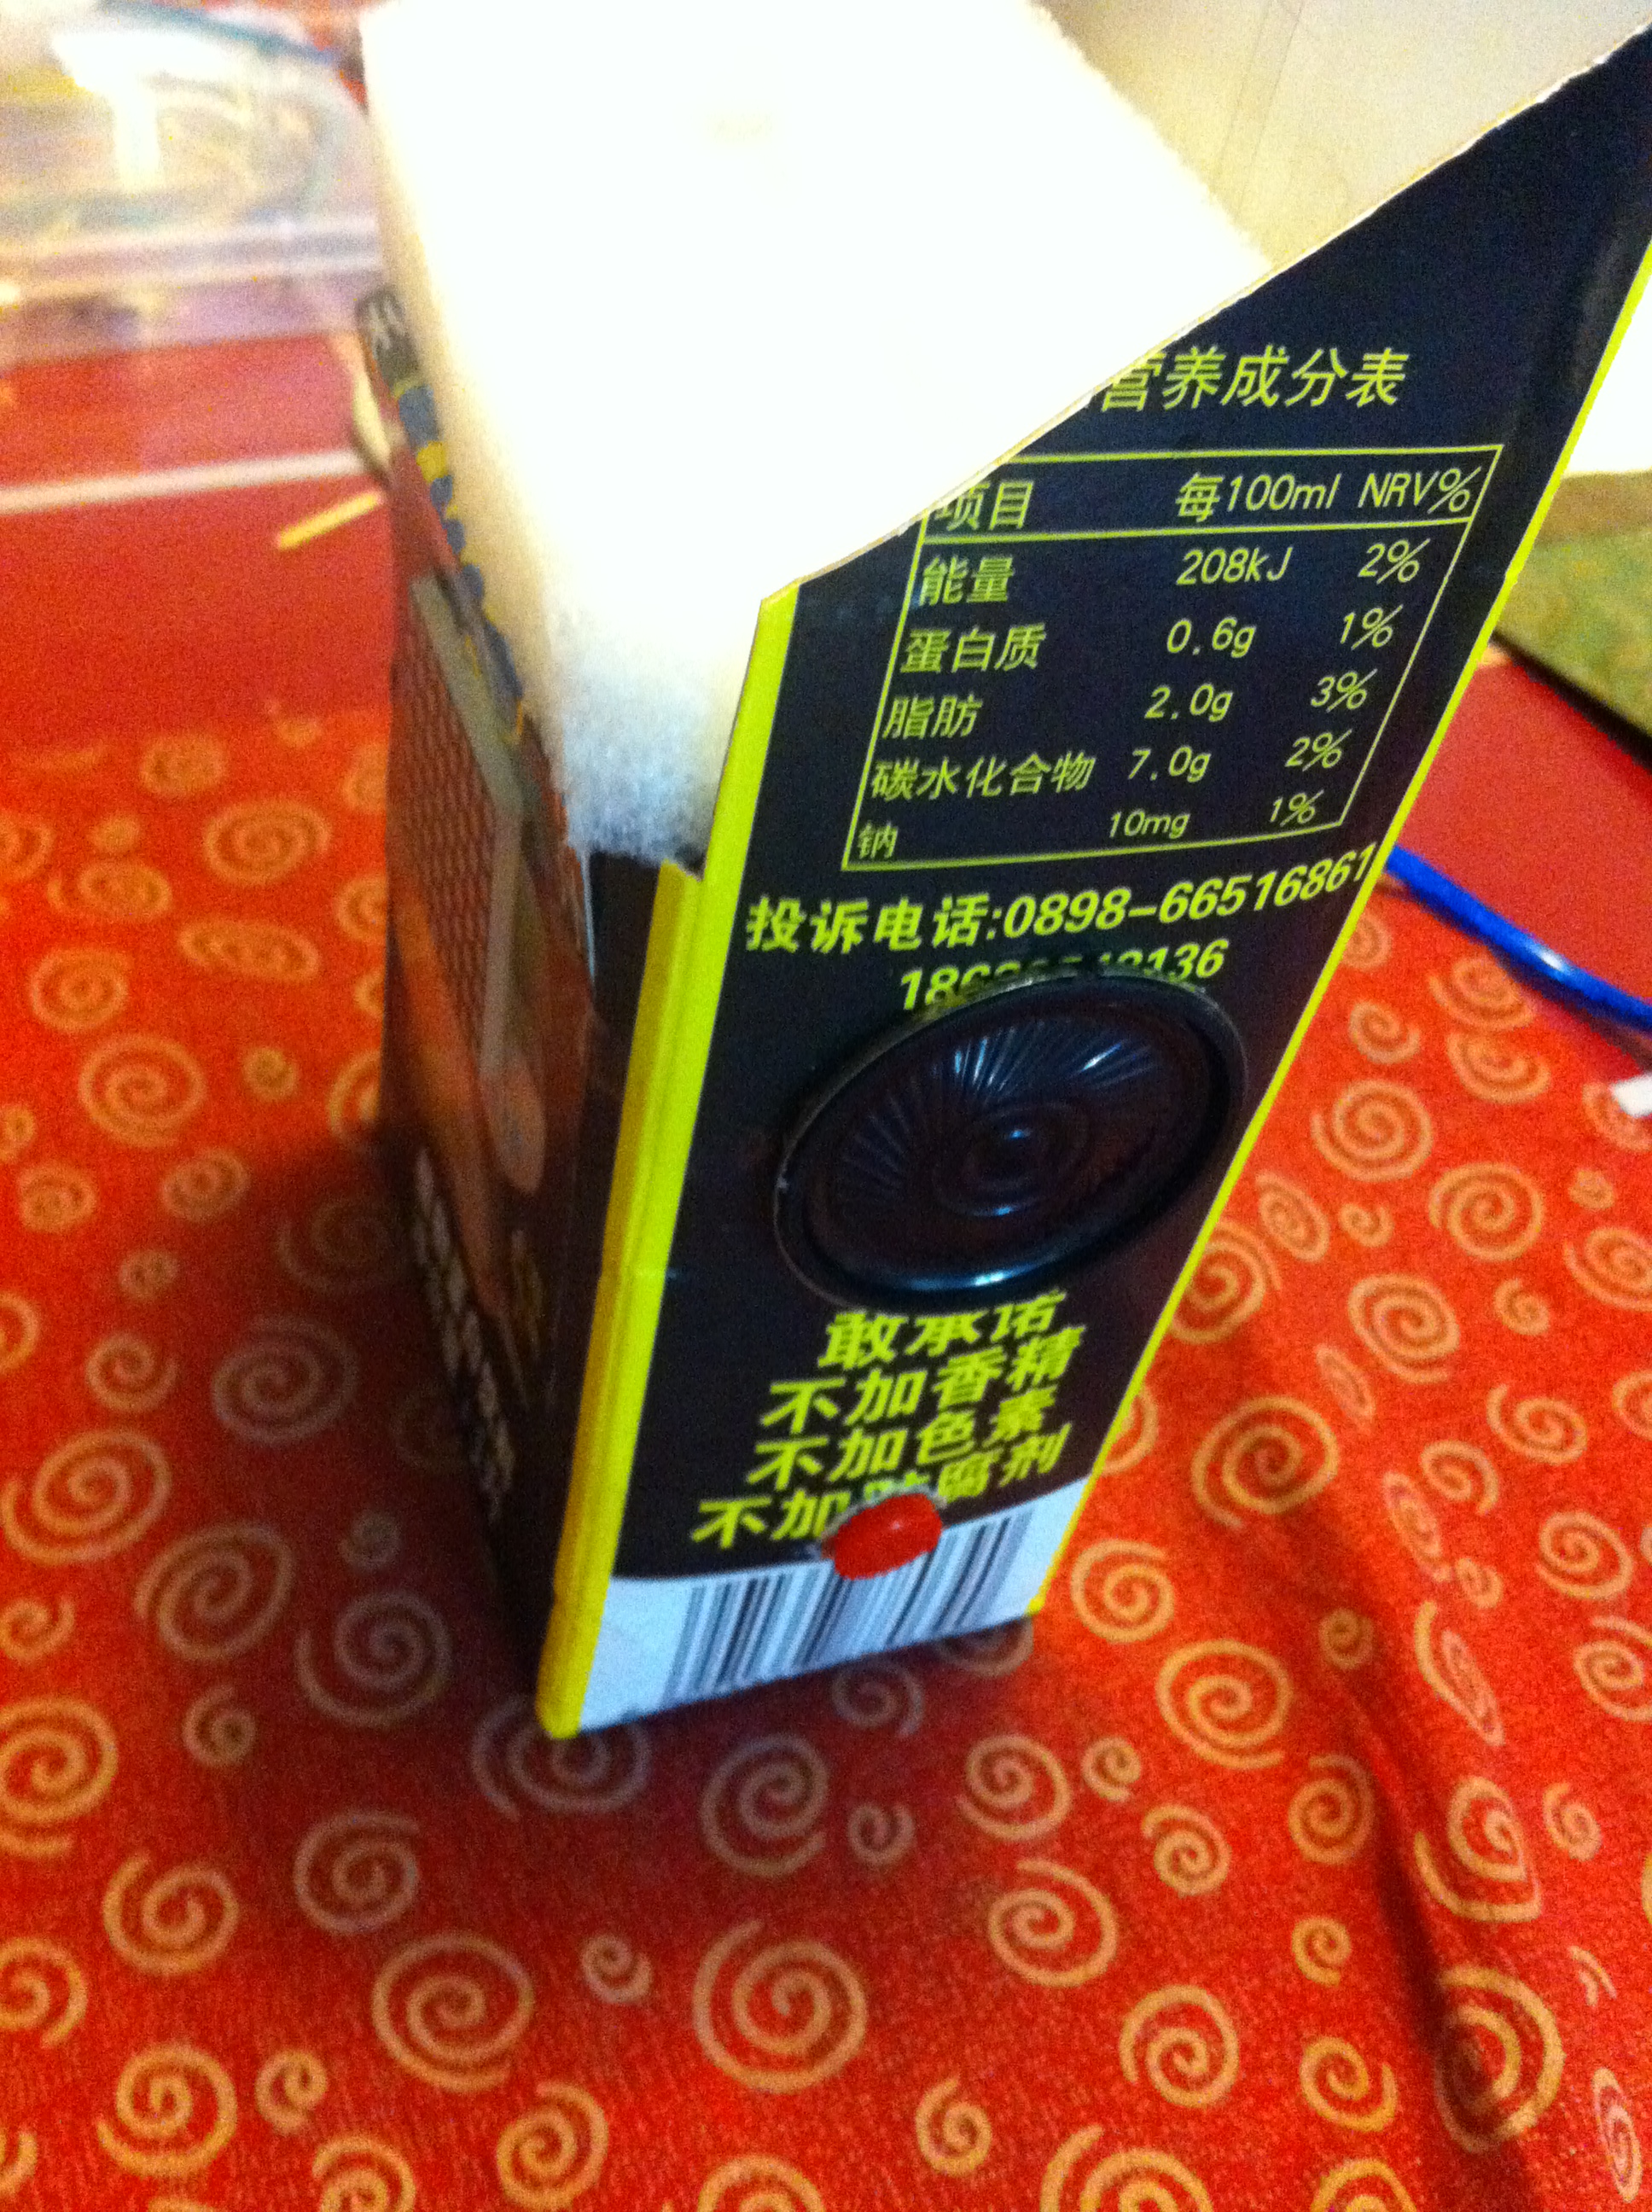
侧面有一个喇叭,一个按钮

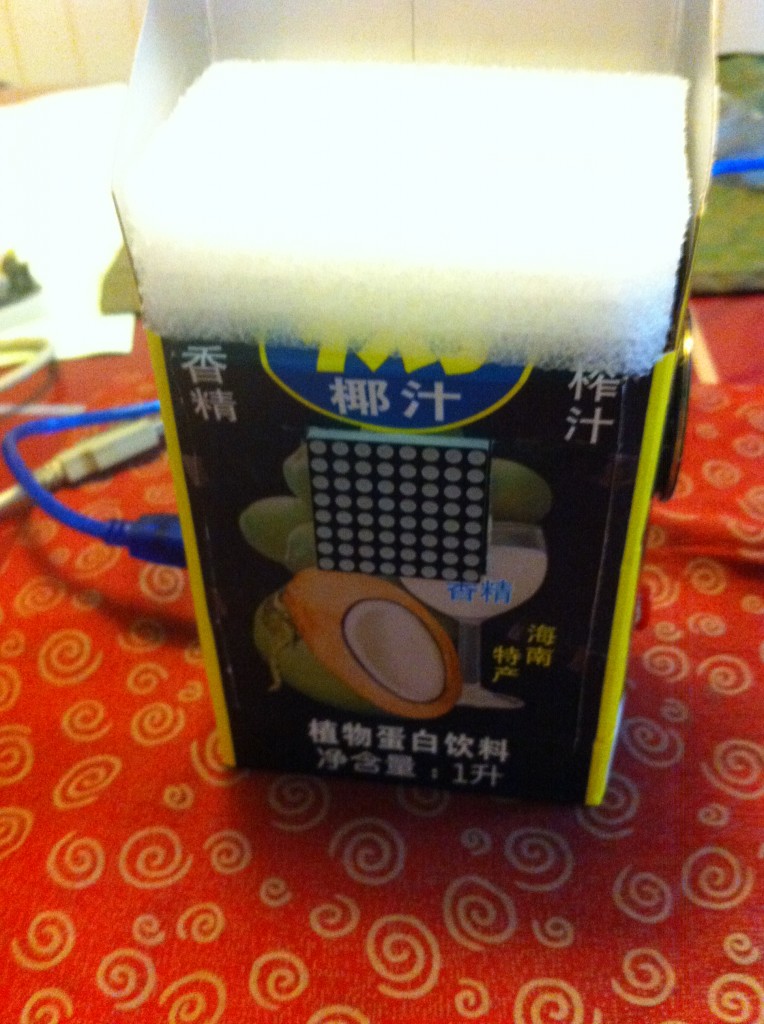
正面俯视,有一个 8×8点阵
振动传感器
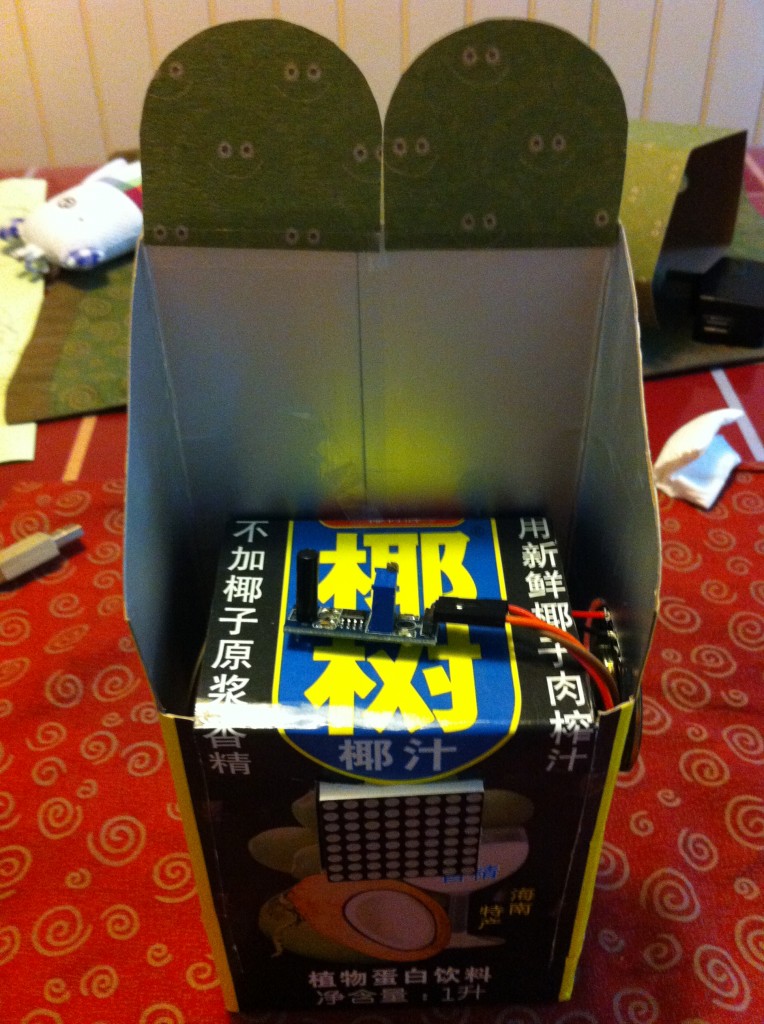
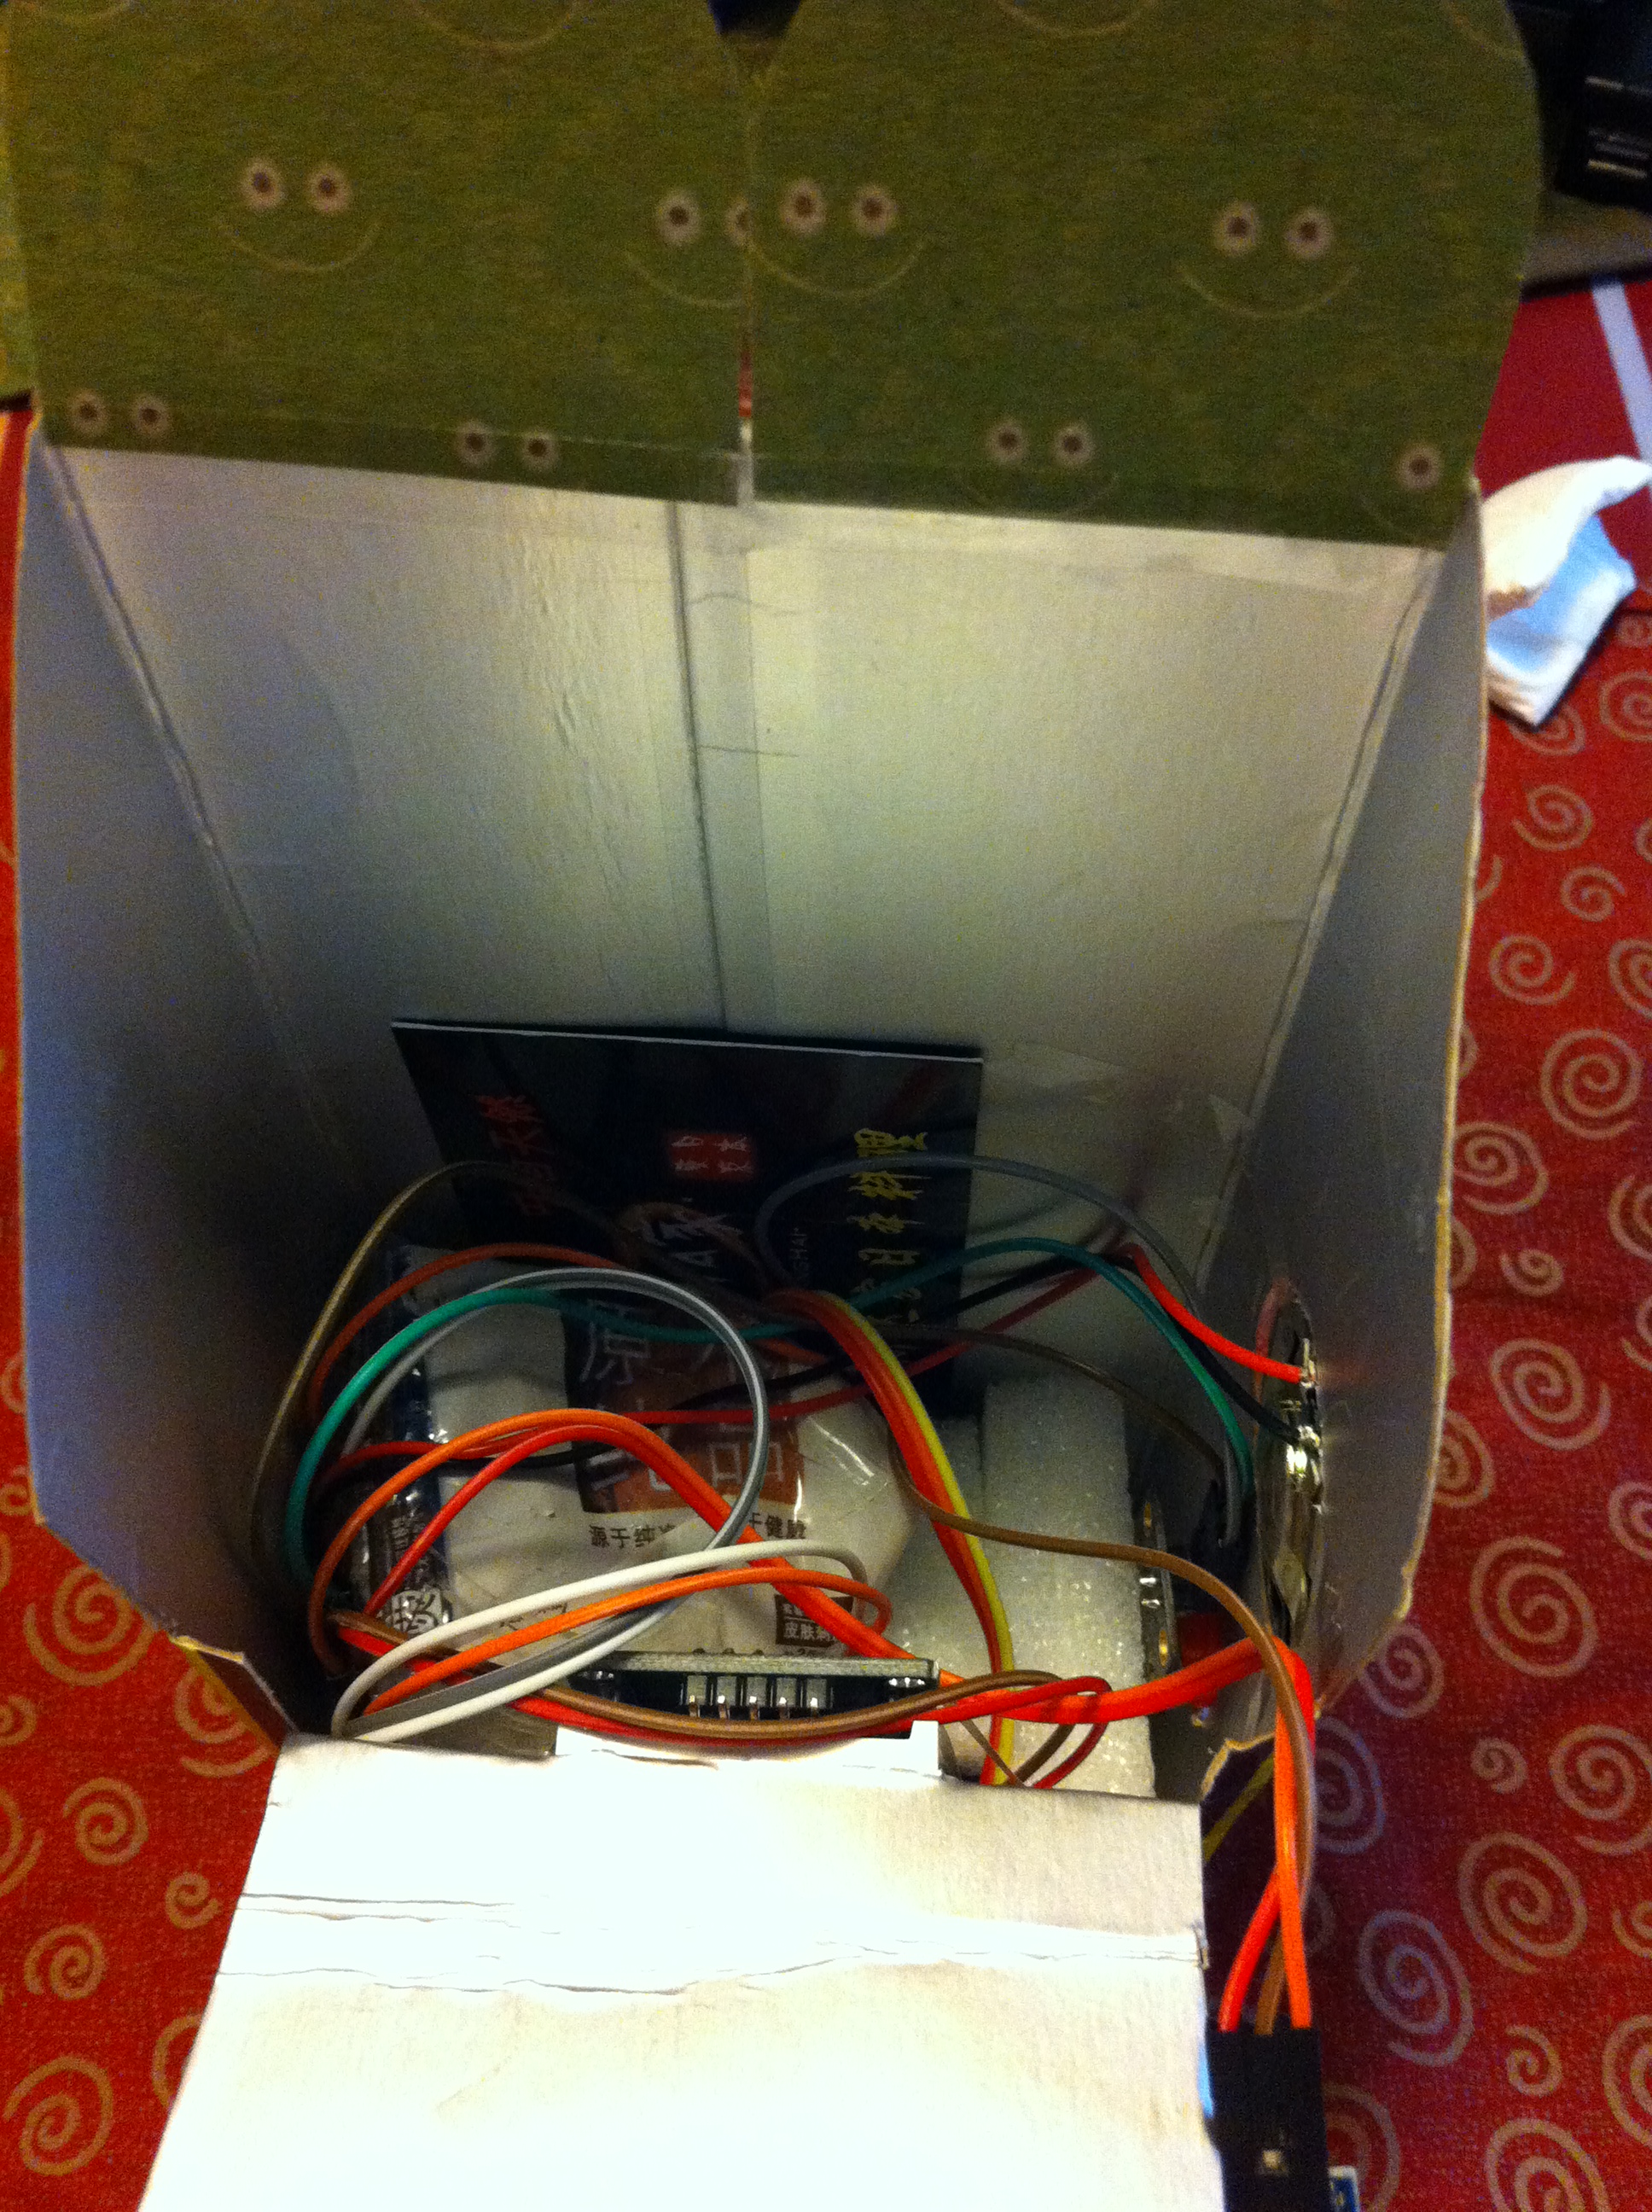
内部线路看起来有点复杂

另外一边做出一个洞,给 Arduino供电

#include "LedControl.h"

const int ShockTestPin = 4; //Pin for vibration sensor
const int AlartPin = 5;     //LED Alert
const int StopPin = 6;      //Stop button
int sta=0;

//pin 12 is connected to the DataIn
//pin 11 is connected to the CLK
//pin 10 is connected to LOAD
//We have only a single MAX72XX.
LedControl lc=LedControl(12,11,10,1);

void showface() {
/* here is the data for the characters */
byte face[8]={
B00000100,
B00100010,
B01000110,
B01000000,
B01000000,
B01000110,
B00100010,
B00000100};

lc.setRow(0,0,face[0]);
lc.setRow(0,1,face[1]);
lc.setRow(0,2,face[2]);
lc.setRow(0,3,face[3]);
lc.setRow(0,4,face[4]);
lc.setRow(0,5,face[5]);
lc.setRow(0,6,face[6]);
lc.setRow(0,7,face[7]);

}

void setup() {

  Serial.begin(9600);

  pinMode(ShockTestPin, INPUT);
  pinMode(AlartPin,OUTPUT);
  digitalWrite(AlartPin,LOW),
  pinMode(StopPin,INPUT);  //Stop pin for input

  //The MAX72XX is in power-saving mode on startup,
  //we have to do a wakeup call

  lc.shutdown(0,false);
  //Set the brightness to a medium values
  lc.setIntensity(0,8);
  //and clear the display
  lc.clearDisplay(0);

} // End of Setup

void loop() {
 long int start;

  if (0==sta) {       //Status One: Test status
     boolean shock=false;

     start=millis();
     while (millis()-start<=1000L) { //Test vibration for 1 second
        if (LOW==digitalRead(ShockTestPin)) {  //If there is virbration signal
          shock=true;                          //Mark true
          break;
        } //if (LOW==digitalRead(ShockTestPin))
     }
     if (false==shock) {sta=0; goto Sta1End;}    //If in the one seconds there is no vibration, it should break
     delay(500);

     //It means we have test vibration in 3 seconds
     sta=1;
  Sta1End:
      ;
  }

  if (1==sta) {
      //Play the voice that we have record
      digitalWrite(AlartPin,LOW);
      digitalWrite(AlartPin,HIGH);
      delay(100);
      digitalWrite(AlartPin,LOW);

      //Delay 10 seconds
      start=millis();

      while (millis()-start<=15000L)
      {
        if (LOW==digitalRead(StopPin)) { //We will stop the playing ,if we test the stop button is pressed
          sta=0;
          lc.clearDisplay(0);
          break;
        }
        if (0==(millis()-start)/1000L % 2) {
           showface();
        }
       else
        {
            lc.clearDisplay(0);
        }
      }//while (millis()-start<=15000L)

  }//if (1==sta)
}
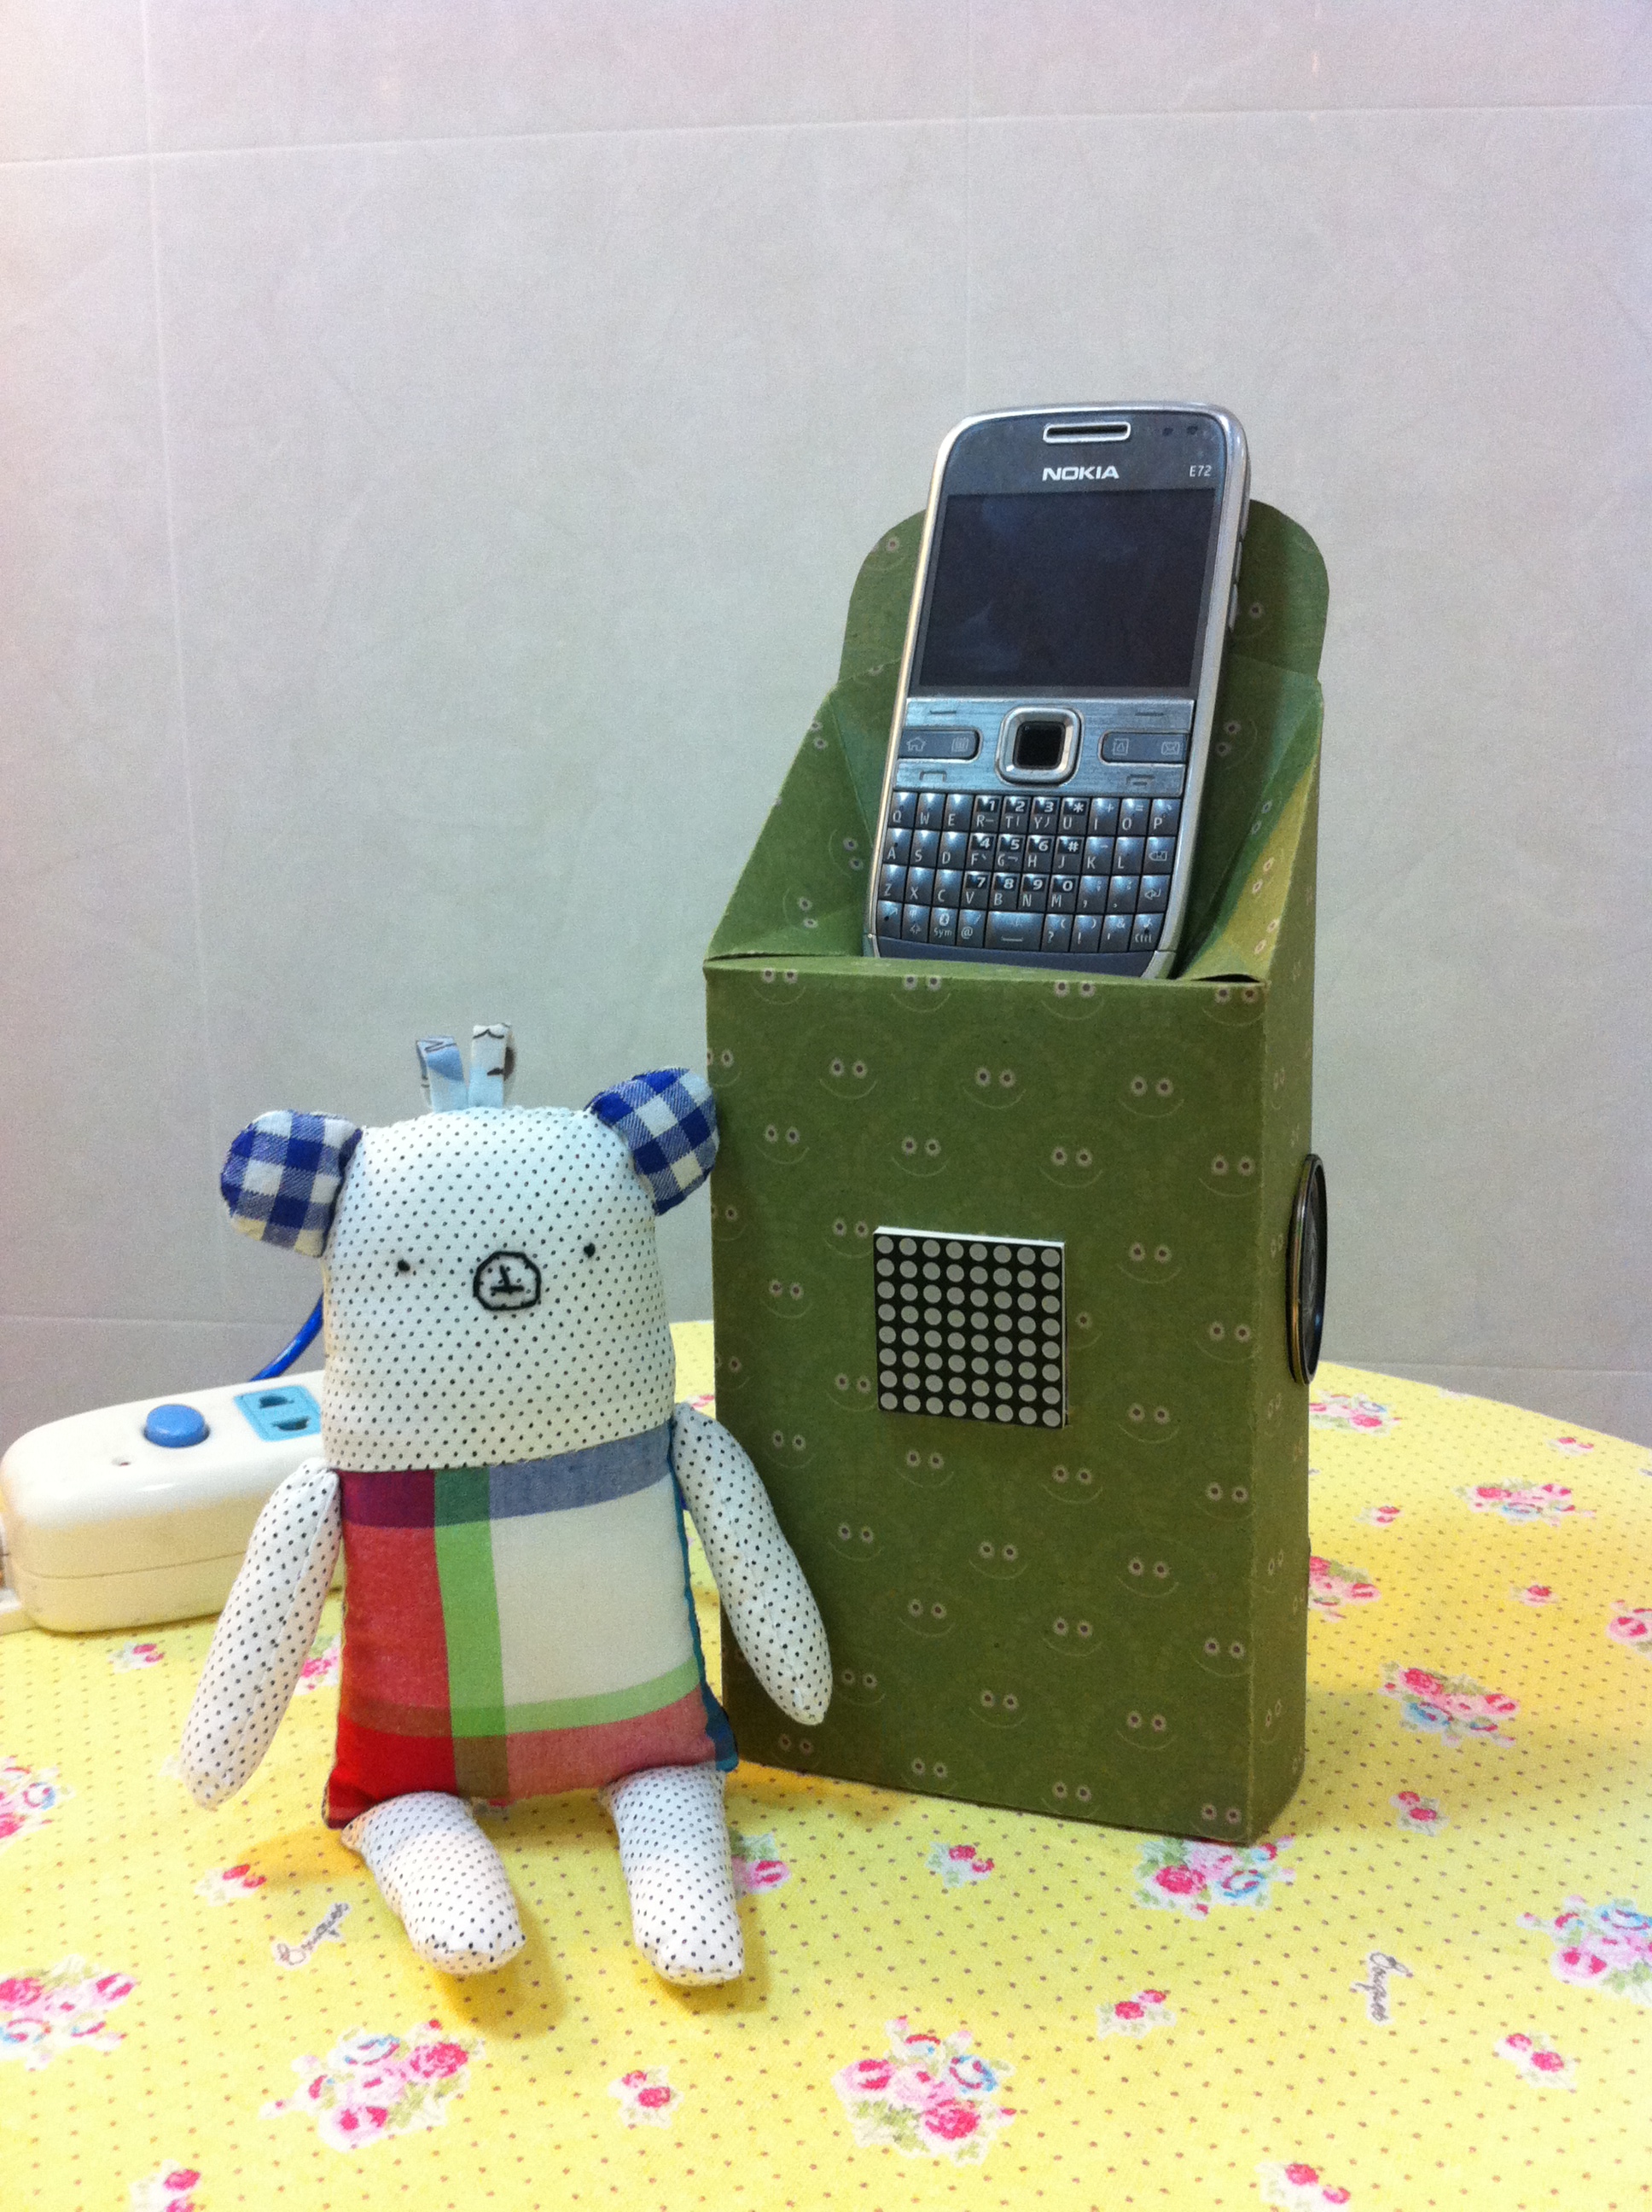
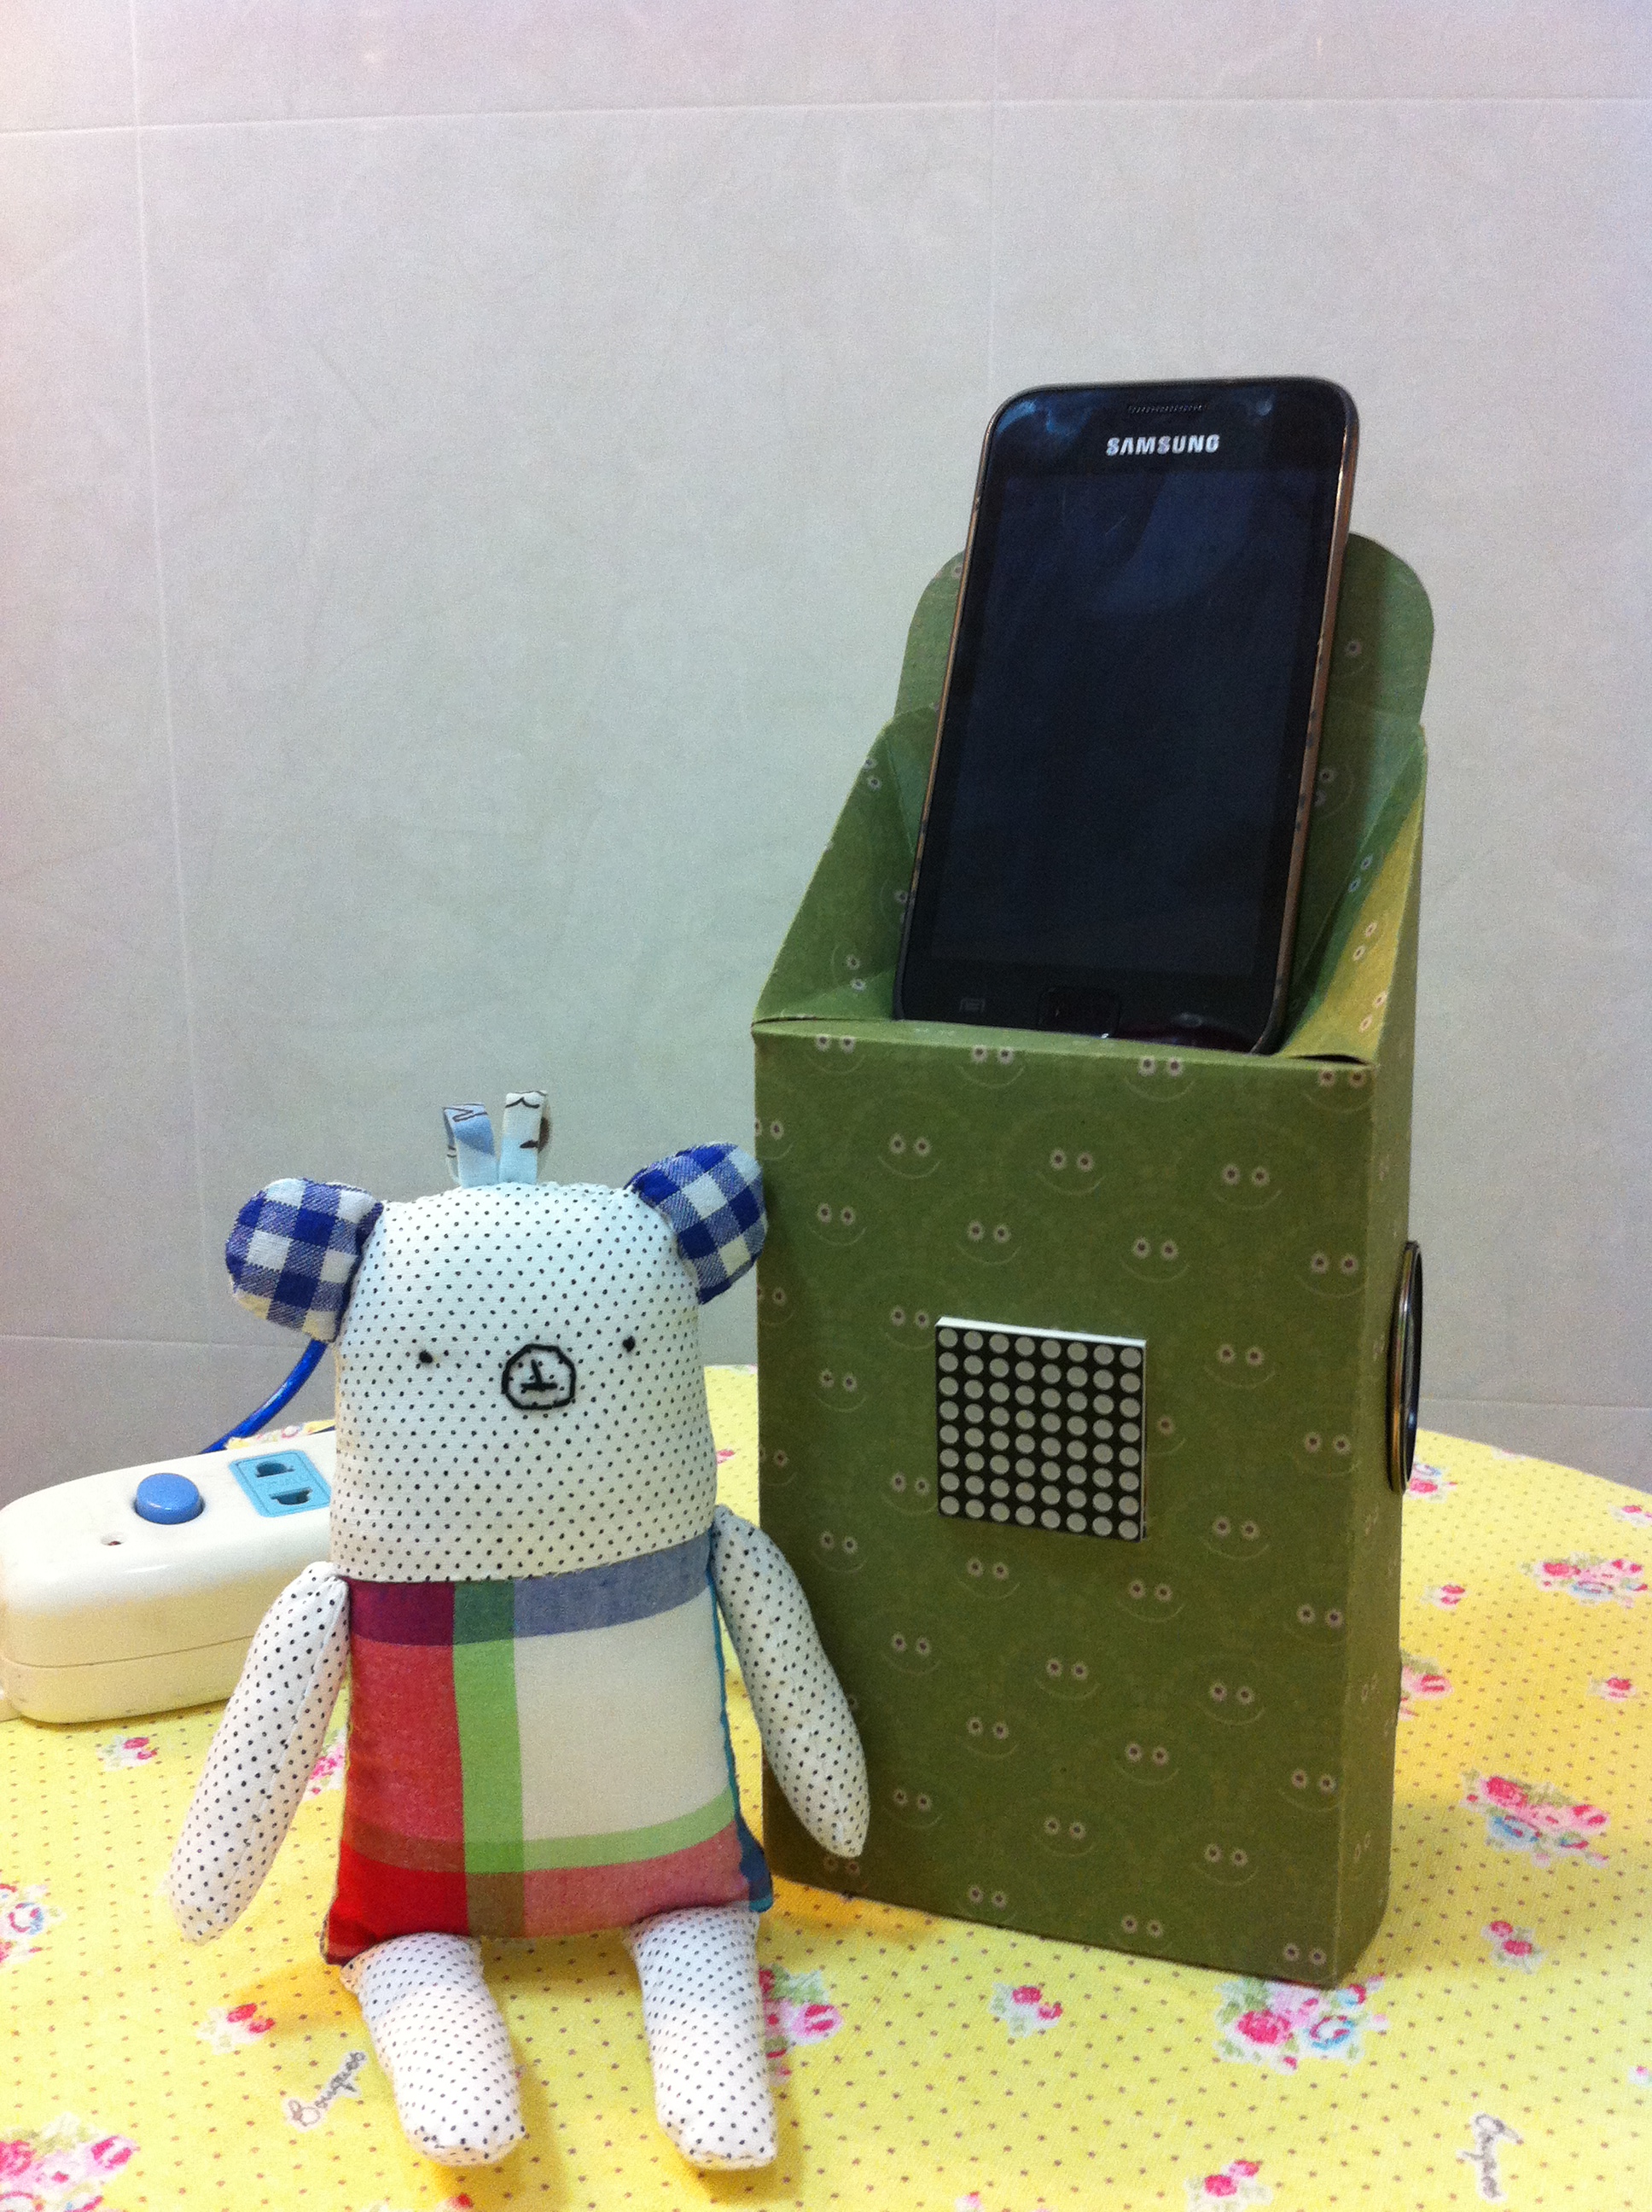
具体的使用方法拍了一个简单的视频,本人倾力献身声
最后放两张靓照


这只是很粗糙的原型,如果真想做出来实用的还有很长的路要走。比如:让检测更灵敏更可靠,或者干脆使用手机的声音作为触发条件。提示音量再大一些。或者再加上充电功能就更加实用,也给需要一直插着让Arduino供电找到更好的借口。
然后严小姐的问题是:如果忽然有很强的振动,误触发了怎么办,如果家里确实没有人它又一直在叫怎么办,如果隔壁在装修,有振动有噪音怎么办?好吧,如果你肯再品准500+以上的预算,让我买块蓝牙开发板,我相信一定不是问题。哦,对了还要换一个支持Android的手机才好啊。