#include <Uefi.h>
#include <Library/UefiLib.h>
#include <Library/ShellCEntryLib.h>
#define SUM(a,b) a+b
/***
Print a welcoming message.
Establishes the main structure of the application.
@retval 0 The application exited normally.
@retval Other An error occurred.
***/
INTN
EFIAPI
ShellAppMain (
IN UINTN Argc,
IN CHAR16 **Argv
)
{
int c =3,d=4;
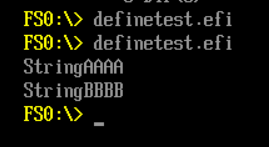
Print(L"Hello there fellow Programmer.\n");
Print(L"Welcome to the world of EDK II.\n");
Print(L"Macro test %d\n",SUM(c,d));
return(0);
}
在 INF 中定义如下:
[BuildOptions]
  MSFT:*_*_X64_CC_FLAGS  = /P
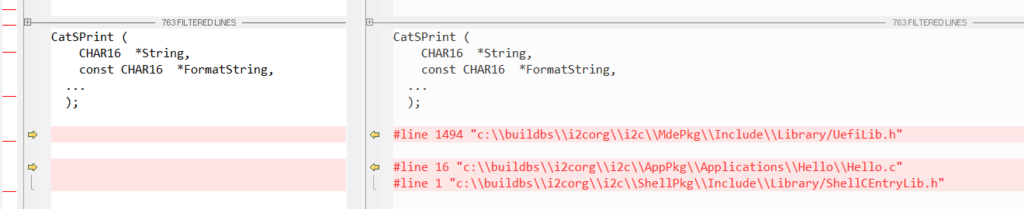
在Build 目录下有生成一个 hello.i 其中有如下代码断,可以看到 SUM 宏已经展开。
INTN
__cdecl
ShellAppMain (
   UINTN Argc,
   CHAR16 **Argv
  )
{
        int c =3,d=4;

  Print(L"Hello there fellow Programmer.\n");
  Print(L"Welcome to the world of EDK II.\n");

  Print(L"Macro test %d\n",c+d);

  return(0);
}
之前看到过很多人用一些词组来证明中文的简洁和高效,比如:人们看到“炮闩”,通过“闩”就能猜到它的用途。这让我想起最近网上的一个笑话:“老师在群里发消息说明天开始一元二次方程。有家长问。能不能一元三次?打个折?” 缺少必要知识,就无法理解“元”的含义。 “一元二次方程” 的英文名是“quadratic equation with one unknown”,从上面大抵能看明白这个方程中有一个未知数以及它的二次方。所以,懂和不懂是取决于知识的储备和语言文字并没有太多关系。

