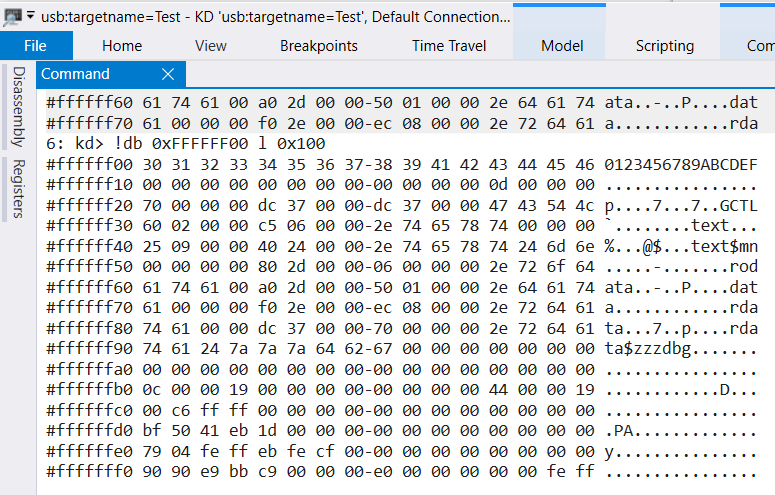
Step to UEFI (129)EFI_CPU_ARCH_PROTOCOL

最近在看 EFI_CPU_ARCH_PROTOCOL 相关内容,相关定义只在 PI Specification的DXE_CIS 章节,和 UEFI Specification 无关。具体如下:

car1

这次先试试其中的NumberOfTimers 和GetTimerValue 。NumberOfTimers 返回的是当前系统中的Timer数量,从我的几个机器的实验看,目前都是 1。GetTimerValue定义如下:

car2

其中的 TimerValue 给出当前系统Timer的值;TimerPeriod给出当前系统Timer值的单位,这个单位是飞秒(10^-15)。比如,TimerPeriod=10^6 (1ns),TimerValue=10^3,那么 Timer 经过的事件是两者相乘的 10^9, 1 微秒(1 microsecond)。

我们编写一个代码来进行实验,测试一个 gBS->stall 1秒,经过的时间。代码如下 :


/** @file

    A simple, basic, application showing how the Hello application could be

    built using the "Standard C Libraries" from StdLib.


    Copyright (c) 2010 - 2011, Intel Corporation. All rights reserved.<BR>

    This program and the accompanying materials

    are licensed and made available under the terms and conditions of the BSD License

    which accompanies this distribution. The full text of the license may be found at

    http://opensource.org/licenses/bsd-license.


    THE PROGRAM IS DISTRIBUTED UNDER THE BSD LICENSE ON AN "AS IS" BASIS,

    WITHOUT WARRANTIES OR REPRESENTATIONS OF ANY KIND, EITHER EXPRESS OR IMPLIED.

**/

#include <Library/BaseLib.h>

#include <Uefi.h>

#include <Library/UefiLib.h>

#include <Library/PrintLib.h>

#include <Library/ShellCEntryLib.h>


#include <Protocol/Cpu.h>


EFI_GUID gEfiCpuArchProtocolGuid =

                { 0x26BACCB1, 0x6F42, 0x11D4,

                        { 0xBC, 0xE7, 0x00, 0x80, 0xC7, 0x3C, 0x88, 0x81 }};


extern EFI_BOOT_SERVICES         *gBS;


/***

  Demonstrates basic workings of the main() function by displaying a

  welcoming message.


  Note that the UEFI command line is composed of 16-bit UCS2 wide characters.

  The easiest way to access the command line parameters is to cast Argv as:

      wchar_t **wArgv = (wchar_t **)Argv;


  @param[in]  Argc    Number of argument tokens pointed to by Argv.

  @param[in]  Argv    Array of Argc pointers to command line tokens.


  @retval  0         The application exited normally.

  @retval  Other     An error occurred.

***/

int

main (

  IN int Argc,

  IN char **Argv

  )

{

  EFI_CPU_ARCH_PROTOCOL  *Cpu;

  UINT64                 TimerValue;

  UINT64                 StartTimerValue; 

  UINT64                 EndTimerValue; 

  UINT64                 TimerPerioid;

  EFI_STATUS             Status;

  UINT64                 tmp;


  //

  // Locate the Cpu Arch Protocol.

  //

  Status = gBS->LocateProtocol (&gEfiCpuArchProtocolGuid, NULL, &Cpu);

  if (EFI_ERROR (Status)) {

    Print(L"Can't find EFI_CPU_ARCH_PROTOCOL\n");

    return Status;

  }


  //Get some base information

  Cpu->GetTimerValue(

        Cpu,

        0, //There is only one timer in system

        &TimerValue,

        &TimerPerioid

  );


  //Usually there is only one timer in this protocol

  Print(L"NumberOfTimers: %d\n",Cpu->NumberOfTimers); 

  //The unite of one timer ,femtoseconds 10^(-15)s

  Print(L"Timer period  : %ld\n",TimerPerioid);


  //Make a simple test here, delay 1 second

  //And check how long it is in the timer

  Print(L"Timer Test Start delay 1s\n");

  Cpu->GetTimerValue(

                Cpu,

                0, //There is only one timer in system

                &StartTimerValue,

                &TimerPerioid

        ); 

  Print(L"   Start at: %ld\n",StartTimerValue);

  gBS->Stall(1000000UL);

  Cpu->GetTimerValue(

                Cpu,

                0, //There is only one timer in system

                &EndTimerValue,

                &TimerPerioid

        ); 

  Print(L"     End at: %ld\n",EndTimerValue);

  tmp = MultU64x64(EndTimerValue-StartTimerValue,TimerPerioid);

  tmp = DivU64x32 (tmp,1000000000UL);

  Print(L"    Elapsed: %ld us\n",tmp);


  return 0;

}

NT32 的虚拟机实验结果如下:

car3

实体机上实验结果如下(看起来实体机上偏差更大?):

car4

X64 EFI Application下载:

cat1

完整代码下载:

CPUArchTest1

时间单位的简单介绍【参考1】:

second millisecond microsecond nanosecond picosecond femtosecond

1ms (毫秒) 1毫秒=0.001秒=10-3
1μs (微秒)   1微秒=0.000001=10-6
1ns (纳秒)  1纳秒=0.0000000001秒=10-9
1ps (皮秒)  1皮秒=0.0000000000001秒=10-12
1fs (飞秒)  1飞秒=0.000000000000001秒=10-15

参考:

  1. http://blog.163.com/digoal@126/blog/static/163877040201062810748700/


Arduino Leonardo 串口起始条件

之前提到过,在编程做Arduino Leonrado 的串口通讯时,需要特别设定打开流控制才能正常工作

us

经过研究发现,这是因为在 \arduino-1.8.4\hardware\arduino\avr\cores\arduino\CDC.cpp 下面的代码导致的。这段代码会检测当前的串口是否有 lineState的设定,如果没有的话,返回 False (应该是Serial就无法正常的初始化)。这段代码的初衷应该是保证从IDE刷新代码之后,直到打开串口才会执行,但是如果你并非使用IDE就会很麻烦。所以可以根据情况移除。

Serial_::operator bool() {
bool result = false;
if (_usbLineInfo.lineState > 0)
result = true;
delay(10);
return result;
}

UEFI Tips: 介绍一个新功能:RamDisk

2015年底的时候, UEFI Specification 2.6中新加入了一个 Ram Disk Protocol,但是一直以来我搞不清楚如何使用。到了 UDK2017 有了Demo,终于可以弄清楚使用方法。
实验环境是 QEMU X64。用到UDK2017中的OvmfPkgX64.dsc,编译之后生成 ovmf.fd 使用 qemu-system-x86_64.exe –bios ovmf.fd 进行启动。启动之后,可以在Setup中刚看到 RamDisk 的相关设定。

image001

从下面可以看到有2种创建方式,一种是直接创建一个空的 Ram Disk。另外一种是读取一个文件放在内存中作为 RamDisk

image002

先试试第一种,选择创建一个 RAW 的Ram Disk大小为 4KB。
image003

启动之后可以在Shell 下面看到(图中 BLK3)。
image004

因为是 RAW,所以没有 FAT分区,也就不会出现 FSx: 这样的盘符。
此外,还可以使用 Create from file 来安装一个带有 Fat 的盘。我做了一个 MemTest 的镜像,安装之后会出现 Fs0: , 但是 MemTest 软件本身在运行的时候会死机(可能是 QEMU 模拟的硬件太老和MemTest有兼容性问题):

image005

同样的方法在实体机上能够正常工作,下图是在 KabyLake-Y上运行的结果:

image006

image007

可以看到,这个功能能够让一些已经编译好的UEFI Application 顺利执行,最直接的应用就是在Boot From WIFI 。

本文提到的 MemTest 工具可以在这里下载 MemTest

这里放一个UDK2017 编译生成的 OVMF.FD ,可以进行试验。需要注意的是,启动速度比较慢,请耐心等待
OVMF

Arduino LED 的思考题

之前做了几块 LED Shield,焊接的是高亮的LED,在使用的发现实在是太亮了,排在一起很难分辨清楚,于是,重新买的普通LED焊接了一下。

image001

0-7放的是红色LED,8-13放的是蓝色LED。可以看到,他们都能工作。

led2

led3

但是如果写出来下面这样的代码,只有红色LED工作:
for (int i=0;i<14;i++) {
pinMode(i,OUTPUT);
digitalWrite(i,HIGH);
}
进一步实验发现,只要有一个红色的亮了,那么蓝色的就没有办法亮起来。

这就是我碰到的问题,有兴趣的朋友可以开始思考原因了。答案在下面。


最终,发现这个问题是因为红色LED压降低导致的,比如,亮起来一个红色之后,对GND的电阻上的电压只有3.3V了,而蓝色LED需要2.6V左右的压降才能工作,因此蓝色LED就没有办法亮起来了。
从设计上来说,这个问题是因为LED的地都接到一起导致的,如果能够独立就不会有这样的问题。

Step to UEFI (128)汇编到机器码的转换

在很长一段时间里面因为有编译器的帮助,完全没有手工进行汇编语言和机器语言转化的需求。不过前面碰到了RDRAND 这样的指令,一方面说明CPU指令还在增长,另一方面也发觉还有这样的要求,于是进行一些探究。
从资料上看,目前还活着的汇编工具有 NASM。先查阅一下支持的指令【参考1】,确定支持了 RDRAND。
a2s1

编写一个简单的 asm 程序,里面有六条指令:
rdrand eax
rdrand ebx
rdrand edi
rdrand ax
rdrand bx
rdrand di使用nasm进行编译,未指定格式默认编译目标为 Binary, -l test.lst 表示生成一个 list 文件
a2s2

打开生成的 test.lst,可以看到下面每条语句对应的机器码(0x66 是32位操作的前缀)
1 00000000 660FC7F0 rdrand eax
2 00000004 660FC7F3 rdrand ebx
3 00000008 660FC7F7 rdrand edi
4 0000000C 0FC7F0 rdrand ax
5 0000000F 0FC7F3 rdrand bx
6 00000012 0FC7F7 rdrand di
同样的,NASM 还有一个反编译工具 ndisasm.exe:
a2s3

从上面可以看出 NASM 可以用来生成指令对应的机器码。在没有涉及到内存地址的情况下是很好的工具。另外一个方面,使用他自带的反编译工具也可以方便的完成机器码到汇编指令的转换。
下载:http://www.nasm.us/pub/nasm/releasebuilds/?C=M;O=D

参考:
1. http://www.nasm.us/xdoc/2.13.01/html/nasmdocb.html

20190905 补充: 这里还有一个在线的汇编语言转机器的工具,可以方便的进行查询:

https://defuse.ca/online-x86-assembler.htm#disassembly

VC Console 读取 WMI 的例子

来自 https://msdn.microsoft.com/en-us/library/aa390423(v=vs.85).aspx

特别注意取得的 WMI 的 String 是 Unicode 的,输出时需要使用 %ls

#include “stdafx.h”

#define _WIN32_DCOM
#include
#include

#pragma comment(lib, “wbemuuid.lib”)

int main(int argc, char **argv)
{
HRESULT hres;

// Step 1: ————————————————–
// Initialize COM. ——————————————

hres = CoInitializeEx(0, COINIT_MULTITHREADED);
if (FAILED(hres))
{
printf(“Failed to initialize COM library. Error code”);
return 1; // Program has failed.
}

// Step 2: ————————————————–
// Set general COM security levels ————————–

hres = CoInitializeSecurity(
NULL,
-1, // COM authentication
NULL, // Authentication services
NULL, // Reserved
RPC_C_AUTHN_LEVEL_DEFAULT, // Default authentication
RPC_C_IMP_LEVEL_IMPERSONATE, // Default Impersonation
NULL, // Authentication info
EOAC_NONE, // Additional capabilities
NULL // Reserved
);

if (FAILED(hres))
{
printf(“Failed to initialize security. Error code = 0x”);
CoUninitialize();
return 1; // Program has failed.
}

// Step 3: —————————————————
// Obtain the initial locator to WMI ————————-

IWbemLocator *pLoc = NULL;

hres = CoCreateInstance(
CLSID_WbemLocator,
0,
CLSCTX_INPROC_SERVER,
IID_IWbemLocator, (LPVOID *)&pLoc);

if (FAILED(hres))
{
printf(“Failed to create IWbemLocator object.”);
CoUninitialize();
return 1; // Program has failed.
}

// Step 4: —————————————————–
// Connect to WMI through the IWbemLocator::ConnectServer method

IWbemServices *pSvc = NULL;

// Connect to the root\cimv2 namespace with
// the current user and obtain pointer pSvc
// to make IWbemServices calls.
hres = pLoc->ConnectServer(
_bstr_t(L”ROOT\\CIMV2″), // Object path of WMI namespace
NULL, // User name. NULL = current user
NULL, // User password. NULL = current
0, // Locale. NULL indicates current
NULL, // Security flags.
0, // Authority (for example, Kerberos)
0, // Context object
&pSvc // pointer to IWbemServices proxy
);

if (FAILED(hres))
{
printf(“Could not connect. Error code = 0x”);
pLoc->Release();
CoUninitialize();
return 1; // Program has failed.
}

printf(“Connected to ROOT\\CIMV2 WMI namespace”);

// Step 5: ————————————————–
// Set security levels on the proxy ————————-

hres = CoSetProxyBlanket(
pSvc, // Indicates the proxy to set
RPC_C_AUTHN_WINNT, // RPC_C_AUTHN_xxx
RPC_C_AUTHZ_NONE, // RPC_C_AUTHZ_xxx
NULL, // Server principal name
RPC_C_AUTHN_LEVEL_CALL, // RPC_C_AUTHN_LEVEL_xxx
RPC_C_IMP_LEVEL_IMPERSONATE, // RPC_C_IMP_LEVEL_xxx
NULL, // client identity
EOAC_NONE // proxy capabilities
);

if (FAILED(hres))
{
printf(“Could not set proxy blanket. Error code = 0x”);
pSvc->Release();
pLoc->Release();
CoUninitialize();
return 1; // Program has failed.
}

// Step 6: ————————————————–
// Use the IWbemServices pointer to make requests of WMI —-

// For example, get the name of the operating system
IEnumWbemClassObject* pEnumerator = NULL;
hres = pSvc->ExecQuery(
bstr_t(“WQL”),
bstr_t(“SELECT * FROM Win32_OperatingSystem”),
WBEM_FLAG_FORWARD_ONLY | WBEM_FLAG_RETURN_IMMEDIATELY,
NULL,
&pEnumerator);

if (FAILED(hres))
{
printf(“Query for operating system name failed.”);
pSvc->Release();
pLoc->Release();
CoUninitialize();
return 1; // Program has failed.
}

// Step 7: ————————————————-
// Get the data from the query in step 6 ——————-

IWbemClassObject *pclsObj = NULL;
ULONG uReturn = 0;

while (pEnumerator)
{
HRESULT hr = pEnumerator->Next(WBEM_INFINITE, 1,
&pclsObj, &uReturn);

if (0 == uReturn)
{
break;
}

VARIANT vtProp;

// Get the value of the Name property
hr = pclsObj->Get(L”Name”, 0, &vtProp, 0, 0);
//wcout << " OS Name : " << vtProp.bstrVal << endl; printf(" OS Name : %ls\n", vtProp.bstrVal); VariantClear(&vtProp); pclsObj->Release();
}

// Cleanup
// ========

pSvc->Release();
pLoc->Release();
pEnumerator->Release();
CoUninitialize();

system(“PAUSE”);
return 0; // Program successfully completed.

}

运行结果 (VS2015 Windows 10 RS1)

Capture

Step to UEFI (127)RDRAND 再研究

前面提到过 RDRAND指令,最近再拿出来看一下,思考了更多问题。
前情提要:
具体的RDRAND指令是通过内嵌汇编实现的,在ASM中直接定义如下

        ; rdrand   ax                  ; generate a 16 bit RN into ax, CF=1 if RN generated ok, otherwise CF=0
        db     0fh, 0c7h, 0f0h         ; rdrand r16:  "0f c7 /6  ModRM:r/m(w)"


第一个问题是:这些数字是哪里来的,如何对应到这个指令上的?这种事情必须查阅 Intel 手册了,在“Intel® 64 and IA-32 Architectures Software Developer’s Manual Volume 2 (2A, 2B, 2C & 2D): Instruction Set Reference, A-Z” 有如下介绍:

rd1

从上面可以看到 0F C7 /6 就是 RDRAND指令。
接下来是第二个问题:这组数字是如何决定指令使用的寄存器的?意思是:如何确定当前机器代码是rdrand ax 还是rdrand bx?
这个问题就涉及到了指令编码 ModR/M 的知识。在研究了下面的资料之后
http://www.mouseos.com/x64/index.html x86/x64 指令编码内幕(适用于 AMD/Intel)
http://blog.csdn.net/aap159951/article/details/48706207 自己的反汇编引擎–Intel指令编码 (2)
配合下面的表格:0F C7 /6 中的 /6 决定列,然后红色框中的是对应的寄存器

rd2

具体来说0F C7 F1 表示 RDRAND ecx;0F C7 F7 表示 RDRAND edi。
接下来就是如何验证上面的猜想。我们使用 0f 0c7 f3 来验证是否为 RDRAND EBX,使用 0f 0c7 f7 来验证是否为 RDRAND EDI。
为了配合内嵌汇编,我在INF 中设置打开生成的 COD文件,这样可以方便的看清楚参数的传递。

[BuildOptions]
  MSFT:*_*_X64_CC_FLAGS = /Oi- /FAcs /Od


这样在编译的时候会生成 cod文件,可以在\Build\AppPkg\DEBUG_VS2013x86\X64\AppPkg\Applications\ 的对应目录下找到
从里面可以看到,通过 rcx传递进去地址,返回值也会在对应的地址中,同时判断 eax是否成功。

; 143  :     if (RdRand32StepEDI (Rand)) {

  00046	48 8b 4c 24 40	 mov	 rcx, QWORD PTR Rand$[rsp]
  0004b	e8 00 00 00 00	 call	 RdRand32StepEDI
  00050	0f b6 c0	 movzx	 eax, al
  00053	85 c0		 test	 eax, eax
  00055	74 04		 je	 SHORT $LN1@RdRand32ED

; 144  :       return EFI_SUCCESS;


有了上面的实验,即可编写代码。需要特别注意三点:一个是不要破坏寄存器,否则可能出现不可预料的后果;另外一个是当函数接收参数只有一个时,会使用rcx来传递参数【这部分的详细资料目前没有查到,有了解的朋友欢迎在留言中补充】;最后的结果会从 rcx 传出,在这个例子中是传输到 rcx 给出的地址中。
最终的代码如下:

;------------------------------------------------------------------------------
;  Generate a 32 bit random number
;    Return TRUE if Rand generated successfully, or FALSE if not
;
;  BOOLEAN EFIAPI RdRand32Step (UINT32 *Rand);   RCX
;------------------------------------------------------------------------------
RdRand32StepEBX  PROC
    ; rdrand   ebx                 ; generate a 32 bit RN into eax, CF=1 if RN generated ok, otherwise CF=0
    push   rbx
    db     0fh, 0c7h, 0f3h         ; rdrand r32:  "0f c7 /6  ModRM:r/m(w)"
    jb     rn32_ok                 ; jmp if CF=1
    xor    ebx, ebx                ; reg=0 if CF=0
    pop    rbx
    ret                            ; return with failure status
rn32_ok:
    mov    [rcx], ebx
    mov    rax,  1
    pop    rbx
    ret
RdRand32StepEBX ENDP

;------------------------------------------------------------------------------
;  Generate a 32 bit random number
;    Return TRUE if Rand generated successfully, or FALSE if not
;
;  BOOLEAN EFIAPI RdRand32Step (UINT32 *Rand);   RCX
;------------------------------------------------------------------------------
RdRand32StepEDI  PROC
    ; rdrand   edi                 ; generate a 32 bit RN into eax, CF=1 if RN generated ok, otherwise CF=0
    push   rdi
    db     0fh, 0c7h, 0f7h         ; rdrand r32:  "0f c7 /6  ModRM:r/m(w)"
    jb     rn32_ok                 ; jmp if CF=1
    xor    edi, edi                ; reg=0 if CF=0
    pop    rdi
    ret                            ; return with failure status
rn32_ok:
    mov    [rcx], edi
    mov    rax,  1
    pop    rdi
    ret
RdRand32StepEDI ENDP


运行结果如下:

rd3

完整的代码下载:

RdRand2

最后还有第三个问题:从上面可以看到0fh, 0c7h, 0f7h 可以对应 RDRAND eax 也可以对应到 RDRAND ax,那么是如何进行区别的呢?
我猜测是根据当前CPU 的状态决定的,当现在的代码段是32位,这个机器码操作的目标是 EAX,如果是16位,操作目标就是ax。 当然,对于这一点我现在无法确认,后面会想办法进行验证。

Step to UEFI (126)ReturnAddress 研究

最近查看代码发现 Base.h 中新添加了一个ReturnAddress的函数(称作宏更恰当)。对应代码如下:

#if defined(_MSC_EXTENSIONS) && !defined (__INTEL_COMPILER) && !defined (MDE_CPU_EBC)
  void * _ReturnAddress(void);
  #pragma intrinsic(_ReturnAddress)
  /**
    Get the return address of the calling function.

    Based on intrinsic function _ReturnAddress that provides the address of
    the instruction in the calling function that will be executed after
    control returns to the caller.

    @param L    Return Level.

    @return The return address of the calling function or 0 if L != 0.

  **/
  #define RETURN_ADDRESS(L)     ((L == 0) ? _ReturnAddress() : (VOID *) 0)
#elif defined(__GNUC__)
  void * __builtin_return_address (unsigned int level);
  /**
    Get the return address of the calling function.

    Based on built-in Function __builtin_return_address that returns
    the return address of the current function, or of one of its callers.

    @param L    Return Level.

    @return The return address of the calling function.

  **/
  #define RETURN_ADDRESS(L)     __builtin_return_address (L)
#else
  /**
    Get the return address of the calling function.

    @param L    Return Level.

    @return 0 as compilers don't support this feature.

  **/
  #define RETURN_ADDRESS(L)     ((VOID *) 0)
#endif


为了一探究竟,编写一个Application ,将上面的内容直接移植到上面:

/** @file
  Support routines for RDRAND instruction access.

Copyright (c) 2013, Intel Corporation. All rights reserved.<BR>
This program and the accompanying materials
are licensed and made available under the terms and conditions of the BSD License
which accompanies this distribution.  The full text of the license may be found at
http://opensource.org/licenses/bsd-license.php

THE PROGRAM IS DISTRIBUTED UNDER THE BSD LICENSE ON AN "AS IS" BASIS,
WITHOUT WARRANTIES OR REPRESENTATIONS OF ANY KIND, EITHER EXPRESS OR IMPLIED.

**/
#include <Uefi.h>
#include <Library/BaseLib.h>
#include <Library/UefiLib.h>

  #pragma intrinsic(_ReturnAddress)
  /**
    Get the return address of the calling function.

    Based on intrinsic function _ReturnAddress that provides the address of
    the instruction in the calling function that will be executed after
    control returns to the caller.

    @param L    Return Level.

    @return The return address of the calling function or 0 if L != 0.

  **/
  #define RETURN_ADDRESS(L)     ((L == 0) ? _ReturnAddress() : (VOID *) 0)

/**
  The user Entry Point for Application. The user code starts with this function
  as the real entry point for the application.

  @param[in] ImageHandle    The firmware allocated handle for the EFI image.
  @param[in] SystemTable    A pointer to the EFI System Table.

  @retval EFI_SUCCESS       The entry point is executed successfully.
  @retval other             Some error occurs when executing this entry point.

**/
EFI_STATUS
EFIAPI
UefiMain (
  IN EFI_HANDLE        ImageHandle,
  IN EFI_SYSTEM_TABLE  *SystemTable
  )
{
        Print (L"return here [%X] \n",UefiMain);
        Print (L"return here [%X] \n",RETURN_ADDRESS(0));
        
        return EFI_SUCCESS;
}


为了更方便的研究编译之后的结果,在INF中打开生成汇编代码的功能:

 [BuildOptions]
  MSFT:*_*_X64_CC_FLAGS = /Oi- /FAcs /Od


上面的代码运行结果如下(NT32模拟器,X64编译)

rtadd

首先查看MAP文件,生成的代码中UefiMain 的地址是4dc,这就是运行结果中 41DB4DC的来源

\Build\AppPkg\DEBUG_VS2013x86\X64\AppPkg\Applications\ReturnAddress\returnaddress\OUTPUT\returnadd.map
0001:000001f8       ProcessModuleEntryPointList 00000000000004b8 f   returnadd:AutoGen.obj
 0001:0000021c       UefiMain                   00000000000004dc f   returnadd:returnaddress.obj
 0001:00000258       DebugPrint                 0000000000000518 f   BaseDebugLibNull:DebugLib.obj


进一步观察 COD 文件,UefiMain 编译的结果如下,就是:48 89 54 24 10 48 89 4c 24 08……

\Build\AppPkg\DEBUG_VS2013x86\X64\AppPkg\Applications\ReturnAddress\returnaddress\returnaddress.cod

UefiMain PROC						; COMDAT

; 50   : {

$LN3:
  00000	48 89 54 24 10	 mov	 QWORD PTR [rsp+16], rdx
  00005	48 89 4c 24 08	 mov	 QWORD PTR [rsp+8], rcx
  0000a	48 83 ec 28	 sub	 rsp, 40			; 00000028H

; 51   :         Print (L"return here [%X] \n",UefiMain);

  0000e	48 8d 15 00 00
	00 00		 lea	 rdx, OFFSET FLAT:UefiMain
  00015	48 8d 0d 00 00
	00 00		 lea	 rcx, OFFSET FLAT:??_C@_1CG@PNEGEHON@?$AAr?$AAe?$AAt?$AAu?$AAr?$AAn?$AA?5?$AAh?$AAe?$AAr?$AAe?$AA?5?$AA?$FL?$AA?$CF?$AAX?$AA?$FN?$AA?5?$AA?6?$AA?$AA@
  0001c	e8 00 00 00 00	 call	 Print


打开十六进制编辑软件,可以看到 0x4DC偏移处就是上面的机器码:

rtadd2

我们再查看调用 UefiMain的地方,可以在 AutoGen.C 中找到

\Build\AppPkg\DEBUG_VS2013x86\X64\AppPkg\Applications\ReturnAddress\returnaddress\AutoGen.cod

ProcessModuleEntryPointList PROC			; COMDAT

; 224  : {

$LN3:
  00000	48 89 54 24 10	 mov	 QWORD PTR [rsp+16], rdx
  00005	48 89 4c 24 08	 mov	 QWORD PTR [rsp+8], rcx
  0000a	48 83 ec 28	 sub	 rsp, 40			; 00000028H

; 225  :   return UefiMain (ImageHandle, SystemTable);

  0000e	48 8b 54 24 38	 mov	 rdx, QWORD PTR SystemTable$[rsp]
  00013	48 8b 4c 24 30	 mov	 rcx, QWORD PTR ImageHandle$[rsp]
  00018	e8 00 00 00 00	 call	 UefiMain


我们再使用上面生成的机器码进行查找,可以发现是从 0x4B8开始的

rtadd3

0x4D5 对应的位置在下面

  0001d	48 83 c4 28	 add	 rsp, 40			; 00000028H
  00021	c3		 ret	 0
ProcessModuleEntryPointList ENDP


就是 call UefiMain 之后的位置。
因此 Return_Address 的作用就是返回当前所在函数返回的位置。比如:下面的示例代码中 Return_Address() 取得的地址就是 RT: 的地址。

Int Foo()
{
Return_Address()
}
Call Foo()
Rt:


本文提到的完整代码在这里:
ReturnAddress

参考:
1. https://msdn.microsoft.com/en-us/library/64ez38eh.aspx

Step to UEFI (125)CPUBreakPoint 研究

最近在研究 Intel ITP,这是可以进行源码级别调试的硬件工具。刚使用就遇到一个有意思的问题:如何让代码在需要的时候停下来。最直接的想法就是编写死循环,但是很快发现因为编译器的优化,当它发现你编写的代码是死循环,那么它会自动优化掉后面的它认为跑不到的代码。因此需要另辟蹊径找到更标准的方法。
找人请教了一下,对方指点说有一个 CpuBreakpoint() 函数可以使用。首先看这个函数的原型,在\MdePkg\Include\Library\BaseLib.h 中如下:

/**
  Generates a breakpoint on the CPU.

  Generates a breakpoint on the CPU. The breakpoint must be implemented such
  that code can resume normal execution after the breakpoint.

**/
VOID
EFIAPI
CpuBreakpoint (
  VOID
  );


具体实现代码可以在 \MdePkg\Library\BaseLib\X64\CpuBreakpoint.c 中找到

void __debugbreak ();

#pragma intrinsic(__debugbreak)

/**
  Generates a breakpoint on the CPU.

  Generates a breakpoint on the CPU. The breakpoint must be implemented such
  that code can resume normal execution after the breakpoint.

**/
VOID
EFIAPI
CpuBreakpoint (
  VOID
  )
{
  __debugbreak ();
}


上面代码使用到了 Intrinsic ,对于这个关键字,我的理解是 VS 编译器插入汇编的方法(X64 是不可以直接使用 __ASM进行内嵌汇编的)。这个问题在之前的文章中涉及到,下面用实验来说明,在Shell Application,加入如下代码:

  __asm{
          int 3;
  }


在 -a IA32 的情况下,可以编译通过;在 -a X64 的情况下,编译期有如下错误提示:

d:\udk2017\AppPkg\Applications\BreakPointDemo\BreakPointDemo.c(45) : error C4235
: nonstandard extension used : ‘_asm’ keyword not supported on this architecture

d:\udk2017\AppPkg\Applications\BreakPointDemo\BreakPointDemo.c(46) : error C2143
: syntax error : missing ‘;’ before ‘constant’
d:\udk2017\AppPkg\Applications\BreakPointDemo\BreakPointDemo.c(46) : warning C40
91: ‘ ‘ : ignored on left of ‘int’ when no variable is declared
NMAKE : fatal error U1077: ‘”C:\Program Files (x86)\Microsoft Visual Studio 12.0
\Vc\bin\x86_amd64\cl.exe”‘ : return code ‘0x2’
Stop.
为此, VS 定义了一个关键字Intrinsic 用来内嵌汇编。“大多数的函数是在库中,Intrinsic Function却内嵌在编译器中(built in to the compiler)” 【参考1】。
为了进一步验证,需要看到编译之后的结果,我们在 \MdePkg\Library\BaseLib\BaseLib.inf 中加入如下指令:

[BuildOptions]
  MSFT:*_*_X64_CC_FLAGS = /Oi- /FAcs /Od


重新编译,会生成cpubreakpoint.c对应的 cod 文件。

PUBLIC	CpuBreakpoint
; Function compile flags: /Odsp
; File d:\udk2017\mdepkg\library\baselib\x64\cpubreakpoint.c
;	COMDAT CpuBreakpoint
_TEXT	SEGMENT
CpuBreakpoint PROC					; COMDAT

; 36   : {

  00000	66 90		 npad	 2

; 37   :   __debugbreak ();

  00002	cc		 int	 3

; 38   : }

  00003	c3		 ret	 0
CpuBreakpoint ENDP
_TEXT	ENDS
END


可见,产生了一个 int 3 。

下面是完整的测试代码
运行之后会在 Shell 下面 Hang 住,运行调试工具,发现是停在PeiDxeSmmCpuException.c 文件中。这个让我很意外,因为在之前的调试工具中,看到 Int3 都是会停在调用 Int 3 的位置。

cpb1

之后,仔细研读了一下代码,发现停的这个位置实际上是 Int 3 的处理函数。这个处理函数的结尾使用 CpuDeadLoop 来让代码停下来。
ITP 支持直接修改内存,因此,我们把 CPUDeadLoop 的汇编判断修改为 NOP 指令之后可以返回到调用处。

cbp2

留下一个很类似的函数 CpuDeadLoop ,有兴趣的朋友可以去研究代码的具体实现。
ITP 是非常有力的武器,但是用起来还是非常麻烦,绝大多数情况下,串口输出信息依然是我们的首选。

参考:
1.http://www.cnblogs.com/wangguchangqing/p/5466301.html

Delphi 版的 KeyPressed 函数

有时候,我们需要在 console 中检查是否有按键按下,对于c语言来说,有 kbhit 和 keypressed, 但是Delphi库中没有对应的现成函数。

经过搜索,最终找到了一段代码【参考1】,根据这段代码,编写下面的测试程序:

program Project5;

{$APPTYPE CONSOLE}

{$R *.res}

uses
  System.SysUtils,Windows;


function KeyPressed:Boolean;
var
  lpNumberOfEvents     : DWORD;
  lpBuffer             : TInputRecord;
  lpNumberOfEventsRead : DWORD;
  nStdHandle           : THandle;
begin
  Result:=false;
  //get the console handle
  nStdHandle := GetStdHandle(STD_INPUT_HANDLE);
  lpNumberOfEvents:=0;
  //get the number of events
  GetNumberOfConsoleInputEvents(nStdHandle,lpNumberOfEvents);
  if lpNumberOfEvents<> 0 then
  begin
    //retrieve the event
    PeekConsoleInput(nStdHandle,lpBuffer,1,lpNumberOfEventsRead);
    if lpNumberOfEventsRead <> 0 then
    begin
      if lpBuffer.EventType = KEY_EVENT then //is a Keyboard event?
      begin
        if lpBuffer.Event.KeyEvent.bKeyDown then //the key was pressed?
          Result:=true
        else
          FlushConsoleInputBuffer(nStdHandle); //flush the buffer
      end
      else
      FlushConsoleInputBuffer(nStdHandle);//flush the buffer
    end;
  end;
end;

var
  i:integer;

  begin
  while (keypressed()=false) do
    begin
      write('waiting ');
      writeln(i);
      sleep(1000);
      inc(i);
    end;
end.


运行结果:

dkp

参考:
1.https://stackoverflow.com/questions/5845080/how-i-can-implement-a-iskeypressed-function-in-a-delphi-console-application