/**
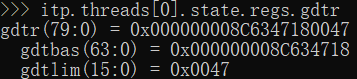
Reads the current Global Descriptor Table Register(GDTR) descriptor.
Reads and returns the current GDTR descriptor and returns it in Gdtr. This
function is only available on IA-32 and x64.
If Gdtr is NULL, then ASSERT().
@param Gdtr The pointer to a GDTR descriptor.
**/
VOID
EFIAPI
AsmReadGdtr (
OUT IA32_DESCRIPTOR *Gdtr
);
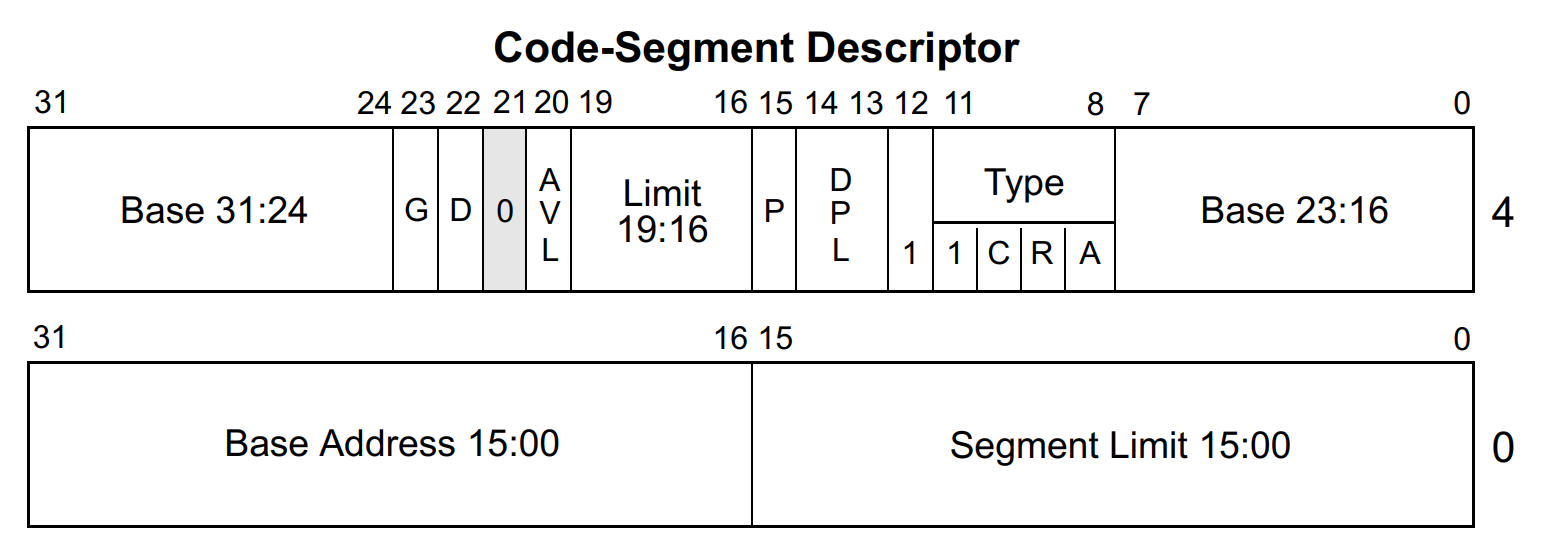
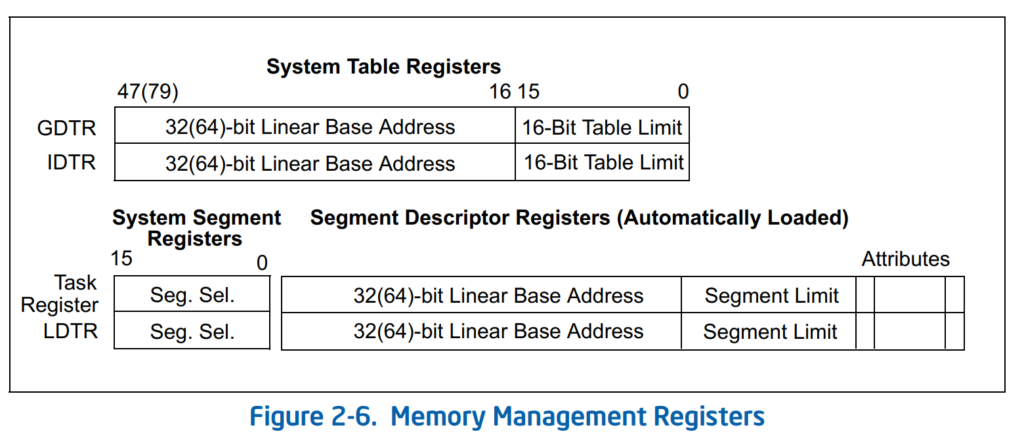
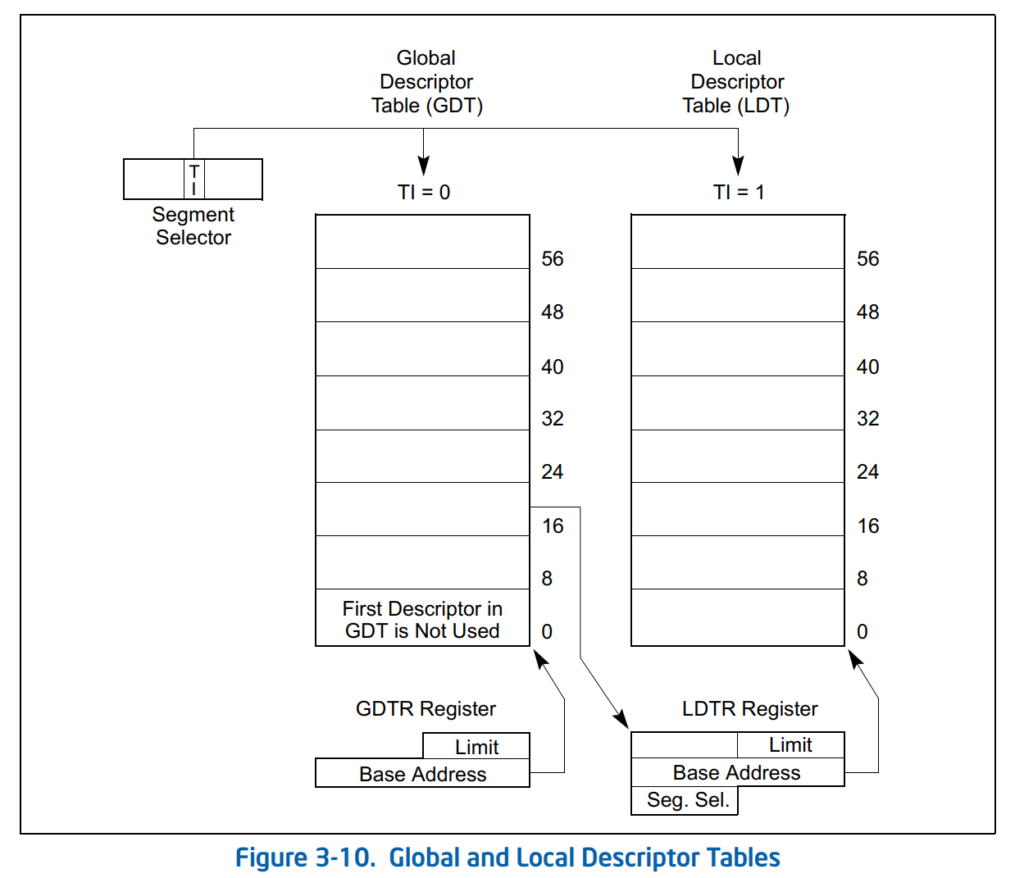
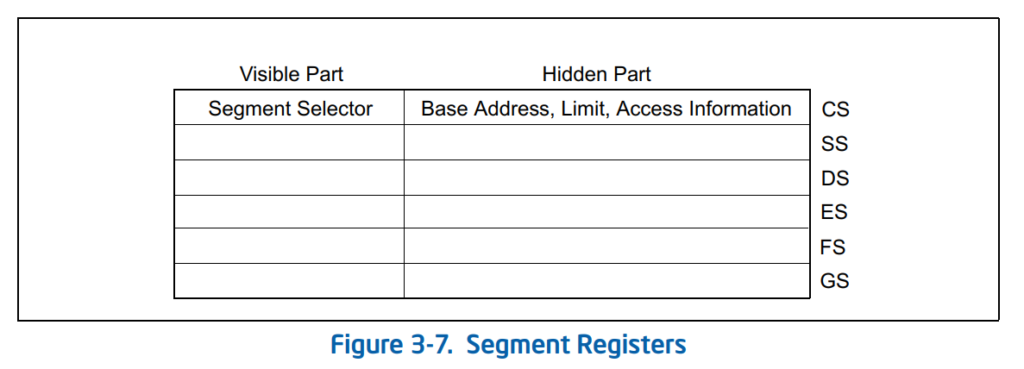
Every segment register has a “visible” part and a “hidden”
part. (The hidden part is sometimes referred to as a “descriptor cache” or a
“shadow register.”) When a segment selector is loaded into the visible part of
a segment register, the processor also loads the hidden part of the segment
register with the base address, segment limit, and access control information
from the segment descriptor pointed to by the segment selector. The information
cached in the segment register (visible and hidden) allows the processor to
translate addresses without taking extra bus cycles to read the base address
and limit from the segment descriptor. In systems in which multiple processors
have access to the same descriptor tables, it is the
responsibility of software to reload the segment registers when the descriptor
tables are modified. If this is not done, an old segment descriptor cached in a
segment register might be used after its memory-resident version has been
modified.
[Defines]
  INF_VERSION                    = 0x00010005
  BASE_NAME                      = mst
  FILE_GUID                      = fb925ac7-192b-9569-8580-7c6f5f710601
  MODULE_TYPE                    = UEFI_APPLICATION
  VERSION_STRING                 = 1.0
  ENTRY_POINT                    = MSMain

#
# The following information is for reference only and not required by the build tools.
#
#  VALID_ARCHITECTURES           = IA32 X64 IPF
#

[Sources]
  MSTest.c

[Packages]
  AppPkg/AppPkg.dec
  MdePkg/MdePkg.dec

[LibraryClasses]
  UefiApplicationEntryPoint
  UefiLib
  BaseLib
错误提示为:
c:\buildbs\201903\AppPkg\Applications\MSTest\MSTest.c(20): error C2143: syntax error: missing '{' before '*'
c:\buildbs\201903\AppPkg\Applications\MSTest\MSTest.c(20): warning C4218: nonstandard extension used: must specify at least a storage class or a type
NMAKE : fatal error U1077: '"C:\Program Files (x86)\Microsoft Visual Studio 14.0\Vc\bin\x86_amd64\cl.exe"' : return code '0x2'
Stop.