在测试一些简单的 UEFI Application 时,EDK2 自带的Emulator 还是非常方便的。这次介绍的就是如何修改 Emulator的默认分辨率。
首先,使用 build -a X64 -p EmulatorPkg\EmulatorPkg.dsc -t VS2019 编译 Emulator
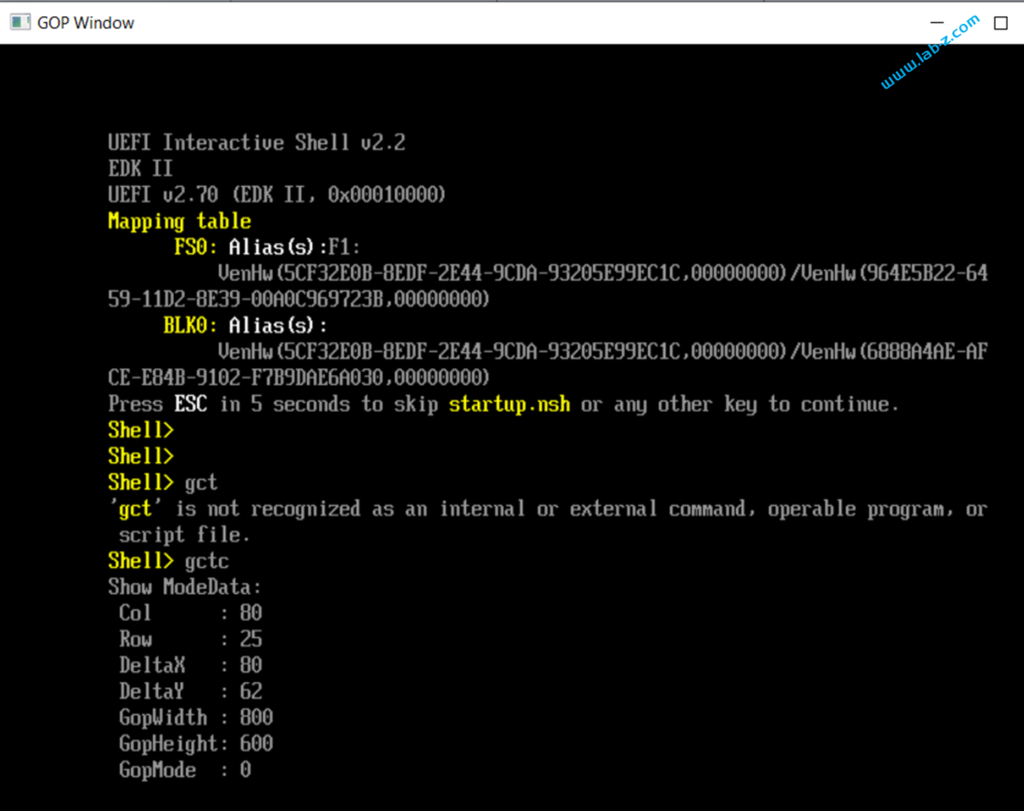
接下来运行 Build\EmulatorX64\DEBUG_VS2019\X64 中的 WinHost.exe,在 Shell 中运行【参考1】提供的 Application 检查当前的分辨率,可以看到默认为 800×600。
接下来修改分辨率,在 \EmulatorPkg\EmulatorPkg.dsc 中指定分辨率为 1024×768:
[PcdsDynamicDefault.common.DEFAULT]
  gEfiMdeModulePkgTokenSpaceGuid.PcdFlashNvStorageFtwSpareBase64|0
  gEfiMdeModulePkgTokenSpaceGuid.PcdFlashNvStorageFtwWorkingBase64|0
  gEfiMdeModulePkgTokenSpaceGuid.PcdFlashNvStorageVariableBase64|0
  #LABZ_Start
  gEfiMdeModulePkgTokenSpaceGuid.PcdVideoHorizontalResolution|1024
  gEfiMdeModulePkgTokenSpaceGuid.PcdVideoVerticalResolution|768
  #LABZ_End
[PcdsDynamicHii.common.DEFAULT]
  gEfiMdeModulePkgTokenSpaceGuid.PcdConOutColumn|L"Setup"|gEmuSystemConfigGuid|0x0|80
  gEfiMdeModulePkgTokenSpaceGuid.PcdConOutRow|L"Setup"|gEmuSystemConfigGuid|0x4|25
  gEfiMdePkgTokenSpaceGuid.PcdPlatformBootTimeOut|L"Timeout"|gEfiGlobalVariableGuid|0x0|10
重新编译 Emulator后再次运行,可以看到分辨率已经修改为我们指定的。
参考:
1.https://www.lab-z.com/stu233sp/ 屏幕分辨率研究
2.http://lab-z.com/stu282/ 如何修改 Emulator 的分辨率