之前看到过很多人用一些词组来证明中文的简洁和高效,比如:人们看到“炮闩”,通过“闩”就能猜到它的用途。这让我想起最近网上的一个笑话:“老师在群里发消息说明天开始一元二次方程。有家长问。能不能一元三次?打个折?” 缺少必要知识,就无法理解“元”的含义。 “一元二次方程” 的英文名是“quadratic equation with one unknown”,从上面大抵能看明白这个方程中有一个未知数以及它的二次方。所以,懂和不懂是取决于知识的储备和语言文字并没有太多关系。
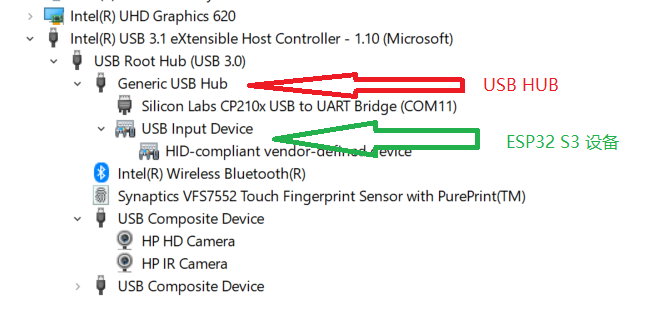
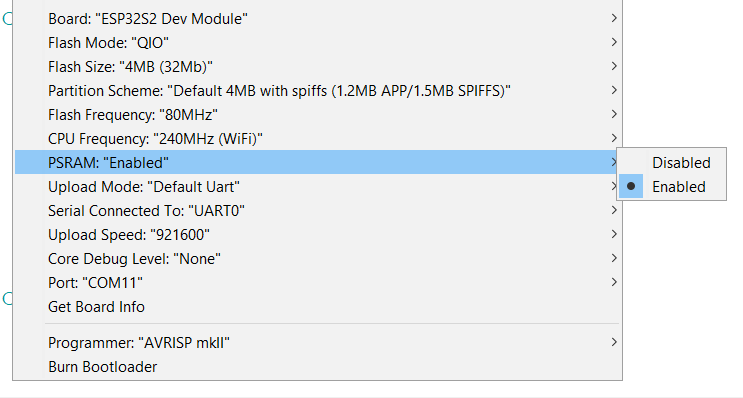
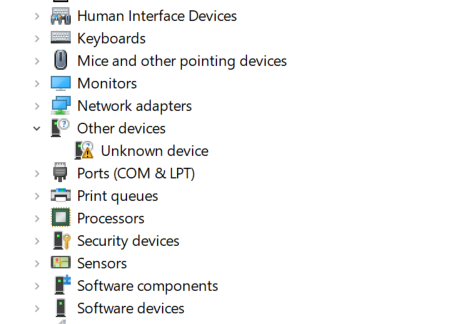
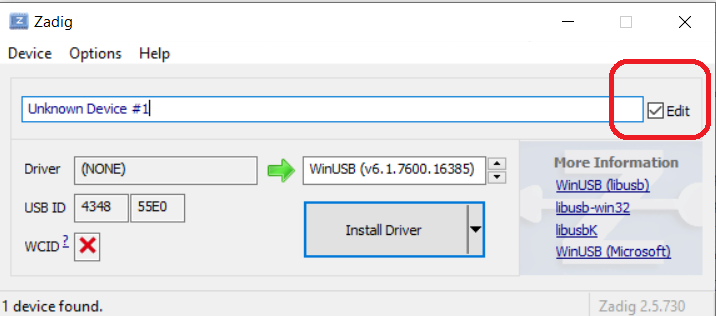
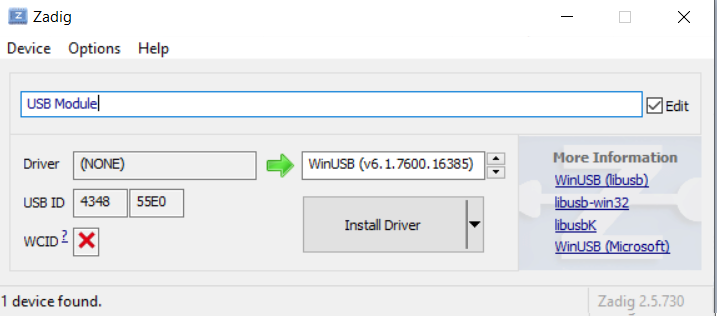
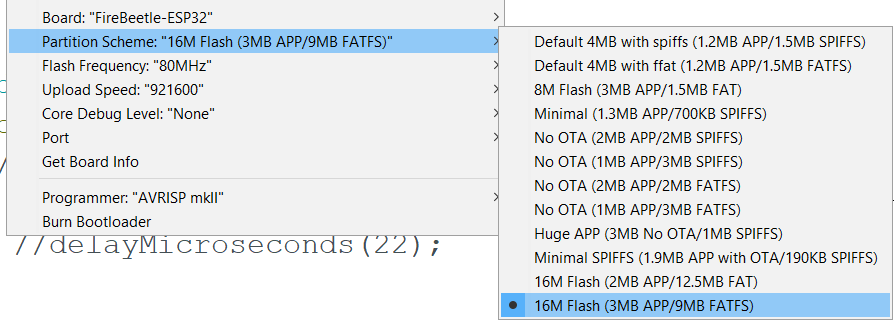
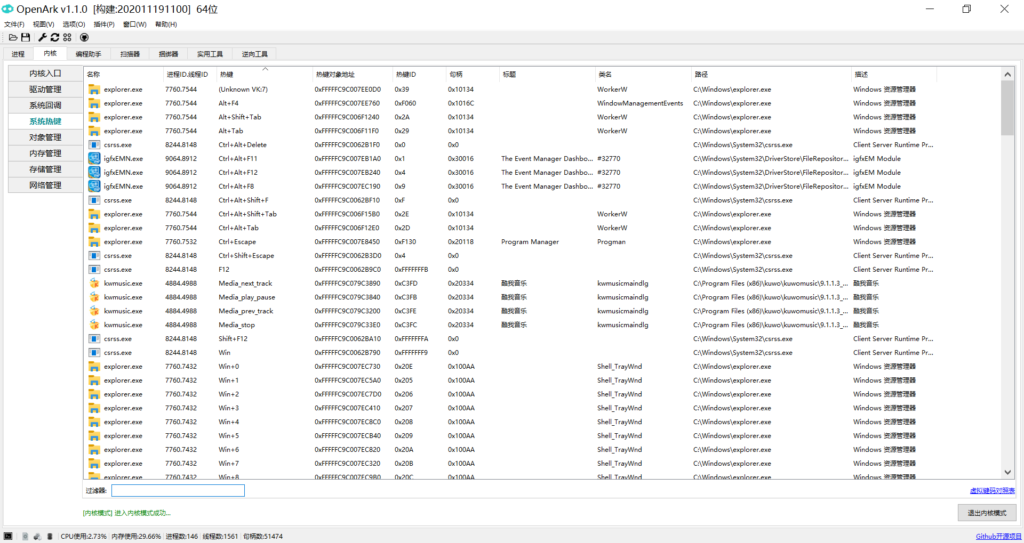
进入 BootLoader后,在 USB 3.0 的 USB口上经常会出现 Yellow Bang 的情况。可以尝试 Disable再Enable 看看能否消除之。如果始终不行,推荐将板子使用一个 USB2.0 HUB和 USB 3.0 相连,这个应该时芯片本身的 Bug(作为 USB 普通设备,不会遇到这个问题);如果一直存在这个问题,那么可以先卸载,然后再重新安装驱动试试;
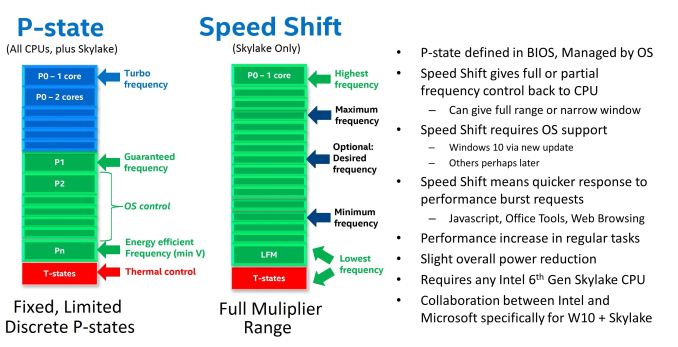
Processor power management technologies are defined in the ACPI specification and are divided into two categories or states:【参考1】
Power performance states (ACPI P states)P-states provide a way to scale the frequency and voltage at which the processor runs so as to reduce the power consumption of the CPU. The number of available P-states can be different for each model of CPU, even those from the same family.
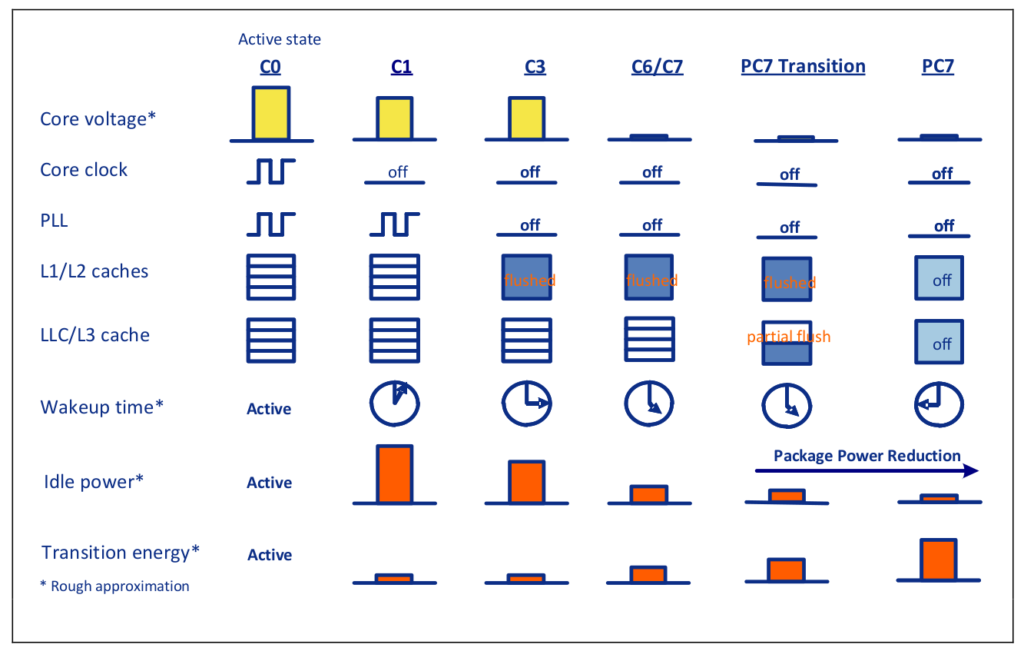
Processor idle sleep states (ACPI C states)C-states are states when the CPU has reduced or turned off selected functions. Different processors support different numbers of C-states in which various parts of the CPU are turned off. To better understand the C-states that are supported and exposed, contact the CPU vendor. Generally, higher C-states turn off more parts of the CPU, which significantly reduce power consumption. Processors may have deeper C-states that are not exposed to the operating system.
简单的说, P-states 是 CPU 醒着的时候降低功耗(好比上班摸鱼,玩玩手机放松一下,但是随时都是醒着的),C-states 就是CPU 睡着了。
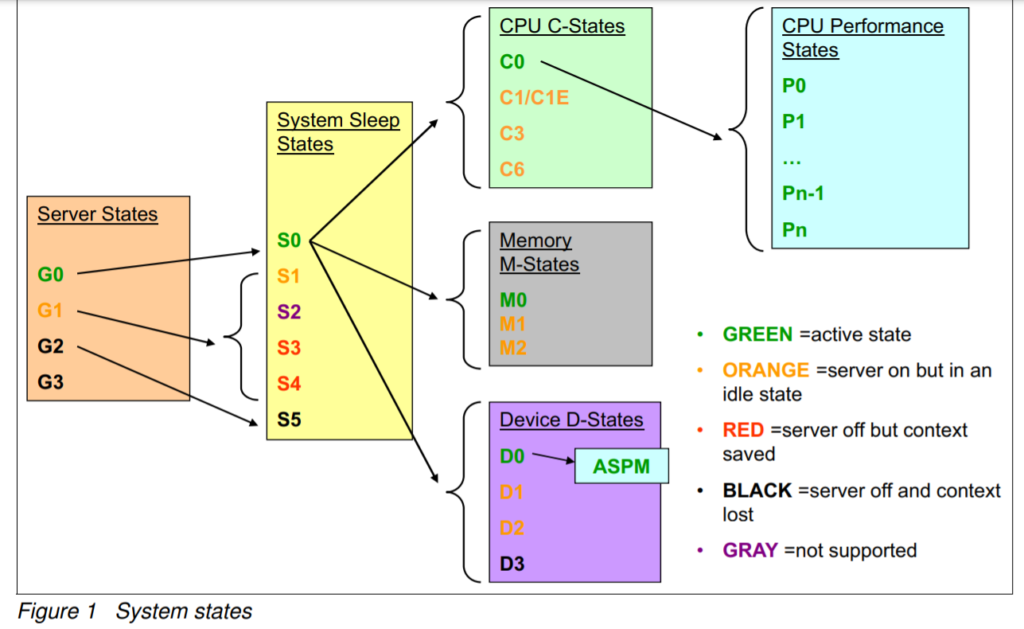
从下面的示意图可以看的更清晰
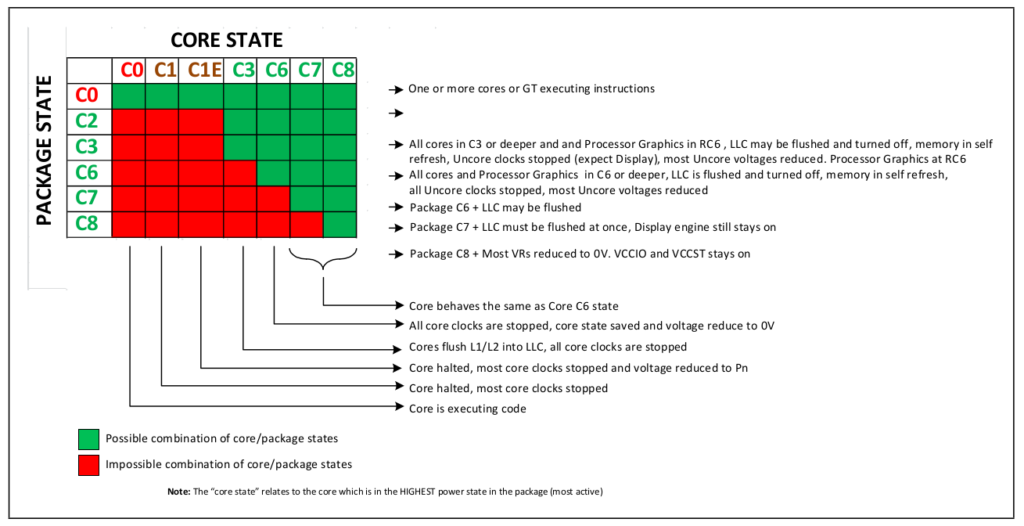
System states【参考2】【参考3】睡得越深,需要关闭的东西越多,也更加省电,相反,需要醒来的时间会越长【参考3】进入 C-States 的一些动作【参考3】
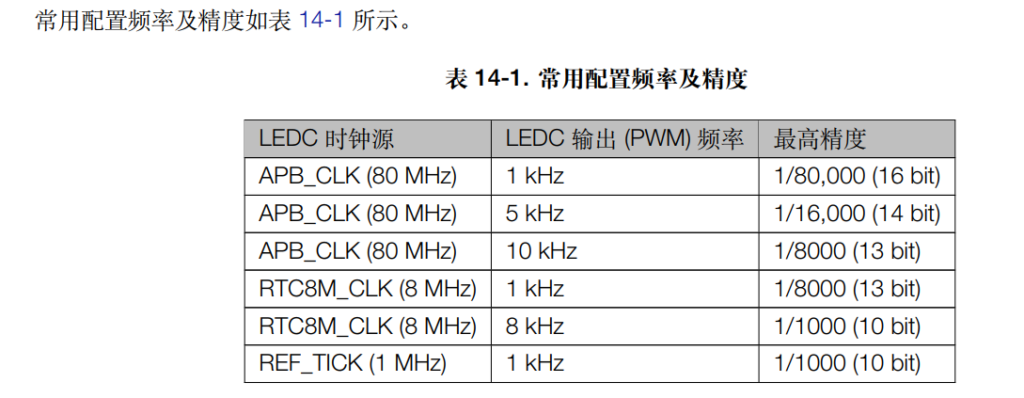
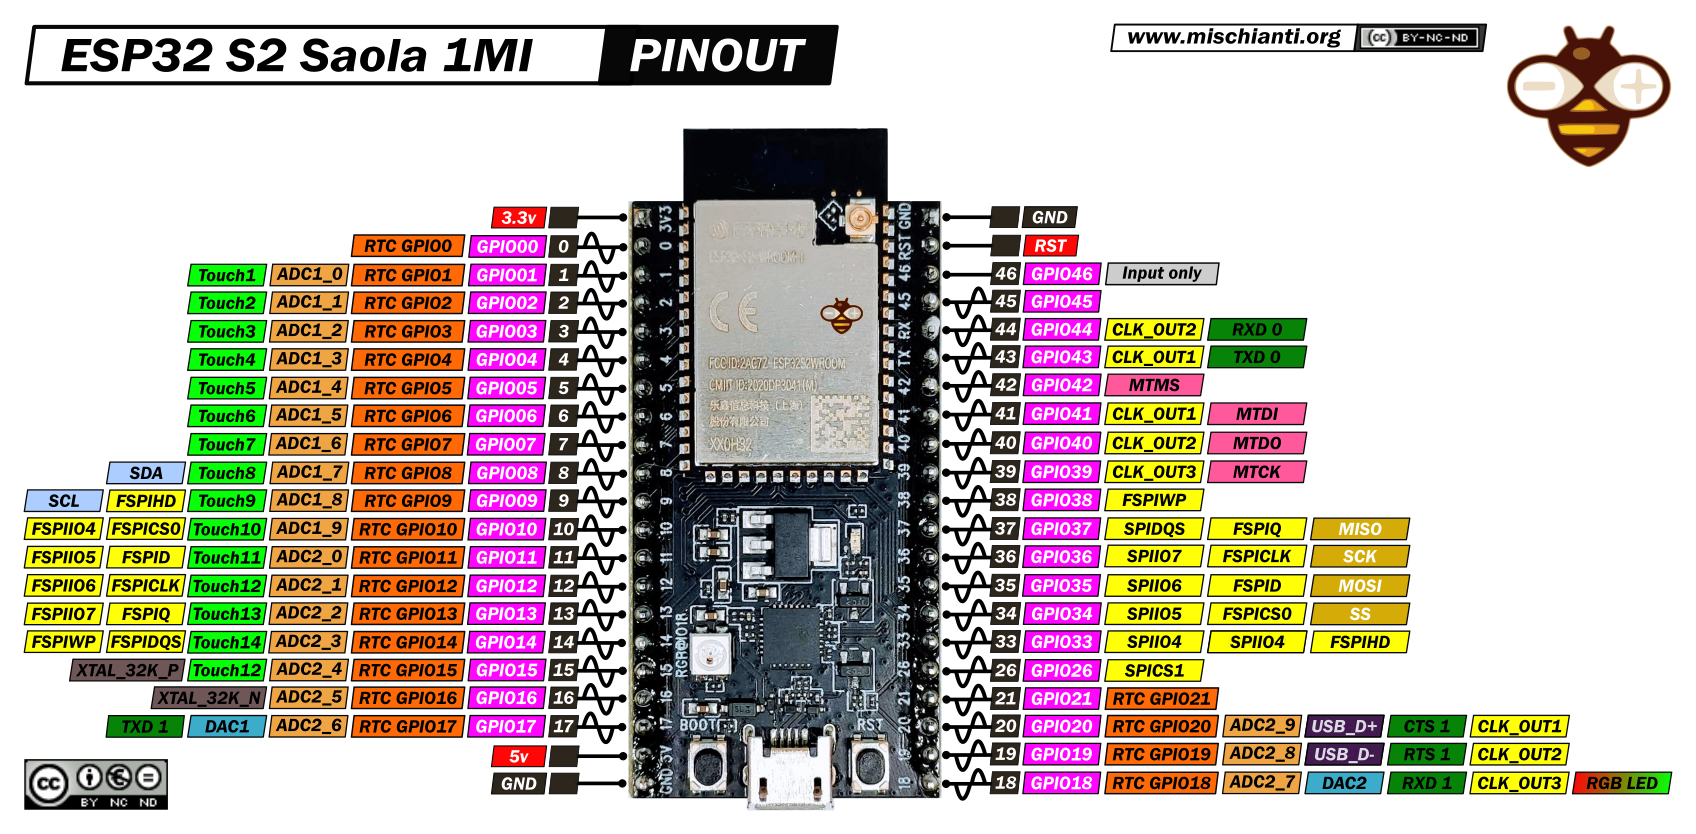
The maximum PWM frequency with the currently used ledc duty resolution of 10 bits in PWM module is 78.125KHz.
The duty resolution can be lowered down to 1 bit in which case the maximum frequency is 40 MHz, but only the duty of 50% is available.
For duty resolution of 8 buts, the maximal frequency is 312.5 kHz.
The available duty levels are (2^bit_num)-1, where bit_num can be 1-15.
The maximal frequency is 80000000 / 2^bit_num
In my MicroPython implementation, I'm currently working on enabling user selectable and/or automatic duty resolution and higher maxumum frequencies.


