“1984年,在当时还叫做苏联的那个国家的首都莫斯科,俄罗斯科学院(当然那时它也还叫做苏联科学院)总部计算机中心的一位工程师阿列克谢·帕基特诺夫开始考虑在计算机上自行开发一些简单的游戏,经过一段时间的尝试后,他通过另一款拼图游戏得到灵感,考虑让不同形状的图形依次下落,在矩形底部堆叠起来使之排列成完整的一行后消除,在另外两位同伴的协助下,他最终完成了这款被他命名为“Tetris”(俄语:Тетрис)的游戏,而我们今天更习惯叫它为“俄罗斯方块”。
1984年6月6日,是公认的俄罗斯方块诞生纪念日,游戏最初由苏联科学院计算中心的工程师阿列克谢·帕基特诺夫开发,他当时从另一款拼图游戏得到灵感。
根据另一位当事人的回忆,“Tetris”这个单词是阿列克谢自己发明并坚持使用的,来自反映俄罗斯方块图案基本结构的“四”(希腊语:tetra)和阿列克谢自己最喜爱的运动“网球”(tennis)的组合。
《俄罗斯方块》的原名“Tetris”(俄语:Тетрис)是发明者阿列克谢·帕基特诺夫自己生造出来的单词,来自反映俄罗斯方块图案基本结构的“四”(希腊语:tetra)和阿列克谢自己最喜爱的运动“网球”(tennis)的组合。
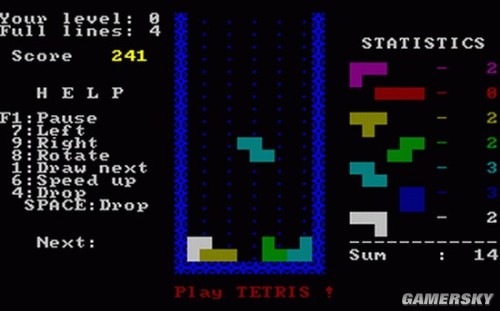
公认的第一款俄罗斯方块原始程序诞生于1984年6月6日,在当时苏联仿制的Elektronika 60计算机上运行,因为这款计算机不能显示色块图案,原始版本只能用字符串来表示图形,但即便这样它也体现出了游戏本身的魅力,阿列克谢和他身边的朋友们很快都开始为之沉迷。1985年,开发同伴之一的瓦丁·格拉西莫夫在MS-DOS下移植了俄罗斯方块,让更多的个人电脑可以运行,游戏得以迅速的普及。
阿列克谢起初希望能合法贩卖俄罗斯方块游戏,但在苏联当时的制度下这十分困难,几经尝试都失败后,阿列克谢表示可以考虑把游戏版权交给国家——当时的苏联科学院。而在诞生后的数年时间里,俄罗斯方块一直都以免费拷贝的形式传播,从苏联扩展到了整个欧洲,也引起了更多人的注意。
第一个俄罗斯方块的程序在苏联仿制的Elektronika 60计算机上运行,因为无法显示色块只能用字符来表示图形,之后一年游戏移植了MS-DOS版,而这一版首次呈现出的图案画面也成为之后三十年来的游戏基础,甚至没有太多变化。
1986年匈牙利的程序员在Apple II和Commodore 64上移植了游戏,英国游戏公司Andromeda的一位经理人罗伯特·斯坦恩注意到了这个商机,他开始联系阿列克谢以及匈牙利的程序员试图购买俄罗斯方块的版权,并在确定到手之前就把它分别卖给了英国的游戏公司Mirrorsoft和美国的游戏公司Spectrum Holobyte,从而导致了接下来整整十余年时间关于俄罗斯方块的版权之争,甚至可以说改变了游戏发展史的一连串事件。” 上述文字节选自《三十年成就经典传奇 <俄罗斯方块>发展史》【参考1】
之前网上有一份开源的 Shell 版本的俄罗斯方块游戏,但是我试验发现做的太糟糕,没有办法玩。然后经过在网上搜索到了一份Windows API 编写的俄罗斯方块游戏【参考2】,放在 VS2015 中很快就可以编译成功,运行起来也没有大问题,于是在这个代码基础上移植到UEFI Shell 下(程序整体非常清晰,移植到其他平台也绝无难度)。
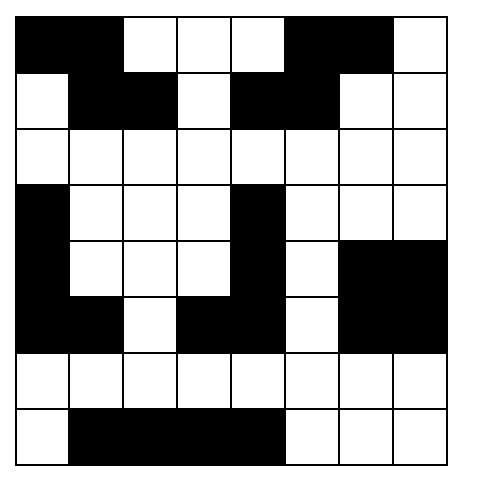
其中比较有意思的是代码中定义的方块有下面六种方块,都是4个格子组成的
在代码头部定义了Blocks[][4] 对应了每种方块的各种变换,比如下面这种 Z 字
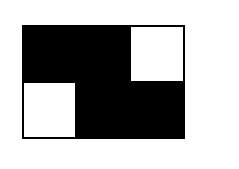
定义方法是给出每个黑块的坐标(左上角为 0,0): 0,0, 1,0, 1,1, 2,1
旋转变换后的一个结果如下:2, 0, 1, 1, 2, 1, 1, 2,
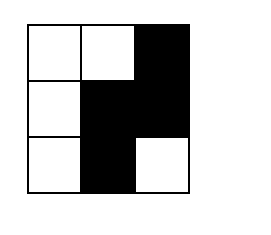
看懂了上面就能搞清楚代码。
#include <Uefi.h>
#include <Library/UefiLib.h>
#include <Library/DebugLib.h>
#include <Library/ShellCEntryLib.h>
#include <Library/UefiBootServicesTableLib.h>
#include <Library/UefiRuntimeServicesTableLib.h>
#include <Library/MemoryAllocationLib.h>
#include <Library/BaseLib.h>
#include <Library/BaseMemoryLib.h>
#define NUMLINEBLOCKS 18 //行数
#define NUMCOLUMNBLOCKS 10 //列数
#define BLOCKSTYLES (sizeof (Blocks) / sizeof (Blocks[0])) //方块的种类数
//定时器触发时间,单位是100ns
#define TIMER_PERIOD_INIT 10000000UL
BOOLEAN pause = FALSE; //暂停
EFI_EVENT TimerEvent;
//是否要重绘界面的标志
BOOLEAN ReDraw=TRUE;
//退出标志
BOOLEAN quit=FALSE;
struct POINT
{
int x;
int y;
};
//游戏区各方格顶点布尔值,代表该方格是否有方块
BOOLEAN GameClient[NUMCOLUMNBLOCKS][NUMLINEBLOCKS];
int F, S, cF, cS; //随机方块图形对应的第一、二纬
int Score; //得分
struct POINT Block[4],NextBlock[4];
//定义各方块形状,以点表示
struct {
struct POINT pt[4];
}
Blocks[][4] =
{
//正7
0, 0, 1, 0, 1, 1, 1, 2, 2, 0, 0, 1, 1, 1, 2, 1, 1, 0, 1, 1, 1, 2, 2, 2, 0, 1, 1, 1, 2, 1, 0, 2,
//反7
1, 0, 2, 0, 1, 1, 1, 2, 0, 1, 1, 1, 2, 1, 2, 2, 1, 0, 1, 1, 0, 2, 1, 2, 0, 0, 0, 1, 1, 1, 2, 1,
//1
1, 0, 1, 1, 1, 2, 1, 3, 0, 1, 1, 1, 2, 1, 3, 1, 1, 0, 1, 1, 1, 2, 1, 3, 0, 1, 1, 1, 2, 1, 3, 1,
//Z
0, 0, 1, 0, 1, 1, 2, 1, 2, 0, 1, 1, 2, 1, 1, 2, 0, 0, 1, 0, 1, 1, 2, 1, 2, 0, 1, 1, 2, 1, 1, 2,
//反Z
1, 0, 2, 0, 0, 1, 1, 1, 1, 0, 1, 1, 2, 1, 2, 2, 1, 0, 2, 0, 0, 1, 1, 1, 1, 0, 1, 1, 2, 1, 2, 2,
//田字
0, 0, 1, 0, 0, 1, 1, 1, 0, 0, 1, 0, 0, 1, 1, 1, 0, 0, 1, 0, 0, 1, 1, 1, 0, 0, 1, 0, 0, 1, 1, 1,
//尖头
1, 0, 0, 1, 1, 1, 2, 1, 0, 0, 0, 1, 1, 1, 0, 2, 0, 0, 1, 0, 2, 0, 1, 1, 1, 0, 0, 1, 1, 1, 1, 2
};
/** Expands to an integer constant expression that is the maximum value
returned by the rand function.
**/
#define RAND_MAX 0x7fffffff
static UINT32 next = 1;
//判断方块是否可以下落
BOOLEAN CanDown(struct POINT pt[])
{
BOOLEAN result = TRUE;
//将方块所在格子先假设指定为无方块
for (int i = 0; i < 4; ++i)
GameClient[pt[i].x][pt[i].y] = FALSE;
for (int i = 0; i < 4; ++i)
{
//假如继续落下超过下底边界,返回false;或者假如该小方块下落一格已经有方块,结果为false
if (pt[i].y + 1 == NUMLINEBLOCKS || GameClient[pt[i].x][pt[i].y + 1])
{
result = FALSE;
break;
}
}
//恢复方块所在格子为有方块
for (int i = 0; i < 4; ++i)
GameClient[pt[i].x][pt[i].y] = TRUE;
return result;
}
//判断是否可以左移
BOOLEAN CanLeft(struct POINT pt[])
{
BOOLEAN result = TRUE;
//将方块所在格子先假设指定为无方块
for (int i = 0; i < 4; ++i)
GameClient[pt[i].x][pt[i].y] = FALSE;
for (int i = 0; i < 4; ++i)
{
//假如继续左移超过左边边界,返回false;或者假如该小方块左移一格已经有方块,结果为false
if (!pt[i].x || GameClient[pt[i].x - 1][pt[i].y])
{
result = FALSE;
break;
}
}
//恢复方块所在格子为有方块
for (int i = 0; i < 4; ++i)
GameClient[pt[i].x][pt[i].y] = TRUE;
return result;
}
//判断是否可以右移
BOOLEAN CanRight(struct POINT pt[])
{
BOOLEAN result = TRUE;
//将方块所在格子先假设指定为无方块
for (int i = 0; i < 4; ++i)
GameClient[pt[i].x][pt[i].y] = FALSE;
for (int i = 0; i < 4; ++i)
{
//假如继续左移超过左边边界,返回false;或者假如该小方块左移一格已经有方块,结果为false
if (pt[i].x + 1 == NUMCOLUMNBLOCKS || GameClient[pt[i].x + 1][pt[i].y])
{
result = FALSE;
break;
}
}
//恢复方块所在格子为有方块
for (int i = 0; i < 4; ++i)
GameClient[pt[i].x][pt[i].y] = TRUE;
return result;
}
//判断是否可以旋转
BOOLEAN CanChange(struct POINT pt[])
{
BOOLEAN result = TRUE;
//将方块所在格子先假设指定为无方块
for (int i = 0; i < 4; ++i)
GameClient[pt[i].x][pt[i].y] = FALSE;
int t = (cS + 1) % 4;
for (int k = 0; k < 4; ++k)
{
int x = Blocks[cF][t].pt[k].x - Blocks[cF][cS].pt[k].x,
y = Blocks[cF][t].pt[k].y - Blocks[cF][cS].pt[k].y;
if (GameClient[pt[k].x + x][pt[k].y + y] || //该方格已经有方块
pt[k].x + x > NUMCOLUMNBLOCKS - 1 || //x坐标超越了右边界
pt[k].x + x < 0 || //x坐标超越了左边界
pt[k].y + y > NUMLINEBLOCKS - 1) //y坐标超越了下底边界
{
result = FALSE;
break;
}
}
//恢复方块所在格子为有方块
for (int i = 0; i < 4; ++i)
GameClient[pt[i].x][pt[i].y] = TRUE;
return result;
}
//实现旋转
void Change(struct POINT pt[])
{
int t = (cS + 1) % 4;
for (int i = 0; i < 4; ++i)
{
int x = Blocks[cF][t].pt[i].x - Blocks[cF][cS].pt[i].x,
y = Blocks[cF][t].pt[i].y - Blocks[cF][cS].pt[i].y;
GameClient[pt[i].x][pt[i].y] = FALSE;
pt[i].x += x;
pt[i].y += y;
GameClient[pt[i].x][pt[i].y] = TRUE;
}
cS = t;
}
//实现右移
void Right(struct POINT pt[])
{
for (int i = 0; i < 4; ++i)
{
GameClient[pt[i].x][pt[i].y] = FALSE;
++pt[i].x;
}
for (int k = 0; k < 4; ++k)
GameClient[pt[k].x][pt[k].y] = TRUE;
}
//实现左移
void Left(struct POINT pt[])
{
for (int i = 0; i < 4; ++i)
{
GameClient[pt[i].x][pt[i].y] = FALSE;
--pt[i].x;
}
for (int k = 0; k < 4; ++k)
GameClient[pt[k].x][pt[k].y] = TRUE;
}
//实现方块的下落
void Down(struct POINT pt[])
{
for (int i = 0; i < 4; ++i)
{
GameClient[pt[i].x][pt[i].y] = FALSE;
++pt[i].y;
}
for (int k = 0; k < 4; ++k)
GameClient[pt[k].x][pt[k].y] = TRUE;
}
//消行处理以及分数结算
void DelSqure()
{
int line = 0, temp;
for (int x = NUMLINEBLOCKS - 1; x >= 0; --x)
{
BOOLEAN result = TRUE;
for (int y = 0; y < NUMCOLUMNBLOCKS; ++y)
{
if (!GameClient[y][x])
{
result = FALSE;
break;
}
}
//判断是否可以消行
if (result)
{
temp = x;
++line;
while (x > 0)
{
for (int y = 0; y < NUMCOLUMNBLOCKS; ++y)
{
GameClient[y][x] = GameClient[y][x - 1];
}
--x;
}
for (int y = 0; y < NUMCOLUMNBLOCKS; ++y)
GameClient[y][0] = FALSE;
x = temp + 1;
}
}
if (line)
Score += (line - 1) * 2 + 1;
//要求重绘
ReDraw=TRUE;
}
/** Compute a pseudo-random number.
*
* Compute x = (7^5 * x) mod (2^31 - 1)
* without overflowing 31 bits:
* (2^31 - 1) = 127773 * (7^5) + 2836
* From "Random number generators: good ones are hard to find",
* Park and Miller, Communications of the ACM, vol. 31, no. 10,
* October 1988, p. 1195.
**/
int
rand()
{
INT32 hi, lo, x;
/* Can't be initialized with 0, so use another value. */
if (next == 0)
next = 123459876;
hi = next / 127773;
lo = next % 127773;
x = 16807 * lo - 2836 * hi;
if (x < 0)
x += 0x7fffffff;
return ((next = x) % ((UINT32)RAND_MAX + 1));
}
//触发时间中断
VOID TimerCallback( EFI_EVENT Event, VOID *Context )
{
//如果当前已经暂停,那么直接退出
if (pause) return ;
//判断是否可以下落
if (CanDown(Block))
{ //可以下落,处理
Down(Block);
}
//不能下移,需要处理消行判断(结合分数),还需要处理下一个显示,和当前显示的方块
else
{
DelSqure();
for (int i = 0; i < 4; ++i)
{
Block[i].x = NextBlock[i].x + 4;
Block[i].y = NextBlock[i].y;
if (GameClient[Block[i].x][Block[i].y])
{
// Stop the Periodic Timer
gBS->SetTimer(TimerEvent, TimerCancel, TIMER_PERIOD_INIT);
}
else
GameClient[Block[i].x][Block[i].y] = TRUE;
}
cS = S; cF = F;
S = rand()%4;
F = rand() % BLOCKSTYLES;
for (int i = 0; i < 4; ++i)
{
NextBlock[i].x = Blocks[F][S].pt[i].x;
NextBlock[i].y = Blocks[F][S].pt[i].y;
}
}
//要求重绘
ReDraw=TRUE;
}
void ConstructGame()
{
EFI_STATUS Status;
CHAR16 ChrSide[2]={0,0};
gST->ConOut->ClearScreen(gST->ConOut);
gST->ConOut->EnableCursor(gST->ConOut, FALSE);
gST->ConOut->SetCursorPosition(gST->ConOut, 0, 0);
//初始化第一个出现的方块,随机生成
cS = rand() % 4;
cF = rand()% BLOCKSTYLES;
for (int i = 0; i < 4; ++i)
{
Block[i].x = Blocks[cF][cS].pt[i].x + 4;
Block[i].y = Blocks[cF][cS].pt[i].y;
GameClient[Block[i].x][Block[i].y] = TRUE;
}
//生成下一个
S = rand() % 4;
F = rand()% BLOCKSTYLES;
for (int i = 0; i < 4; ++i)
{
NextBlock[i].x = Blocks[F][S].pt[i].x;
NextBlock[i].y = Blocks[F][S].pt[i].y;
}
//绘制外围
ChrSide[0]= BOXDRAW_DOUBLE_DOWN_RIGHT;
Print(L"%S",ChrSide);
ChrSide[0]= BOXDRAW_DOUBLE_HORIZONTAL;
for (UINT16 i=0;i<NUMCOLUMNBLOCKS;i++) {Print(L"%S",ChrSide);}
ChrSide[0]=BOXDRAW_DOUBLE_DOWN_LEFT;
Print(L"%S\n",ChrSide);
ChrSide[0]= BOXDRAW_DOUBLE_VERTICAL;
for (UINT16 j=0;j<NUMLINEBLOCKS;j++)
{
Print(L"%S",ChrSide);
for (UINT16 i=0;i<NUMCOLUMNBLOCKS;i++) {Print(L" ");}
Print(L"%S\n",ChrSide);
}
ChrSide[0]= BOXDRAW_DOUBLE_UP_RIGHT;
Print(L"%S",ChrSide);
ChrSide[0]= BOXDRAW_DOUBLE_HORIZONTAL;
for (UINT16 i=0;i<NUMCOLUMNBLOCKS;i++) {Print(L"%S",ChrSide);}
ChrSide[0]=BOXDRAW_DOUBLE_UP_LEFT;
Print(L"%S\n",ChrSide);
Status = gBS->CreateEvent(
EVT_TIMER | EVT_NOTIFY_SIGNAL,
TPL_CALLBACK,
TimerCallback,
NULL,
&TimerEvent);
ASSERT_EFI_ERROR(Status);
//设置定时触发
Status = gBS->SetTimer(TimerEvent, TimerPeriodic, TIMER_PERIOD_INIT);
}
void DestructGame()
{
gBS->SetTimer(TimerEvent, TimerCancel, TIMER_PERIOD_INIT);
gBS->CloseEvent(TimerEvent);
gST->ConOut->ClearScreen(gST->ConOut);
gST->ConOut->EnableCursor(gST->ConOut, TRUE);
}
/**
The user Entry Point for Application.
The user code starts with this function as the real entry point for the application.
@param UINTN Argc the arguments amount
@param CHAR16 **Argv arguments list
@return INTN
**/
INTN ShellAppMain( UINTN Argc, CHAR16 **Argv )
{
EFI_STATUS Status;
EFI_INPUT_KEY Key;
ConstructGame();
// The main loop of the game
while(quit==FALSE) {
Status= gST->ConIn->ReadKeyStroke(gST->ConIn,&Key);
if (Status == EFI_SUCCESS) {
if (Key.ScanCode==0x17) {quit=TRUE;}
switch (Key.ScanCode)
{
case 0x04: //左键
if (CanLeft(Block))
Left(Block);
ReDraw=TRUE;
break;
case 0x03: //右键
if (CanRight(Block))
Right(Block);
ReDraw=TRUE;
break;
case 0x01: //上键
if (CanChange(Block))
Change(Block);
ReDraw=TRUE;
break;
case 0x02: //下键
while (CanDown(Block))
Down(Block);
ReDraw=TRUE;
break;
default:
break;
} //End of switch
//p键 可以起用来暂停
if (Key.UnicodeChar == 'p')
pause = !pause;
else if (Key.UnicodeChar == 'r')
{ // r 键用来重置游戏
Score = 0;
for (int x = 0; x < NUMCOLUMNBLOCKS; ++x)
{
for (int y = 0; y < NUMLINEBLOCKS; ++y)
GameClient[x][y] = FALSE;
}
cS = rand() % 4;
cF = rand() % BLOCKSTYLES;
for (int i = 0; i < 4; ++i)
{
Block[i].x = Blocks[cF][cS].pt[i].x + 4;
Block[i].y = Blocks[cF][cS].pt[i].y;
GameClient[Block[i].x][Block[i].y] = TRUE;
}
S = rand() % 4;
F = rand() % BLOCKSTYLES;
for (int i = 0; i < 4; ++i)
{
NextBlock[i].x = Blocks[F][S].pt[i].x;
NextBlock[i].y = Blocks[F][S].pt[i].y;
}
gBS->SetTimer(TimerEvent, TimerPeriodic, TIMER_PERIOD_INIT);
pause = FALSE;
ReDraw=TRUE;
}
}
//绘制界面
if (ReDraw) {
//显示游戏区的方块
for (int y = 0; y < NUMLINEBLOCKS; ++y)
{
gST->ConOut->SetCursorPosition(gST->ConOut, 1, y+1);
for (int x = 0; x < NUMCOLUMNBLOCKS; ++x)
{
if (GameClient[x][y])
{
Print(L"O");
}
else Print(L" ");
}
Print(L"\n");
}
for (int j=0;j<4;j++)
{
gST->ConOut->SetCursorPosition(gST->ConOut, (NUMCOLUMNBLOCKS + 20), 6+j);
for (int i=0;i<4;i++) {
Print(L" ");
}
}
//显示下一个方块区域的方块
for (int i = 0; i < 4; ++i)
{
gST->ConOut->SetCursorPosition(gST->ConOut, (NextBlock[i].x + NUMCOLUMNBLOCKS + 20), NextBlock[i].y +6);
Print(L"O");
}
ReDraw=FALSE;
}
}
DestructGame();
return 0;
}
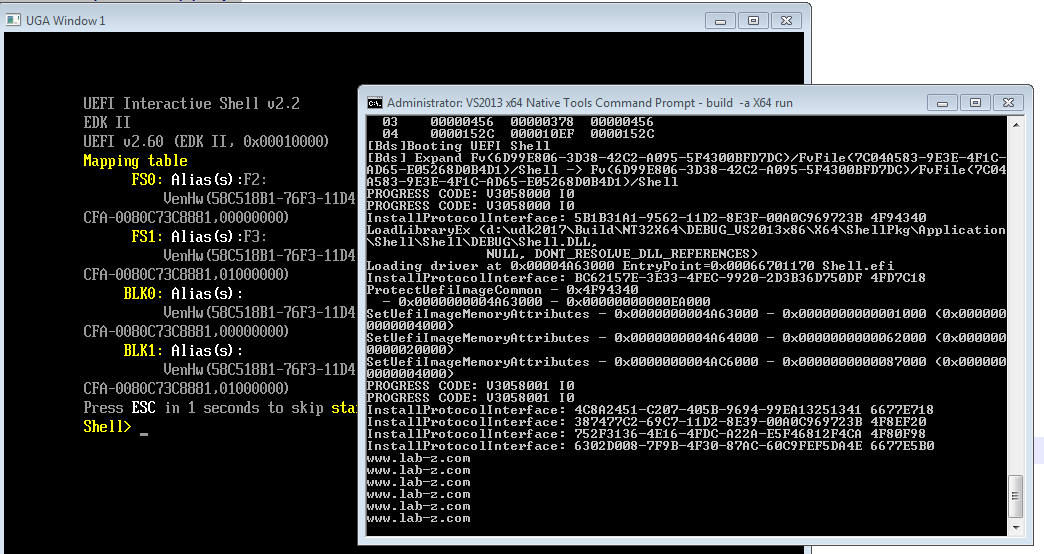
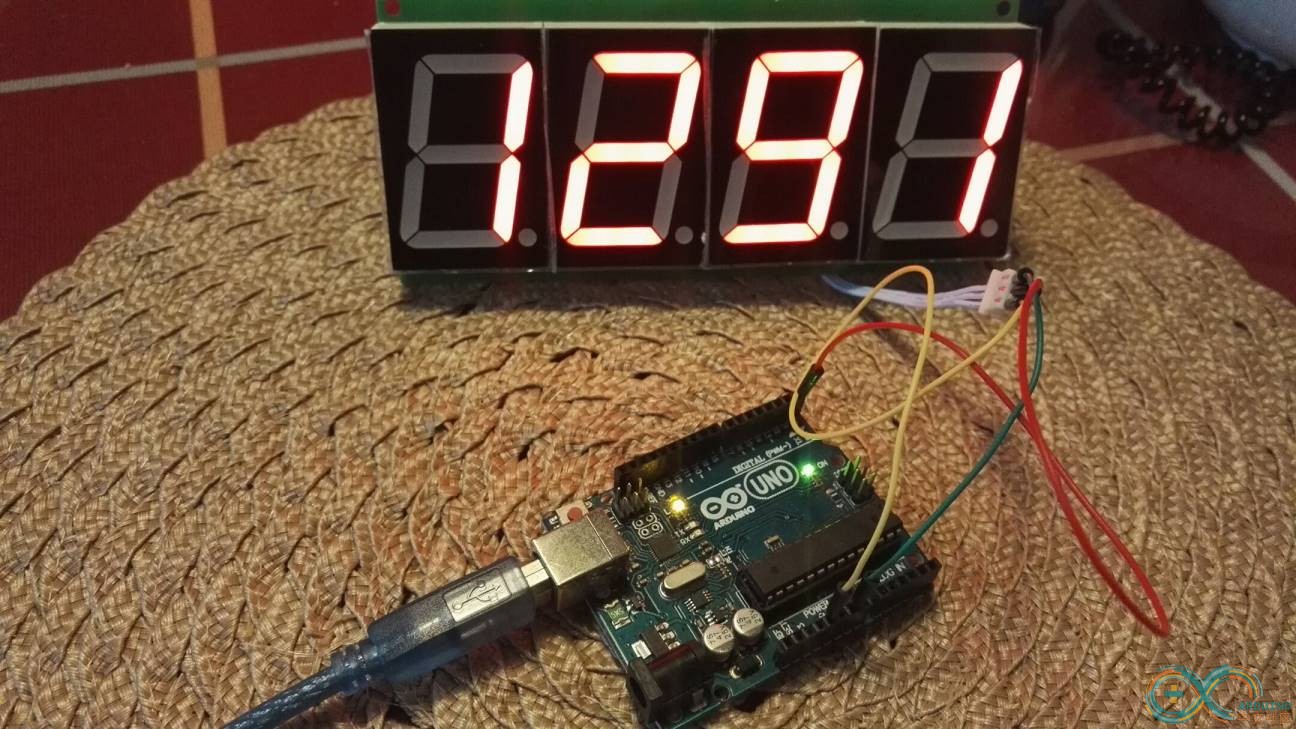
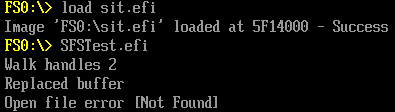
运行结果:
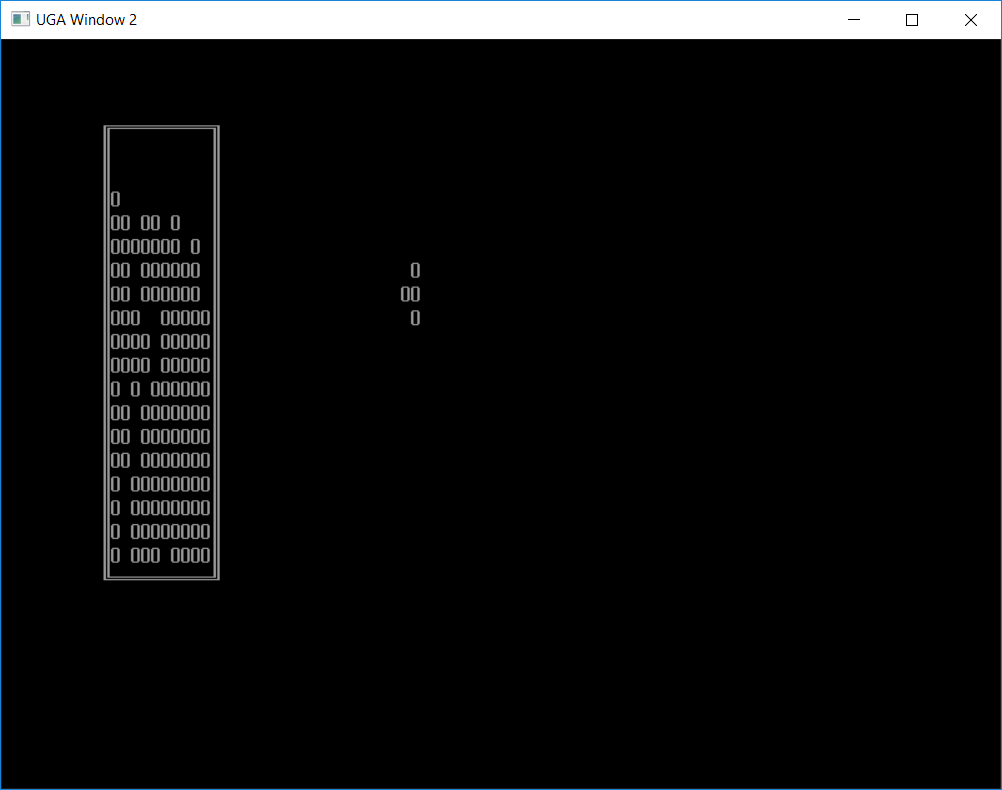
这个只是一个简单的框架,没有实现升级也没有华丽的界面,但是已经具备了俄罗斯方块的基本理念,有兴趣的朋友请继续完善它吧。
参考:
1.https://www.gamersky.com/wenku/201406/369340.shtml 三十年成就经典传奇 《俄罗斯方块》发展史
2. https://blog.csdn.net/zxlstudio/article/details/8899776 C语言俄罗斯方块(简易版) 写的非常漂亮,可以作为Windows SDK 编程的典范。