继续研究 Runtime Service Table 中的GetVariable 函数。本文讲述Runtime Service Table 中的GetVariable是如何实现的,因为 codebase 之间可能存在的差异,建议有兴趣的朋友按照文章提到的方法在实体平台上进行实验验证。也欢迎遇到不同情况的朋友在网站留言。
首先,GetVariable 函数处于 Runtime Service Table 中,因此有必要研究一下这个 Table 的由来。根据【参考1】,这个 Table 的初始化代码在 \UDK2017\MdeModulePkg\Core\Dxe\DxeMain\DxeMain.c 中。 同一个文件中还有Table 的结构体定义:
EFI_RUNTIME_SERVICES mEfiRuntimeServicesTableTemplate = {
{
EFI_RUNTIME_SERVICES_SIGNATURE, // Signature
EFI_RUNTIME_SERVICES_REVISION, // Revision
sizeof (EFI_RUNTIME_SERVICES), // HeaderSize
0, // CRC32
0 // Reserved
},
(EFI_GET_TIME) CoreEfiNotAvailableYetArg2, // GetTime
(EFI_SET_TIME) CoreEfiNotAvailableYetArg1, // SetTime
(EFI_GET_WAKEUP_TIME) CoreEfiNotAvailableYetArg3, // GetWakeupTime
(EFI_SET_WAKEUP_TIME) CoreEfiNotAvailableYetArg2, // SetWakeupTime
(EFI_SET_VIRTUAL_ADDRESS_MAP) CoreEfiNotAvailableYetArg4, // SetVirtualAddressMap
(EFI_CONVERT_POINTER) CoreEfiNotAvailableYetArg2, // ConvertPointer
(EFI_GET_VARIABLE) CoreEfiNotAvailableYetArg5, // GetVariable
(EFI_GET_NEXT_VARIABLE_NAME) CoreEfiNotAvailableYetArg3, // GetNextVariableName
(EFI_SET_VARIABLE) CoreEfiNotAvailableYetArg5, // SetVariable
(EFI_GET_NEXT_HIGH_MONO_COUNT) CoreEfiNotAvailableYetArg1, // GetNextHighMonotonicCount
(EFI_RESET_SYSTEM) CoreEfiNotAvailableYetArg4, // ResetSystem
(EFI_UPDATE_CAPSULE) CoreEfiNotAvailableYetArg3, // UpdateCapsule
(EFI_QUERY_CAPSULE_CAPABILITIES) CoreEfiNotAvailableYetArg4, // QueryCapsuleCapabilities
(EFI_QUERY_VARIABLE_INFO) CoreEfiNotAvailableYetArg4 // QueryVariableInfo
};
初始化之后,整个Table大部分内容都是空的,在BIOS运行的过程中会逐步填充值。
为了确认Runtime Service Table是在这里初始化,采用在DxeMain() 函数中下面位置加入 Debug 信息标记的方法:
  //
  // Allocate the EFI System Table and EFI Runtime Service Table from EfiRuntimeServicesData
  // Use the templates to initialize the contents of the EFI System Table and EFI Runtime Services Table
  //
  gDxeCoreST = AllocateRuntimeCopyPool (sizeof (EFI_SYSTEM_TABLE), &mEfiSystemTableTemplate);
  ASSERT (gDxeCoreST != NULL);

  gDxeCoreRT = AllocateRuntimeCopyPool (sizeof (EFI_RUNTIME_SERVICES), &mEfiRuntimeServicesTableTemplate);
  ASSERT (gDxeCoreRT != NULL);

  gDxeCoreST->RuntimeServices = gDxeCoreRT;
检查 Log 可以看到,这里分配给 Runtime Service Table的内存地址是0x3B954B98:
CoreInitializeMemoryServices:
AllocatePoolPages: failed to allocate 1 pages
AllocatePool: failed to allocate 144 bytes
AllocatePoolPages: failed to allocate 1 pages
AllocatePool: failed to allocate 160 bytes
BaseAddress – 0x3B8A1000 Length – 0x75E000 MinimalMemorySizeNeeded – 0x75E000
LABZ0 [3B953B98]
InstallProtocolInterface: 5B1B31A1-9562-11D2-8E3F-00A0C969723B 39902EB8
InstallProtocolInterface: 5CB5C776-60D5-45EE-883C-452708CD743F 39903028
HOBLIST address in DXE = 0x3689A018
在 Shell 下使用 mm 命令能看到相同的地址:
Valid EFI Header at Address 000000003B953018
———————————————
System: Table Structure size 00000078 revision 00020032
ConIn (0000000037D37AE0) ConOut (0000000036A94218) StdErr (0000000037D37C50)
Runtime Services 000000003B953B98
Boot Services 0000000039902D00
SAL System Table 0000000000000000
ACPI Table 000000003BFFD000
ACPI 2.0 Table 000000003BFFD014
MPS Table 0000000000000000
SMBIOS Table 000000003B94F000
因此,确定这里是Runtime Service Table 初始化的位置。
接下来研究 EFI_GET_VARIABLE具体实现的代码。在MdeModulePkg\Universal\Variable\RuntimeDxe\VariableSmmRuntimeDxe.c 的 SmmVariableReady() 函数中添加 Debug 信息
  //
  // Save the buffer physical address used for SMM conmunication.
  //
  mVariableBufferPhysical = mVariableBuffer;

  gRT->GetVariable         = RuntimeServiceGetVariable;
  gRT->GetNextVariableName = RuntimeServiceGetNextVariableName;
  gRT->SetVariable         = RuntimeServiceSetVariable;
  gRT->QueryVariableInfo   = RuntimeServiceQueryVariableInfo;
DEBUG ((EFI_D_INFO, "LABZ2 GetVariable[%X]\n",RuntimeServiceGetVariable));
  //
  // Install the Variable Architectural Protocol on a new handle.
  //
  Status = gBS->InstallProtocolInterface (
                  &mHandle,
                  &gEfiVariableArchProtocolGuid,
                  EFI_NATIVE_INTERFACE,
                  NULL
                  );
  ASSERT_EFI_ERROR (Status);
查看 Log 输出结果:
InstallProtocolInterface: 5B1B31A1-9562-11D2-8E3F-00A0C969723B 3845B4C0
Loading driver at 0x0003B8D4000 EntryPoint=0x0003B8D5000 VariableSmmRuntimeDxe.efi
InstallProtocolInterface: BC62157E-3E33-4FEC-9920-2D3B36D750DF 3845C818
PROGRESS CODE: V03040002 I0
LABZ2 GetVariable[3B8D5B00]
InstallProtocolInterface: 1E5668E2-8481-11D4-BCF1-0080C73C8881 0
InstallProtocolInterface: CD3D0A05-9E24-437C-A891-1EE053DB7638 3B8D9400
InstallProtocolInterface: AF23B340-97B4-4685-8D4F-A3F28169B21D 3B8D93E0
为了更方便的观察 Runtime Service Table 中的各项值,专门编写了一个简单的 EFI Application,在屏幕上输出各个函数的地址【参考2】。从结果上看,这次启动(每次启动函数地址会发生变化)后,GetVariable 的地址是0x3B8D5B00。
Runtime Service at [3B953B98]
GetTime [3B8C3478]
SetTime [3B8C3484]
GetWakeupTime [3B8C34A0]
SetWakeupTime [3B8C34AC]
ResetSystem [3B8E8730]
GetNextHighMonotonicCount [3B8BC67C]
GetVariable [3B8D5B00]
SetVariable [3B8D5E10]
GetNextVariableName [3B8D5C90]
QueryVariableInfo [3B8D5F6C]
UpdateCapsule [3B8B45BC]
QueryCapsuleCapabilities [3B8B47B8]
就是说在这个函数中,SetVariable 指向了 RuntimeServiceGetVariable 函数可以在\UDK2017\MdeModulePkg\Universal\Variable\RuntimeDxe\VariableSmmRuntimeDxe.c 中看到:
/**
  This code finds variable in storage blocks (Volatile or Non-Volatile).

  Caution: This function may receive untrusted input.
  The data size is external input, so this function will validate it carefully to avoid buffer overflow.

  @param[in]      VariableName       Name of Variable to be found.
  @param[in]      VendorGuid         Variable vendor GUID.
  @param[out]     Attributes         Attribute value of the variable found.
  @param[in, out] DataSize           Size of Data found. If size is less than the
                                     data, this value contains the required size.
  @param[out]     Data               Data pointer.

  @retval EFI_INVALID_PARAMETER      Invalid parameter.
  @retval EFI_SUCCESS                Find the specified variable.
  @retval EFI_NOT_FOUND              Not found.
  @retval EFI_BUFFER_TO_SMALL        DataSize is too small for the result.

**/
EFI_STATUS
EFIAPI
RuntimeServiceGetVariable (
  IN      CHAR16                            *VariableName,
  IN      EFI_GUID                          *VendorGuid,
  OUT     UINT32                            *Attributes OPTIONAL,
  IN OUT  UINTN                             *DataSize,
  OUT     VOID                              *Data
  )
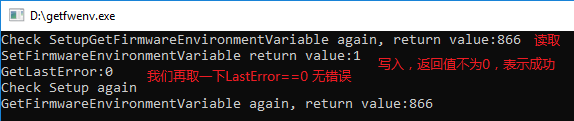
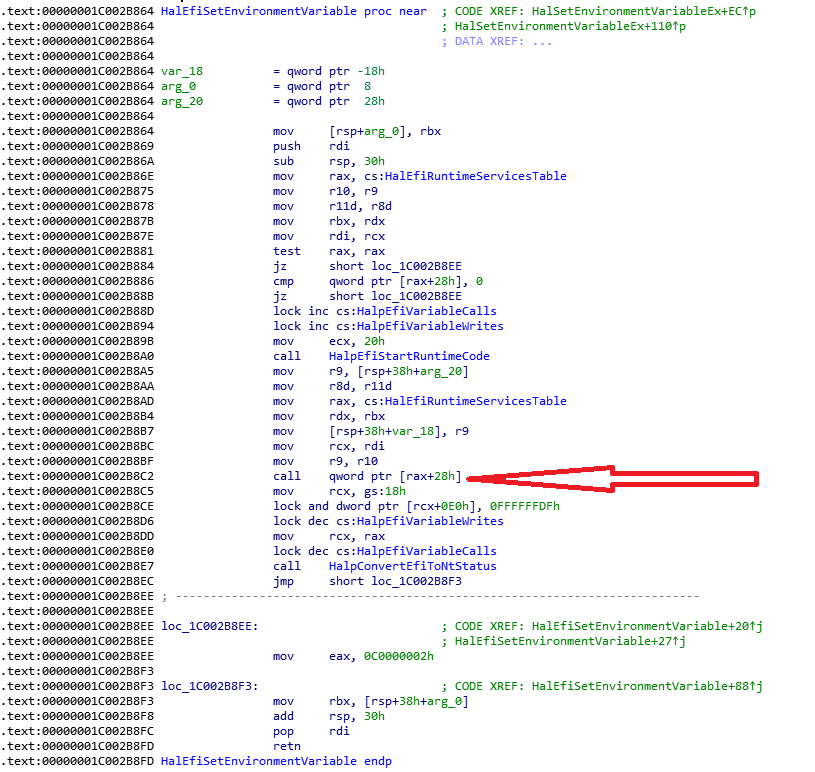
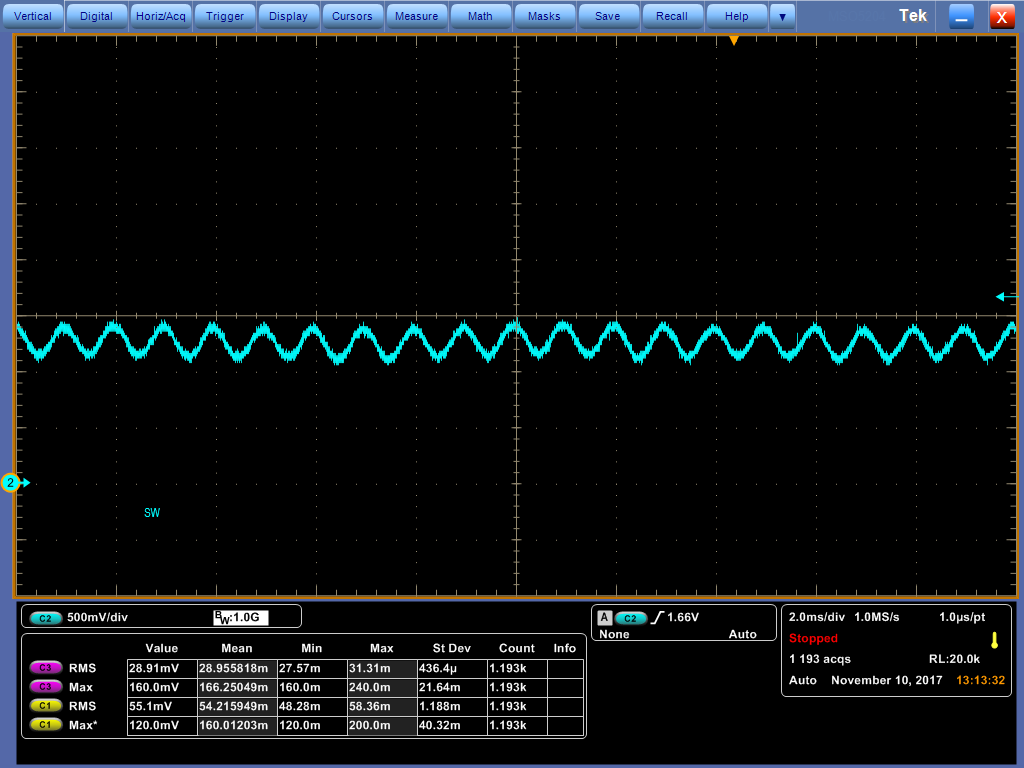
在 Kabylake-R 的平台上实验,先用 RW Everything 修改80 Port 显示值,之后运行我们前面文章中提到的调用 GetEnvironmentVariable API 的函数,每次调用之后80 Port就会变成 89,因此可以确认这部分代码执行到了。完整的例子可以在附件中看到(来自 UDK2017)。
Variable
总结:调gRT->GetVariable 最终是通过SMI 来实现的,也正是因为这个原因,所以在 Windows 下能够实现访问。
参考:
1. https://blog.csdn.net/jiangwei0512/article/details/51627562?locationNum=4&fps=1
2. Shell 下显示 gRT 函数地址的小程序
#include <Library/BaseLib.h>
#include <Uefi.h>
#include <Library/UefiLib.h>
#include <Library/PrintLib.h>
#include <Library/ShellCEntryLib.h>
#include <Protocol/EfiShell.h>
#include <Library/ShellLib.h>

extern EFI_RUNTIME_SERVICES      *gRT;

INTN
EFIAPI
ShellAppMain (
  IN UINTN Argc,
  IN CHAR16 **Argv
  )
{
        Print(L"UEFI Runtime Serivice Table @[%x]\n",gRT);
        Print(L"       GetTime            @[%X]\n",gRT->GetTime);
        Print(L"       SetTime            @[%X]\n",gRT->SetTime);
        Print(L"       GetWakeupTime      @[%X]\n",gRT->GetWakeupTime);
        Print(L"       SetWakeupTime      @[%X]\n",gRT->SetWakeupTime);
        Print(L"       ConvertPointer     @[%X]\n",gRT->ConvertPointer);
        Print(L"       GetVariable        @[%X]\n",gRT->GetVariable);
        Print(L"  GetNextVariableName     @[%X]\n",gRT->GetNextVariableName);
        Print(L"       SetVariable        @[%X]\n",gRT->SetVariable);
        Print(L"       ResetSystem        @[%X]\n",gRT->ResetSystem);
        Print(L"       UpdateCapsule      @[%X]\n",gRT->UpdateCapsule);
        Print(L"       QueryVariableInfo  @[%X]\n",gRT->QueryVariableInfo);
        Print(L" QueryCapsuleCapabilities @[%X]\n",gRT->QueryCapsuleCapabilities);
        Print(L"GetNextHighMonotonicCount @[%X]\n",gRT->GetNextHighMonotonicCount);
        Print(L"     SetVirtualAddressMap @[%X]\n",gRT->SetVirtualAddressMap);

        return EFI_SUCCESS;
}