Step1: 找到 Power Shell, 然后以管理员权限运行
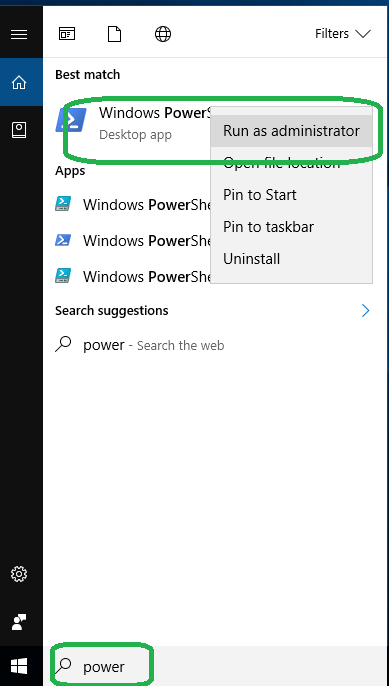
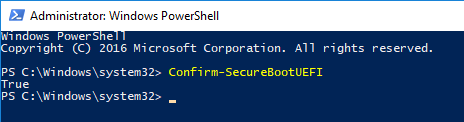
Step2:输入Confirm-SecureBootUEFI 即可:
结果:当前系统支持
当前系统不支持

参考:
1. https://technet.microsoft.com/en-us/itpro/powershell/windows/secure-boot/confirm-securebootuefi
Step1: 找到 Power Shell, 然后以管理员权限运行
Step2:输入Confirm-SecureBootUEFI 即可:
结果:当前系统支持
当前系统不支持
参考:
1. https://technet.microsoft.com/en-us/itpro/powershell/windows/secure-boot/confirm-securebootuefi
QEMU 是很好用的模拟器,可以完整的模拟运行 UEFI BIOS.之前的文章也介绍过【参考1】。最近又把它翻出来玩玩,想直接看看 Debug 输出信息,在【参考2】有提到具体的方法:
“Capturing OVMF debug messages on qemu:
– The default OVMF build writes debug messages to IO port 0x402. The
following qemu command line options save them in the file called
debug.log: ‘-debugcon file:debug.log -global isa-debugcon.iobase=0x402’.
– It is possible to revert to the original behavior, when debug messages were
written to the emulated serial port (potentially intermixing OVMF debug
output with UEFI serial console output). For this the
‘-D DEBUG_ON_SERIAL_PORT’ option has to be passed to the build command (see
the next section), and in order to capture the serial output qemu needs to
be started with eg. ‘-serial file:serial.log”
就是在启动 QEMU 的时候加入 “-debugcon file:debug.log -global isa-debugcon.iobase=0x402” 这个参数,完整的例子:
C:\Program Files\qemu>qemu-system-x86_64 -bios ovmf.FD -debugcon file:debug.log -global isa-debugcon.iobase=0x402
最后的结果会输出在debug.log 文件中。
特别注意:你需要使用Debug版本的 BIOS, OVMF 项目中默认是 Debug版本,不需要修改即可编译出Debug版本。
下面就是一个完整的输出结果:
SecCoreStartupWithStack(0xFFFCC000, 0x818000)
Register PPI Notify: DCD0BE23-9586-40F4-B643-06522CED4EDE
Install PPI: 8C8CE578-8A3D-4F1C-9935-896185C32DD3
Install PPI: 5473C07A-3DCB-4DCA-BD6F-1E9689E7349A
The 0th FV start address is 0x00000820000, size is 0x000E0000, handle is 0x0
Register PPI Notify: 49EDB1C1-BF21-4761-BB12-EB0031AABB39
Register PPI Notify: EA7CA24B-DED5-4DAD-A389-BF827E8F9B38
Install PPI: B9E0ABFE-5979-4914-977F-6DEE78C278A6
Install PPI: DBE23AA9-A345-4B97-85B6-B226F1617389
Loading PEIM at 0x00000829A20 EntryPoint=0x00000829C80 PcdPeim.efi
Install PPI: 06E81C58-4AD7-44BC-8390-F10265F72480
Install PPI: 01F34D25-4DE2-23AD-3FF3-36353FF323F1
Install PPI: 4D8B155B-C059-4C8F-8926-06FD4331DB8A
Install PPI: A60C6B59-E459-425D-9C69-0BCC9CB27D81
Loading PEIM at 0x0000082D7A0 EntryPoint=0x0000082DA00 StatusCodePei.efi
Install PPI: 229832D3-7A30-4B36-B827-F40CB7D45436
Loading PEIM at 0x0000082F6A0 EntryPoint=0x0000082F900 PlatformPei.efi
Select Item: 0x0
FW CFG Signature: 0x554D4551
Select Item: 0x1
FW CFG Revision: 0x1
QemuFwCfg interface is supported.
Platform PEIM Loaded
CMOS:
00: 20 00 38 00 13 00 02 06 03 17 26 02 10 80 00 00
10: 40 00 00 00 07 80 02 FF FF 00 00 00 00 00 00 00
20: 00 00 00 00 00 00 00 00 00 00 00 00 00 00 00 00
30: FF FF 20 00 00 07 00 20 30 00 00 00 00 12 00 00
40: 00 00 00 00 00 00 00 00 00 00 00 00 00 00 00 00
50: 00 00 00 00 00 00 00 00 00 00 00 00 00 00 00 00
60: 00 00 00 00 00 00 00 00 00 00 00 00 00 00 00 00
70: 00 00 00 00 00 00 00 00 00 00 00 00 00 00 00 00
Select Item: 0x19
Select Item: 0x25
S3 support was detected on QEMU
Install PPI: 7408D748-FC8C-4EE6-9288-C4BEC092A410
PublishPeiMemory: mPhysMemAddressWidth=36 PeiMemoryCap=65536 KB
PeiInstallPeiMemory MemoryBegin 0x4000000, MemoryLength 0x4000000
QemuInitializeRam called
Allocated Memory unaligned: Address = 0x7FD0000, Pages = 0x30, Type = 6
After aligning to 0x10000 bytes: Address = 0x7FD0000, Pages = 0x20
Updated aligned-mem HOB with BaseAddress = 7FD0000, Length = 20000, MemoryType = 6
Created after-mem HOB with BaseAddress = 7FF0000, Length = 10000, MemoryType = 7
Reserved variable store memory: 0x7FD0000; size: 128kb
Platform PEI Firmware Volume Initialization
Install PPI: 49EDB1C1-BF21-4761-BB12-EB0031AABB39
Notify: PPI Guid: 49EDB1C1-BF21-4761-BB12-EB0031AABB39, Peim notify entry point: 821333
The 1th FV start address is 0x00000900000, size is 0x00800000, handle is 0x900000
Select Item: 0x19
Select Item: 0x19
Temp Stack : BaseAddress=0x814000 Length=0x4000
Temp Heap : BaseAddress=0x810000 Length=0x1320
Total temporary memory: 32768 bytes.
temporary memory stack ever used: 16384 bytes.
temporary memory heap used: 4896 bytes.
Old Stack size 16384, New stack size 131072
Stack Hob: BaseAddress=0x4000000 Length=0x20000
Heap Offset = 0x3810000 Stack Offset = 0x3808000
TemporaryRamMigration(0x810000, 0x401C000, 0x8000)
Loading PEIM at 0x00007FC5000 EntryPoint=0x00007FC5260 PeiCore.efi
Reinstall PPI: 8C8CE578-8A3D-4F1C-9935-896185C32DD3
Reinstall PPI: 5473C07A-3DCB-4DCA-BD6F-1E9689E7349A
Reinstall PPI: B9E0ABFE-5979-4914-977F-6DEE78C278A6
Install PPI: F894643D-C449-42D1-8EA8-85BDD8C65BDE
Loading PEIM at 0x00007FC1000 EntryPoint=0x00007FC1260 DxeIpl.efi
Install PPI: 0AE8CE5D-E448-4437-A8D7-EBF5F194F731
Install PPI: 1A36E4E7-FAB6-476A-8E75-695A0576FDD7
Loading PEIM at 0x00007FBD000 EntryPoint=0x00007FBD260 S3Resume2Pei.efi
Install PPI: 6D582DBC-DB85-4514-8FCC-5ADF6227B147
DXE IPL Entry
Loading PEIM at 0x00007FA0000 EntryPoint=0x00007FA0260 DxeCore.efi
Loading DXE CORE at 0x00007FA0000 EntryPoint=0x00007FA0260
Install PPI: 605EA650-C65C-42E1-BA80-91A52AB618C6
CoreInitializeMemoryServices:
BaseAddress – 0x4022000 Length – 0x3F5E000 MinimalMemorySizeNeeded – 0x10F4000
InstallProtocolInterface: 5B1B31A1-9562-11D2-8E3F-00A0C969723B 7FB9D20
HOBLIST address in DXE = 0x7D97010
Memory Allocation 0x0000000A 0x818000 – 0x81FFFF
Memory Allocation 0x0000000A 0x810000 – 0x817FFF
Memory Allocation 0x0000000A 0x807000 – 0x807FFF
Memory Allocation 0x0000000A 0x806000 – 0x806FFF
Memory Allocation 0x00000006 0x7FD0000 – 0x7FEFFFF
Memory Allocation 0x00000007 0x7FF0000 – 0x7FFFFFF
Memory Allocation 0x0000000A 0x820000 – 0x8FFFFF
Memory Allocation 0x00000004 0x900000 – 0x10FFFFF
Memory Allocation 0x00000004 0x7F80000 – 0x7F9FFFF
Memory Allocation 0x00000004 0x7FCF000 – 0x7FCFFFF
Memory Allocation 0x00000004 0x7FC5000 – 0x7FCEFFF
Memory Allocation 0x00000004 0x7FC1000 – 0x7FC4FFF
Memory Allocation 0x00000004 0x7FBD000 – 0x7FC0FFF
Memory Allocation 0x00000004 0x7FA0000 – 0x7FBCFFF
Memory Allocation 0x00000003 0x7FA0000 – 0x7FBCFFF
Memory Allocation 0x00000004 0x7F80000 – 0x7F9FFFF
Memory Allocation 0x00000004 0x4000000 – 0x401FFFF
FV Hob 0x900000 – 0x10FFFFF
InstallProtocolInterface: D8117CFE-94A6-11D4-9A3A-0090273FC14D 7FBA000
InstallProtocolInterface: 8F644FA9-E850-4DB1-9CE2-0B44698E8DA4 7D94CDC
InstallProtocolInterface: 09576E91-6D3F-11D2-8E39-00A0C969723B 7D94A90
InstallProtocolInterface: 220E73B6-6BDB-4413-8405-B974B108619A 7D9481C
InstallProtocolInterface: EE4E5898-3914-4259-9D6E-DC7BD79403CF 7FB9688
Loading driver 9B680FCE-AD6B-4F3A-B60B-F59899003443
InstallProtocolInterface: 5B1B31A1-9562-11D2-8E3F-00A0C969723B 7C02168
Loading driver at 0x00007F12000 EntryPoint=0x00007F12260 DevicePathDxe.efi
InstallProtocolInterface: BC62157E-3E33-4FEC-9920-2D3B36D750DF 7C02290
InstallProtocolInterface: 0379BE4E-D706-437D-B037-EDB82FB772A4 7F17C18
InstallProtocolInterface: 8B843E20-8132-4852-90CC-551A4E4A7F1C 7F17C38
InstallProtocolInterface: 05C99A21-C70F-4AD2-8A5F-35DF3343F51E 7F17C40
Loading driver 80CF7257-87AB-47F9-A3FE-D50B76D89541
InstallProtocolInterface: 5B1B31A1-9562-11D2-8E3F-00A0C969723B 7C01CE8
Loading driver at 0x00007F0D000 EntryPoint=0x00007F0D260 PcdDxe.efi
InstallProtocolInterface: BC62157E-3E33-4FEC-9920-2D3B36D750DF 7C01990
InstallProtocolInterface: 11B34006-D85B-4D0A-A290-D5A571310EF7 7F11A58
InstallProtocolInterface: 13A3F0F6-264A-3EF0-F2E0-DEC512342F34 7F11AD8
InstallProtocolInterface: 5BE40F57-FA68-4610-BBBF-E9C5FCDAD365 7F11A4C
InstallProtocolInterface: FD0F4478-0EFD-461D-BA2D-E58C45FD5F5E 7F11B20
Loading driver 733CBAC2-B23F-4B92-BC8E-FB01CE5907B7
InstallProtocolInterface: 5B1B31A1-9562-11D2-8E3F-00A0C969723B 7B64028
!!!!!!!! InsertImageRecord – Section Alignment(0x20) is not 4K !!!!!!!!
!!!!!!!! Image – c:\ovmf\Build\OvmfIa32\DEBUG_MYTOOLS\IA32\OvmfPkg\QemuFlashFvbServicesRuntimeDxe\FvbServicesRuntimeDxe\DEBUG\FvbServicesRuntimeDxe.pdb !!!!!!!!
Loading driver at 0x00007F47000 EntryPoint=0x00007F47260 FvbServicesRuntimeDxe.efi
InstallProtocolInterface: BC62157E-3E33-4FEC-9920-2D3B36D750DF 7C01450
QEMU Flash: Attempting flash detection at FFE00010
QemuFlashDetected => FD behaves as ROM
QemuFlashDetected => No
QEMU flash was not detected. Writable FVB is not being installed.
Error: Image at 00007F47000 start failed: Write Protected
!!!!!!!! ImageRecord not found !!!!!!!!
Loading driver FEDE0A1B-BCA2-4A9F-BB2B-D9FD7DEC2E9F
InstallProtocolInterface: 5B1B31A1-9562-11D2-8E3F-00A0C969723B 7B64028
!!!!!!!! InsertImageRecord – Section Alignment(0x20) is not 4K !!!!!!!!
!!!!!!!! Image – c:\ovmf\Build\OvmfIa32\DEBUG_MYTOOLS\IA32\IntelFrameworkModulePkg\Universal\StatusCode\RuntimeDxe\StatusCodeRuntimeDxe\DEBUG\StatusCodeRuntimeDxe.pdb !!!!!!!!
Loading driver at 0x00007F48000 EntryPoint=0x00007F48260 StatusCodeRuntimeDxe.efi
InstallProtocolInterface: BC62157E-3E33-4FEC-9920-2D3B36D750DF 7B64150
InstallProtocolInterface: D2B2B828-0826-48A7-B3DF-983C006024F0 7F4A838
Loading driver B601F8C4-43B7-4784-95B1-F4226CB40CEE
InstallProtocolInterface: 5B1B31A1-9562-11D2-8E3F-00A0C969723B 7B641E8
!!!!!!!! InsertImageRecord – Section Alignment(0x20) is not 4K !!!!!!!!
!!!!!!!! Image – c:\ovmf\Build\OvmfIa32\DEBUG_MYTOOLS\IA32\MdeModulePkg\Core\RuntimeDxe\RuntimeDxe\DEBUG\RuntimeDxe.pdb !!!!!!!!
Loading driver at 0x00007F45000 EntryPoint=0x00007F45260 RuntimeDxe.efi
InstallProtocolInterface: BC62157E-3E33-4FEC-9920-2D3B36D750DF 7B64890
InstallProtocolInterface: B7DFB4E1-052F-449F-87BE-9818FC91B733 7F47810
Loading driver F80697E9-7FD6-4665-8646-88E33EF71DFC
InstallProtocolInterface: 5B1B31A1-9562-11D2-8E3F-00A0C969723B 7B64428
Loading driver at 0x00007F0A000 EntryPoint=0x00007F0A260 SecurityStubDxe.efi
InstallProtocolInterface: BC62157E-3E33-4FEC-9920-2D3B36D750DF 7B64590
InstallProtocolInterface: 94AB2F58-1438-4EF1-9152-18941A3A0E68 7F0C534
InstallProtocolInterface: A46423E3-4617-49F1-B9FF-D1BFA9115839 7F0C530
Loading driver 13AC6DD0-73D0-11D4-B06B-00AA00BD6DE7
InstallProtocolInterface: 5B1B31A1-9562-11D2-8E3F-00A0C969723B 7B66CE8
Loading driver at 0x00007F05000 EntryPoint=0x00007F05260 EbcDxe.efi
InstallProtocolInterface: BC62157E-3E33-4FEC-9920-2D3B36D750DF 7B66BD0
InstallProtocolInterface: 13AC6DD1-73D0-11D4-B06B-00AA00BD6DE7 7B66C90
InstallProtocolInterface: 2755590C-6F3C-42FA-9EA4-A3BA543CDA25 7B66B50
InstallProtocolInterface: AAEACCFD-F27B-4C17-B610-75CA1F2DFB52 7B66950
Loading driver 79CA4208-BBA1-4A9A-8456-E1E66A81484E
InstallProtocolInterface: 5B1B31A1-9562-11D2-8E3F-00A0C969723B 7B66528
Loading driver at 0x00007F03000 EntryPoint=0x00007F03260 Legacy8259.efi
InstallProtocolInterface: BC62157E-3E33-4FEC-9920-2D3B36D750DF 7B66450
InstallProtocolInterface: 38321DBA-4FE0-4E17-8AEC-413055EAEDC1 7F04B60
Loading driver A19B1FE7-C1BC-49F8-875F-54A5D542443F
InstallProtocolInterface: 5B1B31A1-9562-11D2-8E3F-00A0C969723B 7B65028
Loading driver at 0x00007F00000 EntryPoint=0x00007F00260 CpuIo2Dxe.efi
InstallProtocolInterface: BC62157E-3E33-4FEC-9920-2D3B36D750DF 7B65D50
InstallProtocolInterface: AD61F191-AE5F-4C0E-B9FA-E869D288C64F 7F01F90
Loading driver 1A1E4886-9517-440E-9FDE-3BE44CEE2136
InstallProtocolInterface: 5B1B31A1-9562-11D2-8E3F-00A0C969723B 7B65B28
Loading driver at 0x00007EF8000 EntryPoint=0x00007EF8260 CpuDxe.efi
InstallProtocolInterface: BC62157E-3E33-4FEC-9920-2D3B36D750DF 7B65910
InstallProtocolInterface: 26BACCB1-6F42-11D4-BCE7-0080C73C8881 7EFF96C
Flushing GCD
Flushing GCD
Flushing GCD
Flushing GCD
Flushing GCD
Flushing GCD
Flushing GCD
Flushing GCD
Detect CPU count: 1
Loading driver 6F0198AA-1F1D-426D-AE3E-39AB633FCC28
InstallProtocolInterface: 5B1B31A1-9562-11D2-8E3F-00A0C969723B 775EEA8
!!!!!!!! InsertImageRecord – Section Alignment(0x20) is not 4K !!!!!!!!
!!!!!!!! Image – c:\ovmf\Build\OvmfIa32\DEBUG_MYTOOLS\IA32\PcAtChipsetPkg\KbcResetDxe\Reset\DEBUG\KbcReset.pdb !!!!!!!!
Loading driver at 0x00007F42000 EntryPoint=0x00007F42260 KbcReset.efi
InstallProtocolInterface: BC62157E-3E33-4FEC-9920-2D3B36D750DF 7B65810
InstallProtocolInterface: 27CFAC88-46CC-11D4-9A38-0090273FC14D 0
Loading driver C8339973-A563-4561-B858-D8476F9DEFC4
InstallProtocolInterface: 5B1B31A1-9562-11D2-8E3F-00A0C969723B 775F928
Loading driver at 0x00007EF6000 EntryPoint=0x00007EF6260 Metronome.efi
InstallProtocolInterface: BC62157E-3E33-4FEC-9920-2D3B36D750DF 775FB10
InstallProtocolInterface: 26BACCB2-6F42-11D4-BCE7-0080C73C8881 7EF7E80
Loading driver 22DC2B60-FE40-42AC-B01F-3AB1FAD9AAD8
InstallProtocolInterface: 5B1B31A1-9562-11D2-8E3F-00A0C969723B 775B0A8
!!!!!!!! InsertImageRecord – Section Alignment(0x20) is not 4K !!!!!!!!
!!!!!!!! Image – c:\ovmf\Build\OvmfIa32\DEBUG_MYTOOLS\IA32\OvmfPkg\EmuVariableFvbRuntimeDxe\Fvb\DEBUG\EmuVariableFvbRuntimeDxe.pdb !!!!!!!!
Loading driver at 0x00007F3F000 EntryPoint=0x00007F3F260 EmuVariableFvbRuntimeDxe.efi
InstallProtocolInterface: BC62157E-3E33-4FEC-9920-2D3B36D750DF 775BA50
EMU Variable FVB Started
EMU Variable FVB: Using pre-reserved block at 7FD0000
EMU Variable FVB: Basic FV headers were invalid
Installing FVB for EMU Variable support
InstallProtocolInterface: 8F644FA9-E850-4DB1-9CE2-0B44698E8DA4 7F41C0C
InstallProtocolInterface: 09576E91-6D3F-11D2-8E39-00A0C969723B 7F41BE4
Loading driver CBD2E4D5-7068-4FF5-B462-9822B4AD8D60
InstallProtocolInterface: 5B1B31A1-9562-11D2-8E3F-00A0C969723B 775B7A8
!!!!!!!! InsertImageRecord – Section Alignment(0x20) is not 4K !!!!!!!!
!!!!!!!! Image – c:\ovmf\Build\OvmfIa32\DEBUG_MYTOOLS\IA32\MdeModulePkg\Universal\Variable\RuntimeDxe\VariableRuntimeDxe\DEBUG\VariableRuntimeDxe.pdb !!!!!!!!
Loading driver at 0x00007F35000 EntryPoint=0x00007F35260 VariableRuntimeDxe.efi
InstallProtocolInterface: BC62157E-3E33-4FEC-9920-2D3B36D750DF 775B5D0
VarCheckLibRegisterSetVariableCheckHandler – 0x7F3A60B Success
Variable driver common space: 0xDF9C 0xDF9C 0xDF9C
Variable driver will work without auth variable support!
InstallProtocolInterface: CD3D0A05-9E24-437C-A891-1EE053DB7638 7F3DF78
InstallProtocolInterface: AF23B340-97B4-4685-8D4F-A3F28169B21D 7F3DF7C
InstallProtocolInterface: 1E5668E2-8481-11D4-BCF1-0080C73C8881 0
Loading driver 79E4A61C-ED73-4312-94FE-E3E7563362A9
InstallProtocolInterface: 5B1B31A1-9562-11D2-8E3F-00A0C969723B 775DA28
Loading driver at 0x00007EF4000 EntryPoint=0x00007EF4260 PrintDxe.efi
InstallProtocolInterface: BC62157E-3E33-4FEC-9920-2D3B36D750DF 775DB50
InstallProtocolInterface: F05976EF-83F1-4F3D-8619-F7595D41E538 7EF54F4
Loading driver 348C4D62-BFBD-4882-9ECE-C80BB1C4783B
InstallProtocolInterface: 5B1B31A1-9562-11D2-8E3F-00A0C969723B 775D768
Loading driver at 0x00007EDF000 EntryPoint=0x00007EDF260 HiiDatabase.efi
InstallProtocolInterface: BC62157E-3E33-4FEC-9920-2D3B36D750DF 775D210
InstallProtocolInterface: E9CA4775-8657-47FC-97E7-7ED65A084324 7EF34F4
InstallProtocolInterface: 0FD96974-23AA-4CDC-B9CB-98D17750322A 7EF3518
InstallProtocolInterface: EF9FC172-A1B2-4693-B327-6D32FC416042 7EF352C
InstallProtocolInterface: 587E72D7-CC50-4F79-8209-CA291FC1A10F 7EF3558
InstallProtocolInterface: 0A8BADD5-03B8-4D19-B128-7B8F0EDAA596 7EF3570
InstallProtocolInterface: 31A6406A-6BDF-4E46-B2A2-EBAA89C40920 7EF3504
Loading driver 96B5C032-DF4C-4B6E-8232-438DCF448D0E
InstallProtocolInterface: 5B1B31A1-9562-11D2-8E3F-00A0C969723B 775CA28
Loading driver at 0x00007EDC000 EntryPoint=0x00007EDC260 NullMemoryTestDxe.efi
InstallProtocolInterface: BC62157E-3E33-4FEC-9920-2D3B36D750DF 775CB50
InstallProtocolInterface: 309DE7F1-7F5E-4ACE-B49C-531BE5AA95EF 7EDDF50
Loading driver F9D88642-0737-49BC-81B5-6889CD57D9EA
InstallProtocolInterface: 5B1B31A1-9562-11D2-8E3F-00A0C969723B 775C768
Loading driver at 0x00007ED7000 EntryPoint=0x00007ED7260 SmbiosDxe.efi
InstallProtocolInterface: BC62157E-3E33-4FEC-9920-2D3B36D750DF 775C190
Select Item: 0x0
FW CFG Signature: 0x554D4551
Select Item: 0x1
FW CFG Revision: 0x1
QemuFwCfg interface is supported.
Select Item: 0x19
Select Item: 0x19
Select Item: 0x22
DetectSmbiosVersion: SMBIOS version from QEMU: 0x0208
InstallProtocolInterface: 03583FF6-CB36-4940-947E-B9B39F4AFAF7 7EDB328
Loading driver 9622E42C-8E38-4A08-9E8F-54F784652F6B
InstallProtocolInterface: 5B1B31A1-9562-11D2-8E3F-00A0C969723B 775C2A8
Loading driver at 0x00007ED3000 EntryPoint=0x00007ED3260 AcpiTableDxe.efi
InstallProtocolInterface: BC62157E-3E33-4FEC-9920-2D3B36D750DF 7756010
InstallProtocolInterface: FFE06BDD-6107-46A6-7BB2-5A9C7EC5275C 7756ED4
Loading driver BDCE85BB-FBAA-4F4E-9264-501A2C249581
InstallProtocolInterface: 5B1B31A1-9562-11D2-8E3F-00A0C969723B 77569A8
Loading driver at 0x00007ECE000 EntryPoint=0x00007ECE260 S3SaveStateDxe.efi
InstallProtocolInterface: BC62157E-3E33-4FEC-9920-2D3B36D750DF 7756B10
InstallProtocolInterface: E857CAF6-C046-45DC-BE3F-EE0765FBA887 7ED2420
Loading driver A210F973-229D-4F4D-AA37-9895E6C9EABA
InstallProtocolInterface: 5B1B31A1-9562-11D2-8E3F-00A0C969723B 77561E8
Loading driver at 0x00007ECB000 EntryPoint=0x00007ECB260 DpcDxe.efi
InstallProtocolInterface: BC62157E-3E33-4FEC-9920-2D3B36D750DF 7756310
InstallProtocolInterface: 480F8AE9-0C46-4AA9-BC89-DB9FBA619806 7ECCE90
Loading driver F2765DEC-6B41-11D5-8E71-00902707B35E
InstallProtocolInterface: 5B1B31A1-9562-11D2-8E3F-00A0C969723B 7758028
Loading driver at 0x00007EC9000 EntryPoint=0x00007EC9260 Timer.efi
InstallProtocolInterface: BC62157E-3E33-4FEC-9920-2D3B36D750DF 7758150
InstallProtocolInterface: 26BACCB3-6F42-11D4-BCE7-0080C73C8881 7ECAC90
Loading driver 311161C5-BFD9-4504-8016-213F2DAEDAF3
InstallProtocolInterface: 5B1B31A1-9562-11D2-8E3F-00A0C969723B 7758AE8
Loading driver at 0x00007EC3000 EntryPoint=0x00007EC3260 PciHostBridge.efi
InstallProtocolInterface: BC62157E-3E33-4FEC-9920-2D3B36D750DF 7758CD0
Select Item: 0x0
FW CFG Signature: 0x554D4551
Select Item: 0x1
FW CFG Revision: 0x1
QemuFwCfg interface is supported.
InstallProtocolInterface: CF8034BE-6768-4D8B-B739-7CCE683A9FBE 77589A4
Select Item: 0x19
InstallProtocolInterface: 09576E91-6D3F-11D2-8E39-00A0C969723B 7758398
InstallProtocolInterface: 2F707EBB-4A1A-11D4-9A38-0090273FC14D 77583A8
InitRootBridge: installed root bus 0, with room for 255 subordinate bus(es)
Loading driver FE5CEA76-4F72-49E8-986F-2CD899DFFE5D
InstallProtocolInterface: 5B1B31A1-9562-11D2-8E3F-00A0C969723B 775A028
Loading driver at 0x00007EBE000 EntryPoint=0x00007EBE260 FaultTolerantWriteDxe.efi
InstallProtocolInterface: BC62157E-3E33-4FEC-9920-2D3B36D750DF 775AF50
Ftw: FtwWorkSpaceLba – 0x0, WorkBlockSize – 0x10000, FtwWorkSpaceBase – 0xE000
Ftw: FtwSpareLba – 0x1, SpareBlockSize – 0x10000
Ftw: NumberOfWorkBlock – 0x1, FtwWorkBlockLba – 0x0
Ftw: WorkSpaceLbaInSpare – 0x0, WorkSpaceBaseInSpare – 0xE000
Ftw: Remaining work space size – FE0
Ftw: Work block header check error
Ftw: Work block header check error
Ftw: Both are invalid, init workspace
Ftw: start to reclaim work space
Ftw: reclaim work space successfully
InstallProtocolInterface: 3EBD9E82-2C78-4DE6-9786-8D4BFCB7C881 7754018
InstallProtocolInterface: 6441F818-6362-4E44-B570-7DBA31DD2453 0
Loading driver EBF342FE-B1D3-4EF8-957C-8048606FF671
InstallProtocolInterface: 5B1B31A1-9562-11D2-8E3F-00A0C969723B 775AB68
Loading driver at 0x00007EAA000 EntryPoint=0x00007EAA260 SetupBrowser.efi
InstallProtocolInterface: BC62157E-3E33-4FEC-9920-2D3B36D750DF 775A1D0
InstallProtocolInterface: B9D4C360-BCFB-4F9B-9298-53C136982258 7EBCBC0
InstallProtocolInterface: A770C357-B693-4E6D-A6CF-D21C728E550B 7EBCBD8
InstallProtocolInterface: 1F73B18D-4630-43C1-A1DE-6F80855D7DA4 7EBCBC8
Loading driver 4110465D-5FF3-4F4B-B580-24ED0D06747A
InstallProtocolInterface: 5B1B31A1-9562-11D2-8E3F-00A0C969723B 7759028
Loading driver at 0x00007EA7000 EntryPoint=0x00007EA7260 SmbiosPlatformDxe.efi
InstallProtocolInterface: BC62157E-3E33-4FEC-9920-2D3B36D750DF 7759F10
Select Item: 0x0
FW CFG Signature: 0x554D4551
Select Item: 0x1
FW CFG Revision: 0x1
QemuFwCfg interface is supported.
Select Item: 0x19
Select Item: 0x21
SmbiosAdd: Smbios type 1 with size 0x51 is added to 32-bit table
SmbiosCreateTable: Initialize 32-bit entry point structure
SmbiosCreateTable() re-allocate SMBIOS 32-bit table
SmbiosAdd: Smbios type 3 with size 0x29 is added to 32-bit table
SmbiosAdd: Smbios type 4 with size 0x44 is added to 32-bit table
SmbiosAdd: Smbios type 16 with size 0x19 is added to 32-bit table
SmbiosAdd: Smbios type 17 with size 0x35 is added to 32-bit table
SmbiosAdd: Smbios type 19 with size 0x21 is added to 32-bit table
SmbiosAdd: Smbios type 32 with size 0xD is added to 32-bit table
SmbiosAdd: Smbios type 0 with size 0x48 is added to 32-bit table
Loading driver 49970331-E3FA-4637-9ABC-3B7868676970
InstallProtocolInterface: 5B1B31A1-9562-11D2-8E3F-00A0C969723B 77591E8
Loading driver at 0x00007EA2000 EntryPoint=0x00007EA2280 AcpiPlatform.efi
InstallProtocolInterface: BC62157E-3E33-4FEC-9920-2D3B36D750DF 7759750
Select Item: 0x0
FW CFG Signature: 0x554D4551
Select Item: 0x1
FW CFG Revision: 0x1
QemuFwCfg interface is supported.
AcpiPlatformEntryPoint: PCI enumeration pending, registered callback
Loading driver 378D7B65-8DA9-4773-B6E4-A47826A833E1
InstallProtocolInterface: 5B1B31A1-9562-11D2-8E3F-00A0C969723B 7759528
!!!!!!!! InsertImageRecord – Section Alignment(0x20) is not 4K !!!!!!!!
!!!!!!!! Image – c:\ovmf\Build\OvmfIa32\DEBUG_MYTOOLS\IA32\PcAtChipsetPkg\PcatRealTimeClockRuntimeDxe\PcatRealTimeClockRuntimeDxe\DEBUG\PcRtc.pdb !!!!!!!!
Loading driver at 0x00007F31000 EntryPoint=0x00007F31260 PcRtc.efi
InstallProtocolInterface: BC62157E-3E33-4FEC-9920-2D3B36D750DF 7757E90
InstallProtocolInterface: 27CFAC87-46CC-11D4-9A38-0090273FC14D 0
Loading driver F099D67F-71AE-4C36-B2A3-DCEB0EB2B7D8
InstallProtocolInterface: 5B1B31A1-9562-11D2-8E3F-00A0C969723B 7757AE8
Loading driver at 0x00007EA0000 EntryPoint=0x00007EA0260 WatchdogTimer.efi
InstallProtocolInterface: BC62157E-3E33-4FEC-9920-2D3B36D750DF 7757890
InstallProtocolInterface: 665E3FF5-46CC-11D4-9A38-0090273FC14D 7EA1DA0
Loading driver AD608272-D07F-4964-801E-7BD3B7888652
InstallProtocolInterface: 5B1B31A1-9562-11D2-8E3F-00A0C969723B 7757528
!!!!!!!! InsertImageRecord – Section Alignment(0x20) is not 4K !!!!!!!!
!!!!!!!! Image – c:\ovmf\Build\OvmfIa32\DEBUG_MYTOOLS\IA32\MdeModulePkg\Universal\MonotonicCounterRuntimeDxe\MonotonicCounterRuntimeDxe\DEBUG\MonotonicCounterRuntimeDxe.pdb !!!!!!!!
Loading driver at 0x00007F2E000 EntryPoint=0x00007F2E260 MonotonicCounterRuntimeDxe.efi
InstallProtocolInterface: BC62157E-3E33-4FEC-9920-2D3B36D750DF 7757250
InstallProtocolInterface: 1DA97072-BDDC-4B30-99F1-72A0B56FFF2A 0
Loading driver 42857F0A-13F2-4B21-8A23-53D3F714B840
InstallProtocolInterface: 5B1B31A1-9562-11D2-8E3F-00A0C969723B 77530E8
!!!!!!!! InsertImageRecord – Section Alignment(0x20) is not 4K !!!!!!!!
!!!!!!!! Image – c:\ovmf\Build\OvmfIa32\DEBUG_MYTOOLS\IA32\MdeModulePkg\Universal\CapsuleRuntimeDxe\CapsuleRuntimeDxe\DEBUG\CapsuleRuntimeDxe.pdb !!!!!!!!
Loading driver at 0x00007F2B000 EntryPoint=0x00007F2B260 CapsuleRuntimeDxe.efi
InstallProtocolInterface: BC62157E-3E33-4FEC-9920-2D3B36D750DF 7753CD0
InstallProtocolInterface: 5053697E-2CBC-4819-90D9-0580DEEE5754 0
Loading driver FC5C7020-1A48-4198-9BE2-EAD5ABC8CF2F
InstallProtocolInterface: 5B1B31A1-9562-11D2-8E3F-00A0C969723B 77537E8
Loading driver at 0x00007E79000 EntryPoint=0x00007E79260 BdsDxe.efi
InstallProtocolInterface: BC62157E-3E33-4FEC-9920-2D3B36D750DF 7753A10
Select Item: 0x0
FW CFG Signature: 0x554D4551
Select Item: 0x1
FW CFG Revision: 0x1
QemuFwCfg interface is supported.
InstallProtocolInterface: 665E3FF6-46CC-11D4-9A38-0090273FC14D 7E9A1B4
Loading driver E660EA85-058E-4B55-A54B-F02F83A24707
InstallProtocolInterface: 5B1B31A1-9562-11D2-8E3F-00A0C969723B 7752D28
Loading driver at 0x00007E69000 EntryPoint=0x00007E69299 DisplayEngine.efi
InstallProtocolInterface: BC62157E-3E33-4FEC-9920-2D3B36D750DF 7752150
InstallProtocolInterface: 9BBE29E9-FDA1-41EC-AD52-452213742D2E 7E76274
Loading driver 6B79BBC0-26B9-4FE9-B631-551D8AB078C6
InstallProtocolInterface: 5B1B31A1-9562-11D2-8E3F-00A0C969723B 774FA28
Loading driver at 0x00007E66000 EntryPoint=0x00007E66260 AcpiS3SaveDxe.efi
InstallProtocolInterface: BC62157E-3E33-4FEC-9920-2D3B36D750DF 774FB90
Select Item: 0x0
FW CFG Signature: 0x554D4551
Select Item: 0x1
FW CFG Revision: 0x1
QemuFwCfg interface is supported.
Select Item: 0x19
Select Item: 0x25
InstallProtocolInterface: BD445D79-B7AD-4F04-9AD8-29BD2040EB3C 0
Loading driver D9DCC5DF-4007-435E-9098-8970935504B2
InstallProtocolInterface: 5B1B31A1-9562-11D2-8E3F-00A0C969723B 774F1A8
Loading driver at 0x00007E61000 EntryPoint=0x00007E61265 PlatformDxe.efi
InstallProtocolInterface: BC62157E-3E33-4FEC-9920-2D3B36D750DF 774F510
InstallProtocolInterface: 09576E91-6D3F-11D2-8E39-00A0C969723B 7E64C18
InstallProtocolInterface: 330D4706-F2A0-4E4F-A369-B66FA8D54385 7E65084
Loading driver 93B80004-9FB3-11D4-9A3A-0090273FC14D
InstallProtocolInterface: 5B1B31A1-9562-11D2-8E3F-00A0C969723B 774BCA8
Loading driver at 0x00007E53000 EntryPoint=0x00007E53260 PciBusDxe.efi
InstallProtocolInterface: BC62157E-3E33-4FEC-9920-2D3B36D750DF 774BE10
InstallProtocolInterface: 18A031AB-B443-4D1A-A5C0-0C09261E9F71 7E5F908
InstallProtocolInterface: 107A772C-D5E1-11D4-9A46-0090273FC14D 7E5F934
InstallProtocolInterface: 6A7A5CFF-E8D9-4F70-BADA-75AB3025CE14 7E5F940
InstallProtocolInterface: 19CB87AB-2CB9-4665-8360-DDCF6054F79D 7E5F930
Loading driver 33CB97AF-6C33-4C42-986B-07581FA366D4
InstallProtocolInterface: 5B1B31A1-9562-11D2-8E3F-00A0C969723B 774E228
Loading driver at 0x00007E50000 EntryPoint=0x00007E50260 BlockMmioToBlockIoDxe.efi
InstallProtocolInterface: BC62157E-3E33-4FEC-9920-2D3B36D750DF 774E350
InstallProtocolInterface: 18A031AB-B443-4D1A-A5C0-0C09261E9F71 7E52710
InstallProtocolInterface: 107A772C-D5E1-11D4-9A46-0090273FC14D 7E52728
InstallProtocolInterface: 6A7A5CFF-E8D9-4F70-BADA-75AB3025CE14 7E52734
Loading driver 83DD3B39-7CAF-4FAC-A542-E050B767E3A7
InstallProtocolInterface: 5B1B31A1-9562-11D2-8E3F-00A0C969723B 774B4A8
Loading driver at 0x00007E4D000 EntryPoint=0x00007E4D260 VirtioPciDeviceDxe.efi
InstallProtocolInterface: BC62157E-3E33-4FEC-9920-2D3B36D750DF 774B950
InstallProtocolInterface: 18A031AB-B443-4D1A-A5C0-0C09261E9F71 7E4F960
InstallProtocolInterface: 107A772C-D5E1-11D4-9A46-0090273FC14D 7E4F988
InstallProtocolInterface: 6A7A5CFF-E8D9-4F70-BADA-75AB3025CE14 7E4F994
Loading driver 11D92DFB-3CA9-4F93-BA2E-4780ED3E03B5
InstallProtocolInterface: 5B1B31A1-9562-11D2-8E3F-00A0C969723B 7747028
Loading driver at 0x00007E4A000 EntryPoint=0x00007E4A260 VirtioBlkDxe.efi
InstallProtocolInterface: BC62157E-3E33-4FEC-9920-2D3B36D750DF 7747F50
InstallProtocolInterface: 18A031AB-B443-4D1A-A5C0-0C09261E9F71 7E4CD40
InstallProtocolInterface: 107A772C-D5E1-11D4-9A46-0090273FC14D 7E4CD68
InstallProtocolInterface: 6A7A5CFF-E8D9-4F70-BADA-75AB3025CE14 7E4CD74
Loading driver FAB5D4F4-83C0-4AAF-8480-442D11DF6CEA
InstallProtocolInterface: 5B1B31A1-9562-11D2-8E3F-00A0C969723B 7747AE8
Loading driver at 0x00007E46000 EntryPoint=0x00007E46260 VirtioScsiDxe.efi
InstallProtocolInterface: BC62157E-3E33-4FEC-9920-2D3B36D750DF 7747CD0
InstallProtocolInterface: 18A031AB-B443-4D1A-A5C0-0C09261E9F71 7E48F20
InstallProtocolInterface: 107A772C-D5E1-11D4-9A46-0090273FC14D 7E48F48
InstallProtocolInterface: 6A7A5CFF-E8D9-4F70-BADA-75AB3025CE14 7E48F54
Loading driver CF569F50-DE44-4F54-B4D7-F4AE25CDA599
InstallProtocolInterface: 5B1B31A1-9562-11D2-8E3F-00A0C969723B 7747268
Loading driver at 0x00007E43000 EntryPoint=0x00007E43260 XenIoPciDxe.efi
InstallProtocolInterface: BC62157E-3E33-4FEC-9920-2D3B36D750DF 77476D0
InstallProtocolInterface: 18A031AB-B443-4D1A-A5C0-0C09261E9F71 7E45260
InstallProtocolInterface: 107A772C-D5E1-11D4-9A46-0090273FC14D 7E45288
InstallProtocolInterface: 6A7A5CFF-E8D9-4F70-BADA-75AB3025CE14 7E45294
Loading driver 565EC8BA-A484-11E3-802B-B8AC6F7D65E6
InstallProtocolInterface: 5B1B31A1-9562-11D2-8E3F-00A0C969723B 774A028
Loading driver at 0x00007E3A000 EntryPoint=0x00007E3A265 XenBusDxe.efi
InstallProtocolInterface: BC62157E-3E33-4FEC-9920-2D3B36D750DF 774AF10
Error: Image at 00007E3A000 start failed: Aborted
Loading driver 8C2487EA-9AF3-11E3-B966-B8AC6F7D65E6
InstallProtocolInterface: 5B1B31A1-9562-11D2-8E3F-00A0C969723B 774A028
Loading driver at 0x00007E3E000 EntryPoint=0x00007E3E265 XenPvBlkDxe.efi
InstallProtocolInterface: BC62157E-3E33-4FEC-9920-2D3B36D750DF 774AF10
InstallProtocolInterface: 18A031AB-B443-4D1A-A5C0-0C09261E9F71 7E41EB0
InstallProtocolInterface: 107A772C-D5E1-11D4-9A46-0090273FC14D 7E41F18
InstallProtocolInterface: 6A7A5CFF-E8D9-4F70-BADA-75AB3025CE14 7E41F24
Loading driver 51CCF399-4FDF-4E55-A45B-E123F84D456A
InstallProtocolInterface: 5B1B31A1-9562-11D2-8E3F-00A0C969723B 774AAE8
Loading driver at 0x00007E3B000 EntryPoint=0x00007E3B260 ConPlatformDxe.efi
InstallProtocolInterface: BC62157E-3E33-4FEC-9920-2D3B36D750DF 774AC50
InstallProtocolInterface: 18A031AB-B443-4D1A-A5C0-0C09261E9F71 7E3DCF0
InstallProtocolInterface: 107A772C-D5E1-11D4-9A46-0090273FC14D 7E3DD20
InstallProtocolInterface: 6A7A5CFF-E8D9-4F70-BADA-75AB3025CE14 7E3DD2C
InstallProtocolInterface: 18A031AB-B443-4D1A-A5C0-0C09261E9F71 7E3DD08
InstallProtocolInterface: 107A772C-D5E1-11D4-9A46-0090273FC14D 7E3DD20
InstallProtocolInterface: 6A7A5CFF-E8D9-4F70-BADA-75AB3025CE14 7E3DD2C
Loading driver 408EDCEC-CF6D-477C-A5A8-B4844E3DE281
InstallProtocolInterface: 5B1B31A1-9562-11D2-8E3F-00A0C969723B 774A2E8
Loading driver at 0x00007E34000 EntryPoint=0x00007E34260 ConSplitterDxe.efi
InstallProtocolInterface: BC62157E-3E33-4FEC-9920-2D3B36D750DF 774A450
InstallProtocolInterface: 18A031AB-B443-4D1A-A5C0-0C09261E9F71 7E39978
InstallProtocolInterface: 107A772C-D5E1-11D4-9A46-0090273FC14D 7E39C38
InstallProtocolInterface: 6A7A5CFF-E8D9-4F70-BADA-75AB3025CE14 7E39C44
InstallProtocolInterface: 18A031AB-B443-4D1A-A5C0-0C09261E9F71 7E399C0
InstallProtocolInterface: 107A772C-D5E1-11D4-9A46-0090273FC14D 7E39C50
InstallProtocolInterface: 6A7A5CFF-E8D9-4F70-BADA-75AB3025CE14 7E39C5C
InstallProtocolInterface: 18A031AB-B443-4D1A-A5C0-0C09261E9F71 7E399D8
InstallProtocolInterface: 107A772C-D5E1-11D4-9A46-0090273FC14D 7E39C68
InstallProtocolInterface: 6A7A5CFF-E8D9-4F70-BADA-75AB3025CE14 7E39C74
InstallProtocolInterface: 18A031AB-B443-4D1A-A5C0-0C09261E9F71 7E39990
InstallProtocolInterface: 107A772C-D5E1-11D4-9A46-0090273FC14D 7E39C80
InstallProtocolInterface: 6A7A5CFF-E8D9-4F70-BADA-75AB3025CE14 7E39C8C
InstallProtocolInterface: 18A031AB-B443-4D1A-A5C0-0C09261E9F71 7E399A8
InstallProtocolInterface: 107A772C-D5E1-11D4-9A46-0090273FC14D 7E39C98
InstallProtocolInterface: 6A7A5CFF-E8D9-4F70-BADA-75AB3025CE14 7E39CA4
InstallProtocolInterface: 387477C1-69C7-11D2-8E39-00A0C969723B 7E39A04
InstallProtocolInterface: DD9E7534-7762-4698-8C14-F58517A625AA 7E39A1C
InstallProtocolInterface: 31878C87-0B75-11D5-9A4F-0090273FC14D 7E39A48
InstallProtocolInterface: 8D59D32B-C655-4AE9-9B15-F25904992A43 7E39A84
InstallProtocolInterface: 387477C2-69C7-11D2-8E39-00A0C969723B 7E39B04
InstallProtocolInterface: 387477C2-69C7-11D2-8E39-00A0C969723B 7E39BA4
Loading driver CCCB0C28-4B24-11D5-9A5A-0090273FC14D
InstallProtocolInterface: 5B1B31A1-9562-11D2-8E3F-00A0C969723B 7740028
Loading driver at 0x00007E2E000 EntryPoint=0x00007E2E260 GraphicsConsoleDxe.efi
InstallProtocolInterface: BC62157E-3E33-4FEC-9920-2D3B36D750DF 7740F10
InstallProtocolInterface: 18A031AB-B443-4D1A-A5C0-0C09261E9F71 7E33358
InstallProtocolInterface: 107A772C-D5E1-11D4-9A46-0090273FC14D 7E33370
InstallProtocolInterface: 6A7A5CFF-E8D9-4F70-BADA-75AB3025CE14 7E3337C
Loading driver 9E863906-A40F-4875-977F-5B93FF237FC6
InstallProtocolInterface: 5B1B31A1-9562-11D2-8E3F-00A0C969723B 7740228
Loading driver at 0x00007E27000 EntryPoint=0x00007E27260 TerminalDxe.efi
InstallProtocolInterface: BC62157E-3E33-4FEC-9920-2D3B36D750DF 7740890
InstallProtocolInterface: 18A031AB-B443-4D1A-A5C0-0C09261E9F71 7E2D188
InstallProtocolInterface: 107A772C-D5E1-11D4-9A46-0090273FC14D 7E2D278
InstallProtocolInterface: 6A7A5CFF-E8D9-4F70-BADA-75AB3025CE14 7E2D284
Loading driver 6B38F7B4-AD98-40E9-9093-ACA2B5A253C4
InstallProtocolInterface: 5B1B31A1-9562-11D2-8E3F-00A0C969723B 77403E8
Loading driver at 0x00007E22000 EntryPoint=0x00007E22260 DiskIoDxe.efi
InstallProtocolInterface: BC62157E-3E33-4FEC-9920-2D3B36D750DF 7740590
InstallProtocolInterface: 18A031AB-B443-4D1A-A5C0-0C09261E9F71 7E25F80
InstallProtocolInterface: 107A772C-D5E1-11D4-9A46-0090273FC14D 7E25FE8
InstallProtocolInterface: 6A7A5CFF-E8D9-4F70-BADA-75AB3025CE14 7E25FF4
Loading driver 1FA1F39E-FEFF-4AAE-BD7B-38A070A3B609
InstallProtocolInterface: 5B1B31A1-9562-11D2-8E3F-00A0C969723B 77460A8
Loading driver at 0x00007E1C000 EntryPoint=0x00007E1C260 PartitionDxe.efi
InstallProtocolInterface: BC62157E-3E33-4FEC-9920-2D3B36D750DF 7746DD0
InstallProtocolInterface: 18A031AB-B443-4D1A-A5C0-0C09261E9F71 7E20E40
InstallProtocolInterface: 107A772C-D5E1-11D4-9A46-0090273FC14D 7E20E68
InstallProtocolInterface: 6A7A5CFF-E8D9-4F70-BADA-75AB3025CE14 7E20E74
Loading driver CD3BAFB6-50FB-4FE8-8E4E-AB74D2C1A600
InstallProtocolInterface: 5B1B31A1-9562-11D2-8E3F-00A0C969723B 77461E8
Loading driver at 0x00007E19000 EntryPoint=0x00007E19260 EnglishDxe.efi
InstallProtocolInterface: BC62157E-3E33-4FEC-9920-2D3B36D750DF 77468D0
InstallProtocolInterface: 1D85CD7F-F43D-11D2-9A0C-0090273FC14D 7E1ACE0
InstallProtocolInterface: A4C751FC-23AE-4C3E-92E9-4964CF63F349 7E1ACFC
Loading driver 0167CCC4-D0F7-4F21-A3EF-9E64B7CDCE8B
InstallProtocolInterface: 5B1B31A1-9562-11D2-8E3F-00A0C969723B 7746428
Loading driver at 0x00007E15000 EntryPoint=0x00007E15260 ScsiBus.efi
InstallProtocolInterface: BC62157E-3E33-4FEC-9920-2D3B36D750DF 7746550
InstallProtocolInterface: 18A031AB-B443-4D1A-A5C0-0C09261E9F71 7E18870
InstallProtocolInterface: 107A772C-D5E1-11D4-9A46-0090273FC14D 7E18888
InstallProtocolInterface: 6A7A5CFF-E8D9-4F70-BADA-75AB3025CE14 7E18894
Loading driver 0A66E322-3740-4CCE-AD62-BD172CECCA35
InstallProtocolInterface: 5B1B31A1-9562-11D2-8E3F-00A0C969723B 7745CA8
Loading driver at 0x00007E0F000 EntryPoint=0x00007E0F260 ScsiDisk.efi
InstallProtocolInterface: BC62157E-3E33-4FEC-9920-2D3B36D750DF 7745BD0
InstallProtocolInterface: 18A031AB-B443-4D1A-A5C0-0C09261E9F71 7E14700
InstallProtocolInterface: 107A772C-D5E1-11D4-9A46-0090273FC14D 7E14738
InstallProtocolInterface: 6A7A5CFF-E8D9-4F70-BADA-75AB3025CE14 7E14744
Loading driver 021722D8-522B-4079-852A-FE44C2C13F49
InstallProtocolInterface: 5B1B31A1-9562-11D2-8E3F-00A0C969723B 77456A8
Loading driver at 0x00007E0C000 EntryPoint=0x00007E0C260 SataController.efi
InstallProtocolInterface: BC62157E-3E33-4FEC-9920-2D3B36D750DF 7745810
InstallProtocolInterface: 18A031AB-B443-4D1A-A5C0-0C09261E9F71 7E0ED00
InstallProtocolInterface: 107A772C-D5E1-11D4-9A46-0090273FC14D 7E0ED18
InstallProtocolInterface: 6A7A5CFF-E8D9-4F70-BADA-75AB3025CE14 7E0ED24
Loading driver 5E523CB4-D397-4986-87BD-A6DD8B22F455
InstallProtocolInterface: 5B1B31A1-9562-11D2-8E3F-00A0C969723B 7745268
Loading driver at 0x00007E03000 EntryPoint=0x00007E03260 AtaAtapiPassThruDxe.efi
InstallProtocolInterface: BC62157E-3E33-4FEC-9920-2D3B36D750DF 7745390
InstallProtocolInterface: 18A031AB-B443-4D1A-A5C0-0C09261E9F71 7E0B680
InstallProtocolInterface: 107A772C-D5E1-11D4-9A46-0090273FC14D 7E0B7EC
InstallProtocolInterface: 6A7A5CFF-E8D9-4F70-BADA-75AB3025CE14 7E0B7F8
Loading driver 19DF145A-B1D4-453F-8507-38816676D7F6
InstallProtocolInterface: 5B1B31A1-9562-11D2-8E3F-00A0C969723B 77449A8
Loading driver at 0x00007DFD000 EntryPoint=0x00007DFD260 AtaBusDxe.efi
InstallProtocolInterface: BC62157E-3E33-4FEC-9920-2D3B36D750DF 7744AD0
InstallProtocolInterface: 18A031AB-B443-4D1A-A5C0-0C09261E9F71 7E02468
InstallProtocolInterface: 107A772C-D5E1-11D4-9A46-0090273FC14D 7E02600
InstallProtocolInterface: 6A7A5CFF-E8D9-4F70-BADA-75AB3025CE14 7E0260C
Loading driver 38A0EC22-FBE7-4911-8BC1-176E0D6C1DBD
InstallProtocolInterface: 5B1B31A1-9562-11D2-8E3F-00A0C969723B 77446E8
Loading driver at 0x00007DFA000 EntryPoint=0x00007DFA260 IsaAcpi.efi
InstallProtocolInterface: BC62157E-3E33-4FEC-9920-2D3B36D750DF 7744190
InstallProtocolInterface: 18A031AB-B443-4D1A-A5C0-0C09261E9F71 7DFC448
InstallProtocolInterface: 107A772C-D5E1-11D4-9A46-0090273FC14D 7DFC42C
InstallProtocolInterface: 6A7A5CFF-E8D9-4F70-BADA-75AB3025CE14 7DFC420
Loading driver 240612B5-A063-11D4-9A3A-0090273FC14D
InstallProtocolInterface: 5B1B31A1-9562-11D2-8E3F-00A0C969723B 7744328
Loading driver at 0x00007DF6000 EntryPoint=0x00007DF6260 IsaBusDxe.efi
InstallProtocolInterface: BC62157E-3E33-4FEC-9920-2D3B36D750DF 7743010
InstallProtocolInterface: 18A031AB-B443-4D1A-A5C0-0C09261E9F71 7DF944C
InstallProtocolInterface: 107A772C-D5E1-11D4-9A46-0090273FC14D 7DF9464
InstallProtocolInterface: 6A7A5CFF-E8D9-4F70-BADA-75AB3025CE14 7DF9470
Loading driver 93B80003-9FB3-11D4-9A3A-0090273FC14D
InstallProtocolInterface: 5B1B31A1-9562-11D2-8E3F-00A0C969723B 77439A8
Loading driver at 0x00007DF1000 EntryPoint=0x00007DF1260 IsaSerialDxe.efi
InstallProtocolInterface: BC62157E-3E33-4FEC-9920-2D3B36D750DF 7743B50
InstallProtocolInterface: 18A031AB-B443-4D1A-A5C0-0C09261E9F71 7DF52B0
InstallProtocolInterface: 107A772C-D5E1-11D4-9A46-0090273FC14D 7DF5378
InstallProtocolInterface: 6A7A5CFF-E8D9-4F70-BADA-75AB3025CE14 7DF5384
Loading driver 3DC82376-637B-40A6-A8FC-A565417F2C38
InstallProtocolInterface: 5B1B31A1-9562-11D2-8E3F-00A0C969723B 7743768
Loading driver at 0x00007DEB000 EntryPoint=0x00007DEB260 Ps2KeyboardDxe.efi
InstallProtocolInterface: BC62157E-3E33-4FEC-9920-2D3B36D750DF 7743590
InstallProtocolInterface: 18A031AB-B443-4D1A-A5C0-0C09261E9F71 7DEFD1C
InstallProtocolInterface: 107A772C-D5E1-11D4-9A46-0090273FC14D 7DEFD34
InstallProtocolInterface: 6A7A5CFF-E8D9-4F70-BADA-75AB3025CE14 7DEFD40
Loading driver 0ABD8284-6DA3-4616-971A-83A5148067BA
InstallProtocolInterface: 5B1B31A1-9562-11D2-8E3F-00A0C969723B 773A028
Loading driver at 0x00007DE6000 EntryPoint=0x00007DE6260 IsaFloppyDxe.efi
InstallProtocolInterface: BC62157E-3E33-4FEC-9920-2D3B36D750DF 77433D0
InstallProtocolInterface: 18A031AB-B443-4D1A-A5C0-0C09261E9F71 7DEA438
InstallProtocolInterface: 107A772C-D5E1-11D4-9A46-0090273FC14D 7DEA450
InstallProtocolInterface: 6A7A5CFF-E8D9-4F70-BADA-75AB3025CE14 7DEA45C
Loading driver FA20568B-548B-4B2B-81EF-1BA08D4A3CEC
InstallProtocolInterface: 5B1B31A1-9562-11D2-8E3F-00A0C969723B 773AAE8
Loading driver at 0x00007DDB000 EntryPoint=0x00007DDB260 BootScriptExecutorDxe.efi
InstallProtocolInterface: BC62157E-3E33-4FEC-9920-2D3B36D750DF 773AD10
Loading driver 961578FE-B6B7-44C3-AF35-6BC705CD2B1F
InstallProtocolInterface: 5B1B31A1-9562-11D2-8E3F-00A0C969723B 773A868
Loading driver at 0x00007DD6000 EntryPoint=0x00007DD6463
InstallProtocolInterface: BC62157E-3E33-4FEC-9920-2D3B36D750DF 773A690
InstallProtocolInterface: 18A031AB-B443-4D1A-A5C0-0C09261E9F71 7DD6300
InstallProtocolInterface: 107A772C-D5E1-11D4-9A46-0090273FC14D 7DD6370
InstallProtocolInterface: 6A7A5CFF-E8D9-4F70-BADA-75AB3025CE14 7DD637C
Loading driver A2F436EA-A127-4EF8-957C-8048606FF670
InstallProtocolInterface: 5B1B31A1-9562-11D2-8E3F-00A0C969723B 773F028
Loading driver at 0x00007DCF000 EntryPoint=0x00007DCF265 SnpDxe.efi
InstallProtocolInterface: BC62157E-3E33-4FEC-9920-2D3B36D750DF 773A4D0
InstallProtocolInterface: 18A031AB-B443-4D1A-A5C0-0C09261E9F71 7DD51A0
InstallProtocolInterface: 107A772C-D5E1-11D4-9A46-0090273FC14D 7DD51B8
InstallProtocolInterface: 6A7A5CFF-E8D9-4F70-BADA-75AB3025CE14 7DD51C4
Loading driver 025BBFC7-E6A9-4B8B-82AD-6815A1AEAF4A
InstallProtocolInterface: 5B1B31A1-9562-11D2-8E3F-00A0C969723B 773FAE8
Loading driver at 0x00007DC6000 EntryPoint=0x00007DC6265 MnpDxe.efi
InstallProtocolInterface: BC62157E-3E33-4FEC-9920-2D3B36D750DF 773FCD0
InstallProtocolInterface: 18A031AB-B443-4D1A-A5C0-0C09261E9F71 7DCE660
InstallProtocolInterface: 107A772C-D5E1-11D4-9A46-0090273FC14D 7DCE678
InstallProtocolInterface: 6A7A5CFF-E8D9-4F70-BADA-75AB3025CE14 7DCE684
Loading driver E4F61863-FE2C-4B56-A8F4-08519BC439DF
InstallProtocolInterface: 5B1B31A1-9562-11D2-8E3F-00A0C969723B 773F268
Loading driver at 0x00007DC0000 EntryPoint=0x00007DC0265 VlanConfigDxe.efi
InstallProtocolInterface: BC62157E-3E33-4FEC-9920-2D3B36D750DF 773F8D0
InstallProtocolInterface: 18A031AB-B443-4D1A-A5C0-0C09261E9F71 7DC5758
InstallProtocolInterface: 107A772C-D5E1-11D4-9A46-0090273FC14D 7DC5B54
InstallProtocolInterface: 6A7A5CFF-E8D9-4F70-BADA-75AB3025CE14 7DC5B60
Loading driver 529D3F93-E8E9-4E73-B1E1-BDF6A9D50113
InstallProtocolInterface: 5B1B31A1-9562-11D2-8E3F-00A0C969723B 773E028
Loading driver at 0x00007DBA000 EntryPoint=0x00007DBA265 ArpDxe.efi
InstallProtocolInterface: BC62157E-3E33-4FEC-9920-2D3B36D750DF 773F550
InstallProtocolInterface: 18A031AB-B443-4D1A-A5C0-0C09261E9F71 7DBF31C
InstallProtocolInterface: 107A772C-D5E1-11D4-9A46-0090273FC14D 7DBF334
InstallProtocolInterface: 6A7A5CFF-E8D9-4F70-BADA-75AB3025CE14 7DBF340
Loading driver 94734718-0BBC-47FB-96A5-EE7A5AE6A2AD
InstallProtocolInterface: 5B1B31A1-9562-11D2-8E3F-00A0C969723B 773EAE8
Loading driver at 0x00007DB1000 EntryPoint=0x00007DB1265 Dhcp4Dxe.efi
InstallProtocolInterface: BC62157E-3E33-4FEC-9920-2D3B36D750DF 773ECD0
InstallProtocolInterface: 18A031AB-B443-4D1A-A5C0-0C09261E9F71 7DB94B4
InstallProtocolInterface: 107A772C-D5E1-11D4-9A46-0090273FC14D 7DB94D4
InstallProtocolInterface: 6A7A5CFF-E8D9-4F70-BADA-75AB3025CE14 7DB94E0
Loading driver 9FB1A1F3-3B71-4324-B39A-745CBB015FFF
InstallProtocolInterface: 5B1B31A1-9562-11D2-8E3F-00A0C969723B 773E228
Loading driver at 0x00007DA0000 EntryPoint=0x00007DA0265 Ip4Dxe.efi
InstallProtocolInterface: BC62157E-3E33-4FEC-9920-2D3B36D750DF 773E610
InstallProtocolInterface: 18A031AB-B443-4D1A-A5C0-0C09261E9F71 7DAF36C
InstallProtocolInterface: 107A772C-D5E1-11D4-9A46-0090273FC14D 7DAF770
InstallProtocolInterface: 6A7A5CFF-E8D9-4F70-BADA-75AB3025CE14 7DAF77C
Loading driver DC3641B8-2FA8-4ED3-BC1F-F9962A03454B
InstallProtocolInterface: 5B1B31A1-9562-11D2-8E3F-00A0C969723B 773D028
Loading driver at 0x00006E82000 EntryPoint=0x00006E82265 Mtftp4Dxe.efi
InstallProtocolInterface: BC62157E-3E33-4FEC-9920-2D3B36D750DF 773DE90
InstallProtocolInterface: 18A031AB-B443-4D1A-A5C0-0C09261E9F71 6E896B0
InstallProtocolInterface: 107A772C-D5E1-11D4-9A46-0090273FC14D 6E896D0
InstallProtocolInterface: 6A7A5CFF-E8D9-4F70-BADA-75AB3025CE14 6E896DC
Loading driver 6D6963AB-906D-4A65-A7CA-BD40E5D6AF2B
InstallProtocolInterface: 5B1B31A1-9562-11D2-8E3F-00A0C969723B 773DBA8
Loading driver at 0x00006E7A000 EntryPoint=0x00006E7A265 Udp4Dxe.efi
InstallProtocolInterface: BC62157E-3E33-4FEC-9920-2D3B36D750DF 773DA10
InstallProtocolInterface: 18A031AB-B443-4D1A-A5C0-0C09261E9F71 6E81240
InstallProtocolInterface: 107A772C-D5E1-11D4-9A46-0090273FC14D 6E81260
InstallProtocolInterface: 6A7A5CFF-E8D9-4F70-BADA-75AB3025CE14 6E8126C
Loading driver 6D6963AB-906D-4A65-A7CA-BD40E5D6AF4D
InstallProtocolInterface: 5B1B31A1-9562-11D2-8E3F-00A0C969723B 773D6A8
Loading driver at 0x00006E6C000 EntryPoint=0x00006E6C265 Tcp4Dxe.efi
InstallProtocolInterface: BC62157E-3E33-4FEC-9920-2D3B36D750DF 773D410
InstallProtocolInterface: 18A031AB-B443-4D1A-A5C0-0C09261E9F71 6E79548
InstallProtocolInterface: 107A772C-D5E1-11D4-9A46-0090273FC14D 6E79568
InstallProtocolInterface: 6A7A5CFF-E8D9-4F70-BADA-75AB3025CE14 6E79574
Loading driver 3B1DEAB5-C75D-442E-9238-8E2FFB62B0BB
InstallProtocolInterface: 5B1B31A1-9562-11D2-8E3F-00A0C969723B 773CE68
Loading driver at 0x00006E63000 EntryPoint=0x00006E63265 UefiPxe4BcDxe.efi
InstallProtocolInterface: BC62157E-3E33-4FEC-9920-2D3B36D750DF 773CD10
InstallProtocolInterface: 18A031AB-B443-4D1A-A5C0-0C09261E9F71 6E6B20C
InstallProtocolInterface: 107A772C-D5E1-11D4-9A46-0090273FC14D 6E6B224
InstallProtocolInterface: 6A7A5CFF-E8D9-4F70-BADA-75AB3025CE14 6E6B230
Loading driver 4579B72D-7EC4-4DD4-8486-083C86B182A7
InstallProtocolInterface: 5B1B31A1-9562-11D2-8E3F-00A0C969723B 773C168
Loading driver at 0x00006E54000 EntryPoint=0x00006E54265 IScsi4Dxe.efi
InstallProtocolInterface: BC62157E-3E33-4FEC-9920-2D3B36D750DF 773C7D0
InstallProtocolInterface: 18A031AB-B443-4D1A-A5C0-0C09261E9F71 6E61CA0
InstallProtocolInterface: 107A772C-D5E1-11D4-9A46-0090273FC14D 6E62420
InstallProtocolInterface: 6A7A5CFF-E8D9-4F70-BADA-75AB3025CE14 6E6242C
InstallProtocolInterface: 59324945-EC44-4C0D-B1CD-9DB139DF070C 6E61C48
InstallProtocolInterface: 09576E91-6D3F-11D2-8E39-00A0C969723B 6E61C88
InstallProtocolInterface: 330D4706-F2A0-4E4F-A369-B66FA8D54385 773C318
Loading driver A92CDB4B-82F1-4E0B-A516-8A655D371524
InstallProtocolInterface: 5B1B31A1-9562-11D2-8E3F-00A0C969723B 7739DE8
Loading driver at 0x00007D9C000 EntryPoint=0x00007D9C260 VirtioNetDxe.efi
InstallProtocolInterface: BC62157E-3E33-4FEC-9920-2D3B36D750DF 773BDD0
InstallProtocolInterface: 18A031AB-B443-4D1A-A5C0-0C09261E9F71 7D9FC30
InstallProtocolInterface: 107A772C-D5E1-11D4-9A46-0090273FC14D 7D9FC68
InstallProtocolInterface: 6A7A5CFF-E8D9-4F70-BADA-75AB3025CE14 7D9FC74
Loading driver 2FB92EFA-2EE0-4BAE-9EB6-7464125E1EF7
InstallProtocolInterface: 5B1B31A1-9562-11D2-8E3F-00A0C969723B 773B928
Loading driver at 0x00006E4D000 EntryPoint=0x00006E4D260 UhciDxe.efi
InstallProtocolInterface: BC62157E-3E33-4FEC-9920-2D3B36D750DF 773BA50
InstallProtocolInterface: 18A031AB-B443-4D1A-A5C0-0C09261E9F71 6E52E50
InstallProtocolInterface: 107A772C-D5E1-11D4-9A46-0090273FC14D 6E52E68
InstallProtocolInterface: 6A7A5CFF-E8D9-4F70-BADA-75AB3025CE14 6E52E74
Loading driver BDFE430E-8F2A-4DB0-9991-6F856594777E
InstallProtocolInterface: 5B1B31A1-9562-11D2-8E3F-00A0C969723B 773B668
Loading driver at 0x00006E45000 EntryPoint=0x00006E45260 EhciDxe.efi
InstallProtocolInterface: BC62157E-3E33-4FEC-9920-2D3B36D750DF 773B5D0
InstallProtocolInterface: 18A031AB-B443-4D1A-A5C0-0C09261E9F71 6E4C118
InstallProtocolInterface: 107A772C-D5E1-11D4-9A46-0090273FC14D 6E4C130
InstallProtocolInterface: 6A7A5CFF-E8D9-4F70-BADA-75AB3025CE14 6E4C13C
Loading driver B7F50E91-A759-412C-ADE4-DCD03E7F7C28
InstallProtocolInterface: 5B1B31A1-9562-11D2-8E3F-00A0C969723B 773B3A8
Loading driver at 0x00006E3A000 EntryPoint=0x00006E3A260 XhciDxe.efi
InstallProtocolInterface: BC62157E-3E33-4FEC-9920-2D3B36D750DF 772DE90
InstallProtocolInterface: 18A031AB-B443-4D1A-A5C0-0C09261E9F71 6E44878
InstallProtocolInterface: 107A772C-D5E1-11D4-9A46-0090273FC14D 6E448C8
InstallProtocolInterface: 6A7A5CFF-E8D9-4F70-BADA-75AB3025CE14 6E448D4
Loading driver 240612B7-A063-11D4-9A3A-0090273FC14D
InstallProtocolInterface: 5B1B31A1-9562-11D2-8E3F-00A0C969723B 772DB28
Loading driver at 0x00006E31000 EntryPoint=0x00006E31260 UsbBusDxe.efi
InstallProtocolInterface: BC62157E-3E33-4FEC-9920-2D3B36D750DF 772D090
InstallProtocolInterface: 18A031AB-B443-4D1A-A5C0-0C09261E9F71 6E38C1C
InstallProtocolInterface: 107A772C-D5E1-11D4-9A46-0090273FC14D 6E38C34
InstallProtocolInterface: 6A7A5CFF-E8D9-4F70-BADA-75AB3025CE14 6E38C40
Loading driver 2D2E62CF-9ECF-43B7-8219-94E7FC713DFE
InstallProtocolInterface: 5B1B31A1-9562-11D2-8E3F-00A0C969723B 772D9A8
Loading driver at 0x00006E2B000 EntryPoint=0x00006E2B260 UsbKbDxe.efi
InstallProtocolInterface: BC62157E-3E33-4FEC-9920-2D3B36D750DF 772D850
InstallProtocolInterface: 18A031AB-B443-4D1A-A5C0-0C09261E9F71 6E30990
InstallProtocolInterface: 107A772C-D5E1-11D4-9A46-0090273FC14D 6E309A8
InstallProtocolInterface: 6A7A5CFF-E8D9-4F70-BADA-75AB3025CE14 6E309B4
Loading driver 9FB4B4A7-42C0-4BCD-8540-9BCC6711F83E
InstallProtocolInterface: 5B1B31A1-9562-11D2-8E3F-00A0C969723B 772D6E8
Loading driver at 0x00006E26000 EntryPoint=0x00006E26260 UsbMassStorageDxe.efi
InstallProtocolInterface: BC62157E-3E33-4FEC-9920-2D3B36D750DF 7733E50
InstallProtocolInterface: 18A031AB-B443-4D1A-A5C0-0C09261E9F71 6E2AC14
InstallProtocolInterface: 107A772C-D5E1-11D4-9A46-0090273FC14D 6E2AC2C
InstallProtocolInterface: 6A7A5CFF-E8D9-4F70-BADA-75AB3025CE14 6E2AC38
Loading driver E3752948-B9A1-4770-90C4-DF41C38986BE
InstallProtocolInterface: 5B1B31A1-9562-11D2-8E3F-00A0C969723B 7733B28
Loading driver at 0x00006E1C000 EntryPoint=0x00006E1C260 QemuVideoDxe.efi
InstallProtocolInterface: BC62157E-3E33-4FEC-9920-2D3B36D750DF 7733DD0
InstallProtocolInterface: 18A031AB-B443-4D1A-A5C0-0C09261E9F71 6E213B4
InstallProtocolInterface: 107A772C-D5E1-11D4-9A46-0090273FC14D 6E21424
InstallProtocolInterface: 6A7A5CFF-E8D9-4F70-BADA-75AB3025CE14 6E21430
InstallProtocolInterface: 5C198761-16A8-4E69-972C-89D67954F81D 6E20F90
[BdsDxe] Locate Variable Lock protocol – Success
[Variable] Lock: 8BE4DF61-93CA-11D2-AA0D-00E098032B8C:PlatformLangCodes Success
[Variable] Lock: 8BE4DF61-93CA-11D2-AA0D-00E098032B8C:LangCodes Success
[Variable] Lock: 8BE4DF61-93CA-11D2-AA0D-00E098032B8C:BootOptionSupport Success
[Variable] Lock: 8BE4DF61-93CA-11D2-AA0D-00E098032B8C:HwErrRecSupport Success
[Variable] Lock: 8BE4DF61-93CA-11D2-AA0D-00E098032B8C:OsIndicationsSupported Success
Variable Driver Auto Update Lang, Lang:eng, PlatformLang:en Status: Success
InstallProtocolInterface: 09576E91-6D3F-11D2-8E39-00A0C969723B 7E99210
InstallProtocolInterface: 330D4706-F2A0-4E4F-A369-B66FA8D54385 7E991D8
InstallProtocolInterface: 09576E91-6D3F-11D2-8E39-00A0C969723B 7E99228
InstallProtocolInterface: 330D4706-F2A0-4E4F-A369-B66FA8D54385 7E991E4
InstallProtocolInterface: 09576E91-6D3F-11D2-8E39-00A0C969723B 7E99260
InstallProtocolInterface: 330D4706-F2A0-4E4F-A369-B66FA8D54385 7E99284
InstallProtocolInterface: 09576E91-6D3F-11D2-8E39-00A0C969723B 7E9A19C
InstallProtocolInterface: 330D4706-F2A0-4E4F-A369-B66FA8D54385 7E9A190
PlatformBdsInit
Registered NotifyDevPath Event
PlatformBdsPolicyBehavior
PCI Bus First Scanning
PciBus: Discovered PCI @ [00|00|00]
PciBus: Discovered PCI @ [00|01|00]
PciBus: Discovered PCI @ [00|01|01]
BAR[4]: Type = Io32; Alignment = 0xF; Length = 0x10; Offset = 0x20
PciBus: Discovered PCI @ [00|01|03]
PciBus: Discovered PCI @ [00|02|00]
BAR[0]: Type = PMem32; Alignment = 0xFFFFFF; Length = 0x1000000; Offset = 0x10
BAR[2]: Type = Mem32; Alignment = 0xFFF; Length = 0x1000; Offset = 0x18
PciBus: Discovered PCI @ [00|03|00]
BAR[0]: Type = Mem32; Alignment = 0x1FFFF; Length = 0x20000; Offset = 0x10
BAR[1]: Type = Io32; Alignment = 0x3F; Length = 0x40; Offset = 0x14
PciBus: HostBridge->SubmitResources() – Success
PciBus: HostBridge->NotifyPhase(AllocateResources) – Success
PciBus: Resource Map for Root Bridge PciRoot(0x0)
Type = Io16; Base = 0xC000; Length = 0x1000; Alignment = 0xFFF
Base = 0xC000; Length = 0x40; Alignment = 0x3F; Owner = PCI [00|03|00:14]
Base = 0xC040; Length = 0x10; Alignment = 0xF; Owner = PCI [00|01|01:20]
Type = Mem32; Base = 0x80000000; Length = 0x1100000; Alignment = 0xFFFFFF
Base = 0x80000000; Length = 0x1000000; Alignment = 0xFFFFFF; Owner = PCI [00|02|00:10]
Base = 0x81000000; Length = 0x20000; Alignment = 0x1FFFF; Owner = PCI [00|03|00:10]
Base = 0x81020000; Length = 0x1000; Alignment = 0xFFF; Owner = PCI [00|02|00:18]
InstallProtocolInterface: 30CFE3E7-3DE1-4586-BE20-DEABA1B3B793 0
OnPciEnumerated: PCI enumeration complete, installing ACPI tables
Select Item: 0x19
Select Item: 0x27
Select Item: 0x19
Select Item: 0x29
Select Item: 0x19
Select Item: 0x26
InstallQemuFwCfgTables: installed 6 tables
InstallProtocolInterface: 09576E91-6D3F-11D2-8E39-00A0C969723B 7734E10
InstallProtocolInterface: 4CF5B200-68B8-4CA5-9EEC-B23E3F50029A 772E758
InstallProtocolInterface: 09576E91-6D3F-11D2-8E39-00A0C969723B 7734DD0
InstallProtocolInterface: 4CF5B200-68B8-4CA5-9EEC-B23E3F50029A 772E418
InstallProtocolInterface: 09576E91-6D3F-11D2-8E39-00A0C969723B 7734050
InstallProtocolInterface: 4CF5B200-68B8-4CA5-9EEC-B23E3F50029A 772EC98
InstallProtocolInterface: 09576E91-6D3F-11D2-8E39-00A0C969723B 7734010
InstallProtocolInterface: 4CF5B200-68B8-4CA5-9EEC-B23E3F50029A 7734098
InstallProtocolInterface: 09576E91-6D3F-11D2-8E39-00A0C969723B 7734B90
InstallProtocolInterface: 4CF5B200-68B8-4CA5-9EEC-B23E3F50029A 7726018
InstallProtocolInterface: 09576E91-6D3F-11D2-8E39-00A0C969723B 7738490
InstallProtocolInterface: 4CF5B200-68B8-4CA5-9EEC-B23E3F50029A 7726BD8
InstallProtocolInterface: 4006C0C1-FCB3-403E-996D-4A6C8724E06D 7726C44
InstallProtocolInterface: 5B1B31A1-9562-11D2-8E3F-00A0C969723B 771BBA8
Loading driver at 0x00006D83000 EntryPoint=0x00006D867F2 8086100e.efi
InstallProtocolInterface: BC62157E-3E33-4FEC-9920-2D3B36D750DF 771BA50
InstallProtocolInterface: 18A031AB-B443-4D1A-A5C0-0C09261E9F71 6D991C4
InstallProtocolInterface: 6A7A5CFF-E8D9-4F70-BADA-75AB3025CE14 6D991B0
InstallProtocolInterface: 3BC1B285-8A15-4A82-AABF-4D7D13FB3265 7726C38
[Variable]END_OF_DXE is signaled
Initialize variable error flag (FF)
S3Ready!
AcpiS3Context: AcpiFacsTable is 0x 7F7D000
AcpiS3Context: IdtrProfile is 0x 7F70800
AcpiS3Context: S3NvsPageTableAddress is 0x 0
AcpiS3Context: S3DebugBufferAddress is 0x 7F6F000
Select Item: 0x19
Select Item: 0x25
InstallProtocolInterface: 60FF8964-E906-41D0-AFED-F241E974E08E 0
InstallProtocolInterface: FA20568B-548B-4B2B-81EF-1BA08D4A3CEC 0
Found Mass Storage device: PciRoot(0x0)/Pci(0x1,0x1)
SataControllerStart START
InstallProtocolInterface: A1E37052-80D9-4E65-A317-3E9A55C43EC9 775D0D4
SataControllerStart END status = Success
==AtaAtapiPassThru Start== Controller = 7726890
[secondary] channel [master] [cdrom ] device
CalculateBestPioMode: AdvancedPioMode = 3
IdeInitCalculateMode: PioMode = 3
CalculateBestUdmaMode: DeviceUDmaMode = 203F
IdeInitCalculateMode: UdmaMode = 5
InstallProtocolInterface: 1D3DE7F0-0807-424F-AA69-11A54E19A46F 76E9A68
InstallProtocolInterface: 143B7632-B81B-4CB7-ABD3-B625A5B9BFFE 76E9A94
InstallProtocolInterface: 19DF145A-B1D4-453F-8507-38816676D7F6 76E8FD0
InstallProtocolInterface: 0167CCC4-D0F7-4F21-A3EF-9E64B7CDCE8B 76E8C58
InstallProtocolInterface: 09576E91-6D3F-11D2-8E39-00A0C969723B 76E8350
InstallProtocolInterface: 932F47E6-2362-4002-803E-3CD54B138F85 76E8B18
InstallProtocolInterface: 964E5B21-6459-11D2-8E39-00A0C969723B 76E8418
InstallProtocolInterface: D432A67F-14DC-484B-B3BB-3F0291849327 76E84DC
InstallProtocolInterface: CE345171-BA0B-11D2-8E4F-00A0C969723B 76E7CD8
BlockSize : 2048
LastBlock : 0
PlatformBdsGetDriverOption
Boot Mode:0
Found LPC Bridge device
BdsPlatform.c+210: COM1 DevPath: PciRoot(0x0)/Pci(0x1,0x0)/Serial(0x0)/Uart(115200,8,N,1)/VenPcAnsi()
BdsPlatform.c+239: COM2 DevPath: PciRoot(0x0)/Pci(0x1,0x0)/Serial(0x1)/Uart(115200,8,N,1)/VenPcAnsi()
Found PCI VGA device
QemuVideo: QEMU Standard VGA detected
QemuVideo: Using mmio bar @ 0x81020000
InstallProtocolInterface: 09576E91-6D3F-11D2-8E39-00A0C969723B 76E7A90
Adding Mode 0 as Bochs Internal Mode 0: 640×480, 32-bit, 60 Hz
Adding Mode 1 as Bochs Internal Mode 1: 800×480, 32-bit, 60 Hz
Adding Mode 2 as Bochs Internal Mode 2: 800×600, 32-bit, 60 Hz
Adding Mode 3 as Bochs Internal Mode 3: 832×624, 32-bit, 60 Hz
Adding Mode 4 as Bochs Internal Mode 4: 960×640, 32-bit, 60 Hz
Adding Mode 5 as Bochs Internal Mode 5: 1024×600, 32-bit, 60 Hz
Adding Mode 6 as Bochs Internal Mode 6: 1024×768, 32-bit, 60 Hz
Adding Mode 7 as Bochs Internal Mode 7: 1152×864, 32-bit, 60 Hz
Adding Mode 8 as Bochs Internal Mode 8: 1152×870, 32-bit, 60 Hz
Adding Mode 9 as Bochs Internal Mode 9: 1280×720, 32-bit, 60 Hz
Adding Mode 10 as Bochs Internal Mode 10: 1280×760, 32-bit, 60 Hz
Adding Mode 11 as Bochs Internal Mode 11: 1280×768, 32-bit, 60 Hz
Adding Mode 12 as Bochs Internal Mode 12: 1280×800, 32-bit, 60 Hz
Adding Mode 13 as Bochs Internal Mode 13: 1280×960, 32-bit, 60 Hz
Adding Mode 14 as Bochs Internal Mode 14: 1280×1024, 32-bit, 60 Hz
Adding Mode 15 as Bochs Internal Mode 15: 1360×768, 32-bit, 60 Hz
Adding Mode 16 as Bochs Internal Mode 16: 1366×768, 32-bit, 60 Hz
Adding Mode 17 as Bochs Internal Mode 17: 1400×1050, 32-bit, 60 Hz
Adding Mode 18 as Bochs Internal Mode 18: 1440×900, 32-bit, 60 Hz
Adding Mode 19 as Bochs Internal Mode 19: 1600×900, 32-bit, 60 Hz
Adding Mode 20 as Bochs Internal Mode 20: 1600×1200, 32-bit, 60 Hz
Adding Mode 21 as Bochs Internal Mode 21: 1680×1050, 32-bit, 60 Hz
Adding Mode 22 as Bochs Internal Mode 22: 1920×1080, 32-bit, 60 Hz
Adding Mode 23 as Bochs Internal Mode 23: 1920×1200, 32-bit, 60 Hz
Adding Mode 24 as Bochs Internal Mode 24: 1920×1440, 32-bit, 60 Hz
Adding Mode 25 as Bochs Internal Mode 25: 2000×2000, 32-bit, 60 Hz
Adding Mode 26 as Bochs Internal Mode 26: 2048×1536, 32-bit, 60 Hz
Adding Mode 27 as Bochs Internal Mode 27: 2048×2048, 32-bit, 60 Hz
Adding Mode 28 as Bochs Internal Mode 28: 2560×1440, 32-bit, 60 Hz
Adding Mode 29 as Bochs Internal Mode 29: 2560×1600, 32-bit, 60 Hz
InitializeBochsGraphicsMode: 640×480 @ 32
PixelBlueGreenRedReserved8BitPerColor
FrameBufferBase: 0x80000000, FrameBufferSize: 0x12C000
0: shl:0 shr:0 mask:FF0000
1: shl:0 shr:0 mask:FF00
2: shl:0 shr:0 mask:FF
Bytes per pixel: 4
InstallProtocolInterface: 9042A9DE-23DC-4A38-96FB-7ADED080516A 76E7628
InstallVbeShim: VBE shim installed
PixelBlueGreenRedReserved8BitPerColor
PixelBlueGreenRedReserved8BitPerColor
PixelBlueGreenRedReserved8BitPerColor
PixelBlueGreenRedReserved8BitPerColor
PixelBlueGreenRedReserved8BitPerColor
PixelBlueGreenRedReserved8BitPerColor
PixelBlueGreenRedReserved8BitPerColor
PixelBlueGreenRedReserved8BitPerColor
PixelBlueGreenRedReserved8BitPerColor
PixelBlueGreenRedReserved8BitPerColor
PixelBlueGreenRedReserved8BitPerColor
PixelBlueGreenRedReserved8BitPerColor
PixelBlueGreenRedReserved8BitPerColor
PixelBlueGreenRedReserved8BitPerColor
PixelBlueGreenRedReserved8BitPerColor
PixelBlueGreenRedReserved8BitPerColor
PixelBlueGreenRedReserved8BitPerColor
PixelBlueGreenRedReserved8BitPerColor
PixelBlueGreenRedReserved8BitPerColor
PixelBlueGreenRedReserved8BitPerColor
PixelBlueGreenRedReserved8BitPerColor
PixelBlueGreenRedReserved8BitPerColor
PixelBlueGreenRedReserved8BitPerColor
PixelBlueGreenRedReserved8BitPerColor
PixelBlueGreenRedReserved8BitPerColor
PixelBlueGreenRedReserved8BitPerColor
PixelBlueGreenRedReserved8BitPerColor
PixelBlueGreenRedReserved8BitPerColor
PixelBlueGreenRedReserved8BitPerColor
PixelBlueGreenRedReserved8BitPerColor
InstallProtocolInterface: 64A892DC-5561-4536-92C7-799BFC183355 76C3D18
InstallProtocolInterface: 09576E91-6D3F-11D2-8E39-00A0C969723B 76E74D0
InstallProtocolInterface: 7EE2BD44-3DA0-11D4-9A38-0090273FC14D 76C4F18
InstallProtocolInterface: 09576E91-6D3F-11D2-8E39-00A0C969723B 774B110
InstallProtocolInterface: 7EE2BD44-3DA0-11D4-9A38-0090273FC14D 774B098
InstallProtocolInterface: 09576E91-6D3F-11D2-8E39-00A0C969723B 76C3F50
InstallProtocolInterface: 7EE2BD44-3DA0-11D4-9A38-0090273FC14D 76C3E98
InstallProtocolInterface: 09576E91-6D3F-11D2-8E39-00A0C969723B 76C6ED0
InstallProtocolInterface: 7EE2BD44-3DA0-11D4-9A38-0090273FC14D 76C5F18
InstallProtocolInterface: 09576E91-6D3F-11D2-8E39-00A0C969723B 76C6D50
InstallProtocolInterface: 7EE2BD44-3DA0-11D4-9A38-0090273FC14D 76C6C98
InstallProtocolInterface: 09576E91-6D3F-11D2-8E39-00A0C969723B 76C6450
InstallProtocolInterface: 7EE2BD44-3DA0-11D4-9A38-0090273FC14D 76C63D8
InstallProtocolInterface: 09576E91-6D3F-11D2-8E39-00A0C969723B 76C48D0
InstallProtocolInterface: BB25CF6F-F1D4-11D2-9A0C-0090273FC1FD 76C3BD8
InstallProtocolInterface: 9E863906-A40F-4875-977F-5B93FF237FC6 774EDD0
Terminal – Mode 0, Column = 80, Row = 25
Terminal – Mode 1, Column = 80, Row = 50
Terminal – Mode 2, Column = 100, Row = 31
InstallProtocolInterface: 09576E91-6D3F-11D2-8E39-00A0C969723B 76C3690
InstallProtocolInterface: 387477C1-69C7-11D2-8E39-00A0C969723B 76C3024
InstallProtocolInterface: DD9E7534-7762-4698-8C14-F58517A625AA 76C30A8
InstallProtocolInterface: 387477C2-69C7-11D2-8E39-00A0C969723B 76C3030
InstallProtocolInterface: D3B36F2B-D551-11D4-9A46-0090273FC14D 0
InstallProtocolInterface: D3B36F2C-D551-11D4-9A46-0090273FC14D 0
InstallProtocolInterface: D3B36F2D-D551-11D4-9A46-0090273FC14D 0
PixelBlueGreenRedReserved8BitPerColor
PixelBlueGreenRedReserved8BitPerColor
PixelBlueGreenRedReserved8BitPerColor
InitializeBochsGraphicsMode: 800×600 @ 32
PixelBlueGreenRedReserved8BitPerColor
FrameBufferBase: 0x80000000, FrameBufferSize: 0x1D4C00
0: shl:0 shr:0 mask:FF0000
1: shl:0 shr:0 mask:FF00
2: shl:0 shr:0 mask:FF
Bytes per pixel: 4
GraphicsConsole video resolution 800 x 600
Graphics – Mode 0, Column = 80, Row = 25
Graphics – Mode 1, Column = 0, Row = 0
Graphics – Mode 2, Column = 100, Row = 31
InstallProtocolInterface: 387477C2-69C7-11D2-8E39-00A0C969723B 76E755C
InstallProtocolInterface: D3B36F2C-D551-11D4-9A46-0090273FC14D 0
PixelBlueGreenRedReserved8BitPerColor
PixelBlueGreenRedReserved8BitPerColor
PixelBlueGreenRedReserved8BitPerColor
PixelBlueGreenRedReserved8BitPerColor
PixelBlueGreenRedReserved8BitPerColor
PixelBlueGreenRedReserved8BitPerColor
PixelBlueGreenRedReserved8BitPerColor
PixelBlueGreenRedReserved8BitPerColor
PixelBlueGreenRedReserved8BitPerColor
PixelBlueGreenRedReserved8BitPerColor
PixelBlueGreenRedReserved8BitPerColor
PixelBlueGreenRedReserved8BitPerColor
PixelBlueGreenRedReserved8BitPerColor
PixelBlueGreenRedReserved8BitPerColor
PixelBlueGreenRedReserved8BitPerColor
PixelBlueGreenRedReserved8BitPerColor
PixelBlueGreenRedReserved8BitPerColor
PixelBlueGreenRedReserved8BitPerColor
PixelBlueGreenRedReserved8BitPerColor
PixelBlueGreenRedReserved8BitPerColor
PixelBlueGreenRedReserved8BitPerColor
PixelBlueGreenRedReserved8BitPerColor
PixelBlueGreenRedReserved8BitPerColor
PixelBlueGreenRedReserved8BitPerColor
PixelBlueGreenRedReserved8BitPerColor
PixelBlueGreenRedReserved8BitPerColor
PixelBlueGreenRedReserved8BitPerColor
PixelBlueGreenRedReserved8BitPerColor
PixelBlueGreenRedReserved8BitPerColor
PixelBlueGreenRedReserved8BitPerColor
InstallProtocolInterface: 9042A9DE-23DC-4A38-96FB-7ADED080516A 7E39B60
InstallProtocolInterface: 387477C1-69C7-11D2-8E39-00A0C969723B 76AF018
InstallProtocolInterface: DD9E7534-7762-4698-8C14-F58517A625AA 76AF024
InstallProtocolInterface: D3B36F2B-D551-11D4-9A46-0090273FC14D 0
PlatformBdsDiagnostics
PlatformBdsConnectSequence
InstallProtocolInterface: 964E5B21-6459-11D2-8E39-00A0C969723B 76AAF18
InstallProtocolInterface: CE345171-BA0B-11D2-8E4F-00A0C969723B 76B0B18
InstallProtocolInterface: 964E5B21-6459-11D2-8E39-00A0C969723B 76B07D8
InstallProtocolInterface: CE345171-BA0B-11D2-8E4F-00A0C969723B 76AAE58
SataControllerStart START
SataControllerStart error return status = Already started
BlockSize : 2048
LastBlock : 0
InstallProtocolInterface: A19832B9-AC25-11D3-9A2D-0090273FC14D 6D9A3EC
InstallProtocolInterface: 09576E91-6D3F-11D2-8E39-00A0C969723B 6D9A874
InstallProtocolInterface: E18541CD-F755-4F73-928D-643C8A79B229 6D9A75C
InstallProtocolInterface: 1ACED566-76ED-4218-BC81-767F1F977A89 6D9A75C
InstallProtocolInterface: 6A7A5CFF-E8D9-4F70-BADA-75AB3025CE14 6D9A784
InstallProtocolInterface: 6F6C7323-2077-7523-6E68-656C7066756C 6D9A790
InstallProtocolInterface: 330D4706-F2A0-4E4F-A369-B66FA8D54385 6D9A794
Support(): UNDI3.1 found on handle 76B0710
InstallProtocolInterface: 9E23D768-D2F3-4366-9FC3-3A7ABA864374 7699C9C
InstallProtocolInterface: F36FF770-A7E1-42CF-9ED2-56F0F271F44C 7499F64
Support(): UNDI3.1 found on handle 76B0710
InstallProtocolInterface: 09576E91-6D3F-11D2-8E39-00A0C969723B 74A1F50
InstallProtocolInterface: 330D4706-F2A0-4E4F-A369-B66FA8D54385 7498DD4
InstallProtocolInterface: E4F61863-FE2C-4B56-A8F4-08519BC439DF 7498DD0
Support(): UNDI3.1 found on handle 76B0710
InstallProtocolInterface: 7AB33A91-ACE5-4326-B572-E7EE33D39F16 749CF24
InstallProtocolInterface: F44C00EE-1F2C-4A00-AA09-1C9F3E0800A3 7496894
Support(): UNDI3.1 found on handle 76B0710
InstallProtocolInterface: 7AB33A91-ACE5-4326-B572-E7EE33D39F16 7495BE4
InstallProtocolInterface: 09576E91-6D3F-11D2-8E39-00A0C969723B 750FF50
InstallProtocolInterface: 330D4706-F2A0-4E4F-A369-B66FA8D54385 74955A8
InstallProtocolInterface: C51711E7-B4BF-404A-BFB8-0A048EF1FFE4 7495014
InstallProtocolInterface: 5B446ED1-E30B-4FAA-871A-3654ECA36080 7495414
Support(): UNDI3.1 found on handle 76B0710
InstallProtocolInterface: 41D94CD2-35B6-455A-8258-D4E51334AADD 7496C94
InstallProtocolInterface: 83F01464-99BD-45E5-B383-AF6305D8E9E6 7569F54
Support(): UNDI3.1 found on handle 76B0710
InstallProtocolInterface: 41D94CD2-35B6-455A-8258-D4E51334AADD 74A0DD4
InstallProtocolInterface: 3AD9DF29-4501-478D-B1F8-7F7FE70E50F3 7499BE0
InstallProtocolInterface: 9D9A39D8-BD42-4A73-A4D5-8EE94BE11380 749EDD4
Support(): UNDI3.1 found on handle 76B0710
InstallProtocolInterface: 41D94CD2-35B6-455A-8258-D4E51334AADD 74A2DD4
InstallProtocolInterface: 3AD9DF29-4501-478D-B1F8-7F7FE70E50F3 749BBE0
InstallProtocolInterface: 2FE800BE-8F01-4AA6-946B-D71388E1833F 764FF54
Support(): UNDI3.1 found on handle 76B0710
InstallProtocolInterface: 41D94CD2-35B6-455A-8258-D4E51334AADD 74A4DD4
InstallProtocolInterface: 00720665-67EB-4A99-BAF7-D3C33A1C7CC9 7661F9C
Support(): UNDI3.1 found on handle 76B0710
InstallProtocolInterface: F4B427BB-BA21-4F16-BC4E-43E416AB619C 74AADDC
InstallProtocolInterface: 8A219718-4EF5-4761-91C8-C0F04BDA9E56 74ACE14
InstallProtocolInterface: 41D94CD2-35B6-455A-8258-D4E51334AADD 74B0DD4
InstallProtocolInterface: 41D94CD2-35B6-455A-8258-D4E51334AADD 74B4DD4
InstallProtocolInterface: 3AD9DF29-4501-478D-B1F8-7F7FE70E50F3 749DBE0
InstallProtocolInterface: 78247C57-63DB-4708-99C2-A8B4A9A61F6B 74B2DDC
InstallProtocolInterface: 41D94CD2-35B6-455A-8258-D4E51334AADD 74BCDD4
InstallProtocolInterface: 3AD9DF29-4501-478D-B1F8-7F7FE70E50F3 74BADE0
InstallProtocolInterface: 41D94CD2-35B6-455A-8258-D4E51334AADD 74C2E54
InstallProtocolInterface: 3AD9DF29-4501-478D-B1F8-7F7FE70E50F3 74C0E20
InstallProtocolInterface: 03C4E603-AC28-11D3-9A2D-0090273FC14D 7489038
InstallProtocolInterface: 56EC3091-954C-11D2-8E3F-00A0C969723B 7489078
Support(): UNDI3.1 found on handle 76B0710
InstallProtocolInterface: 143B7632-B81B-4CB7-ABD3-B625A5B9BFFE 7488028
InstallProtocolInterface: 65530BC7-A359-410F-B010-5AADC7EC2B62 74CAE78
InstallProtocolInterface: 41D94CD2-35B6-455A-8258-D4E51334AADD 74CEE54
InstallProtocolInterface: 4579B72D-7EC4-4DD4-8486-083C86B182A7 748801C
Support(): UNDI3.1 found on handle 76B0710
SataControllerStart START
SataControllerStart error return status = Already started
BlockSize : 2048
LastBlock : 0
Support(): UNDI3.1 found on handle 76B0710
Support(): UNDI3.1 found on handle 76B0710
Support(): UNDI3.1 found on handle 76B0710
Support(): UNDI3.1 found on handle 76B0710
BlockSize : 2048
LastBlock : 0
Select Item: 0x8
Select Item: 0x17
qemu -kernel was not used.
BdsLibConnectAll
SataControllerStart START
SataControllerStart error return status = Already started
BlockSize : 2048
LastBlock : 0
Support(): UNDI3.1 found on handle 76B0710
Support(): UNDI3.1 found on handle 76B0710
Support(): UNDI3.1 found on handle 76B0710
Support(): UNDI3.1 found on handle 76B0710
SataControllerStart START
SataControllerStart error return status = Already started
BlockSize : 2048
LastBlock : 0
Support(): UNDI3.1 found on handle 76B0710
Support(): UNDI3.1 found on handle 76B0710
Support(): UNDI3.1 found on handle 76B0710
Support(): UNDI3.1 found on handle 76B0710
BlockSize : 2048
LastBlock : 0
Support(): UNDI3.1 found on handle 76B0710
Support(): UNDI3.1 found on handle 76B0710
Support(): UNDI3.1 found on handle 76B0710
Support(): UNDI3.1 found on handle 76B0710
Buffer: EFI DVD/CDROM
Select Item: 0x19
Select Item: 0xE
PixelBlueGreenRedReserved8BitPerColor
PixelBlueGreenRedReserved8BitPerColor
PixelBlueGreenRedReserved8BitPerColor
Memory Previous Current Next
Type Pages Pages Pages
====== ======== ======== ========
0A 00000004 00000022 0000002A
09 00000008 00000007 00000008
00 00000004 0000001C 00000023
06 00000024 0000002C 00000037
05 00000030 00000020 00000030
03 00000180 00000286 00000327
04 00000F00 000009D5 00000F00
Booting EFI DVD/CDROM
BlockSize : 2048
LastBlock : 0
PlatformBdsBootFail
PixelBlueGreenRedReserved8BitPerColor
PixelBlueGreenRedReserved8BitPerColor
PixelBlueGreenRedReserved8BitPerColor
Memory Previous Current Next
Type Pages Pages Pages
====== ======== ======== ========
0A 0000002A 00000022 0000002A
09 00000008 00000007 00000008
00 00000023 0000001C 00000023
06 00000037 0000002C 00000037
05 00000030 00000020 00000030
03 00000327 00000286 00000327
04 00000F00 000009D6 00000F00
Booting EFI Floppy
PlatformBdsBootFail
PixelBlueGreenRedReserved8BitPerColor
PixelBlueGreenRedReserved8BitPerColor
PixelBlueGreenRedReserved8BitPerColor
Memory Previous Current Next
Type Pages Pages Pages
====== ======== ======== ========
0A 0000002A 00000022 0000002A
09 00000008 00000007 00000008
00 00000023 0000001C 00000023
06 00000037 0000002C 00000037
05 00000030 00000020 00000030
03 00000327 00000286 00000327
04 00000F00 000009D6 00000F00
Booting EFI Floppy 1
PlatformBdsBootFail
Support(): UNDI3.1 found on handle 76B0710
Support(): UNDI3.1 found on handle 76B0710
Support(): UNDI3.1 found on handle 76B0710
Support(): UNDI3.1 found on handle 76B0710
PixelBlueGreenRedReserved8BitPerColor
PixelBlueGreenRedReserved8BitPerColor
PixelBlueGreenRedReserved8BitPerColor
Memory Previous Current Next
Type Pages Pages Pages
====== ======== ======== ========
0A 0000002A 00000022 0000002A
09 00000008 00000007 00000008
00 00000023 0000001C 00000023
06 00000037 0000002C 00000037
05 00000030 00000020 00000030
03 00000327 00000286 00000327
04 00000F00 000009D6 00000F00
Booting EFI Network
InstallProtocolInterface: 245DCA21-FB7B-11D3-8F01-00A0C969723B 7489080
Support(): UNDI3.1 found on handle 76B0710
Support(): UNDI3.1 found on handle 76B0710
Support(): UNDI3.1 found on handle 76B0710
Support(): UNDI3.1 found on handle 76B0710
PlatformBdsBootFail
PixelBlueGreenRedReserved8BitPerColor
PixelBlueGreenRedReserved8BitPerColor
PixelBlueGreenRedReserved8BitPerColor
Memory Previous Current Next
Type Pages Pages Pages
====== ======== ======== ========
0A 0000002A 00000022 0000002A
09 00000008 00000007 00000008
00 00000023 0000001C 00000023
06 00000037 0000002C 00000037
05 00000030 00000020 00000030
03 00000327 00000286 00000327
04 00000F00 000009D9 00000F00
Booting EFI Internal Shell
InstallProtocolInterface: 5B1B31A1-9562-11D2-8E3F-00A0C969723B 7548DE8
Loading driver at 0x00006C9C000 EntryPoint=0x00006C9C260 Shell.efi
InstallProtocolInterface: BC62157E-3E33-4FEC-9920-2D3B36D750DF 7506E90
InstallProtocolInterface: 387477C2-69C7-11D2-8E39-00A0C969723B 7562E54
InstallProtocolInterface: 752F3136-4E16-4FDC-A22A-E5F46812F4CA 7566F90
InstallProtocolInterface: 6302D008-7F9B-4F30-87AC-60C9FEF5DA4E 6D52A58
参考:
1. http://www.lab-z.com/qemuovmf/ Step to UEFI (68) —– 编译一个能在 QEMU 上跑的BIOS
2.https://sourceforge.net/p/tianocore/edk2/ci/master/tree/OvmfPkg/
Arduino Uno 大概是用途最广泛的型号了,美中不足的是它的GPIO 有限,这里介绍一个GPIO的扩展模块。基于 PCA9555芯片的 GPIO模块。
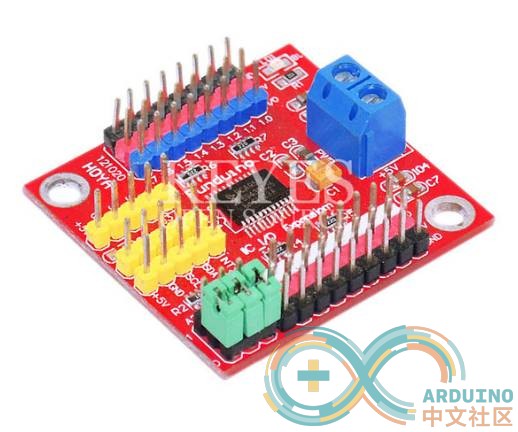
简单的说,这个模块是将I2C转换为 GPIO,一共支持16个GPIO。板子上通过跳线的方式可以选择当前的地址0x20-0x27一共8个,理论上可以级联出来8(个模块)*16(个GPIO)=128个GPIO。

特地我去查了一下电气特性【参考1】:
电源支持2.3到5.5v(正常工作范围),IO 输入5V,支持每一个输出最大50mA,输入时每个最大20mA。电源供电最大输入 160mA(这意味着不能同时有3以上的 GPIO输出50mA,在使用的时候一定要特别注意,最好把它当作只能提供电平的控制模块)。
简单实验这个模块,用4个LED,负极通过一个1K电阻接地,虽然这样会让LED看起来很暗,但是我能够确定不会有过流的问题。然后用扩展版上的 P0.6,P0.7 ,P1.6和P1.7连接LED正极进行供电控制。
运行的代码来自 DFRobot【参考2】(看起来他们在很久之前做过一块类似的板子,但是目前已经停产了)。当I2C地址选择三个Pin都为0时,模块地址是0x20。另外,I2C访问部分,我修改为Wire.write之前的Wire.send 函数已经取消了。
/******************************************************************************
Test Program for the 12C PCA9555 Board part number DFR0013 IIC TO GPIO module from dfrobot.com
16 outputs that I used to drive this relay board made in Bulgaria
[url]http://www.denkovi.com/product/21/16-relay-board-for-your-pic-avr-project-12v.html[/url]
it's a great little expansion board that can be used to drive LEDs or anything you want.
made by [email]peter@testelectronics.com[/email]
January 07th 2011
My biggest problem was figuring out the I2C address of the PCA9555.
If there are no jumpers the address is 1 0 0 '1 1 1'
Jumpers make the address 1 0 0 '0 0 0'. This is opposite of what I expected.
******************************************************************************/

#include <Wire.h>

//  with no jumpers the full address is   1 0 0 1 1 1    1 0 0 A2 A1 A0  0x27 is the default address for the DFR0013 board with no jumpers.
#define PCA9555 0x20 // 0x27 is default address for the DFR0013 board with no jumpers.
                     // 0x20 is address for the DFR0013 board with all jumpers.
// COMMAND BYTE TO REGISTER RELATIONSHIP FROM PCA9555 DATA SHEET
// At reset, the device's ports are inputs with a high value resistor pull-ups to VDD
// If relays turning on during power up are a problem. Add a pull down resistor to each relay transistor base.

#define IN_P0 0x00 // Read Input port0
#define IN_P1 0x01 // Read Input port1
#define OUT_P0 0x02 // Write Output port0
#define OUT_P1 0x03 // Write Output port1
#define INV_P0 0x04 // Input Port Polarity Inversion port0 if B11111111 is written input polarity is inverted
#define INV_P1 0x05 // Input Port Polarity Inversion port1 if B11111111 is written input polarity is inverted
#define CONFIG_P0 0x06 // Configuration port0 configures the direction of the I/O pins 0 is output 1 is input
#define CONFIG_P1 0x07 // Configuration port1 configures the direction of the I/O pins 0 is output 1 is input

#define PAUSE 200

void setup()
{
  Wire.begin(PCA9555); // join i2c bus (address optional for master) tried to get working
  write_io (CONFIG_P0, B00000000); //defines all pins on Port0 are outputs
  write_io (CONFIG_P1, B00000000); //defines all pins on Port1 are outputs
  write_io (OUT_P0, B00000000); //clears all relays
  write_io (OUT_P1, B00000000); //clears all relays
  delay (PAUSE);
}


void loop()
{
  write_io (OUT_P0, B00000001);
  delay (PAUSE);
  write_io (OUT_P0, B00000010);
  delay (PAUSE);
  write_io (OUT_P0, B00000100);
  delay (PAUSE);
  write_io (OUT_P0, B00001000);
  delay (PAUSE);
  write_io (OUT_P0, B00010000);
  delay (PAUSE);
  write_io (OUT_P0, B00100000);
  delay (PAUSE);
  write_io (OUT_P0, B01000000);
  delay (PAUSE);
  write_io (OUT_P0, B10000000);
  delay (PAUSE);
  write_io (OUT_P0, B00000000);


  write_io (OUT_P1, B00000001);
  delay (PAUSE);
  write_io (OUT_P1, B00000010);
  delay (PAUSE);
  write_io (OUT_P1, B00000100);
  delay (PAUSE);
  write_io (OUT_P1, B00001000);
  delay (PAUSE);
  write_io (OUT_P1, B00010000);
  delay (PAUSE);
  write_io (OUT_P1, B00100000);
  delay (PAUSE);
  write_io (OUT_P1, B01000000);
  delay (PAUSE);
  write_io (OUT_P1, B10000000);
  delay (PAUSE);
  write_io (OUT_P1, B00000000);

}


 void write_io(int command, int value)
{
  Wire.beginTransmission(PCA9555);
  Wire.write(command),Wire.write(value);
  Wire.endTransmission();
}
最终工作的样子:
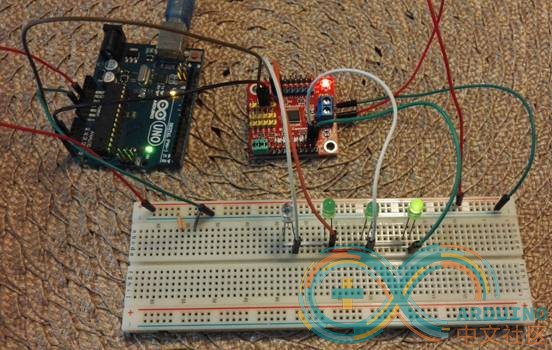
最后补充一些:
1. 这个模块在淘宝价格20左右,DFRobot新的替代品的价格在65左右;
2. 模块做工不错,看起来挺舒服,应该是机器焊接的(老婆偶然看到,竟然觉得挺精致)
3. Github 上有人提供了一个库,有兴趣的朋友可以试试。如果能够简化编程,都值得实验 https://github.com/nicoverduin/PCA9555
参考:
1. http://www.nxp.com/documents/data_sheet/PCA9555.pdf
2. http://wiki.dfrobot.com.cn/index.php/(SKUFR0013)IIC_TO_GPIO%E6%A8%A1%E5%9D%97
最近在搞 Connected Standby,基本上就是不停的在编译。忽然发现编译速度让人难以忍受。于是晚上抽空测试了一下编译的速度。
测试的基本方法是在编译的批处理开始和结尾加入类似下面的语句用来测算时间:
del /s /q build
echo %time% >> start.txt
echo %time% >> end.txt
首先上场的是工作用的笔记本电脑:Windows 8 系统, I5-4300 1.9-2.5G的CPU,内存是 8G,使用SSD。首先进行的是每次都要 clean的完全编译,时间基本上在28分钟左右。然后测试的是非完全编译,时间基本上在18分钟左右。很多时候,可能会修改一些配置文件,这样也会导致完全编译。所以,我基本上告别了笔记本的编译。
再试试台式机,普通的HDD,CPU比较给力是 Intel I7 870 2.93-3.07G,内存8G。

我个人感觉和硬盘可能有关系,所以用软件虚拟了一个2G的硬盘,从结果上来看确实有提升,但是感觉不大……
看起来 CPU 的速度对于BIOS编译的影响更大一些。
第一个问题:如何输出一个 float 的值。可以使用dtostrf 函数【参考1】。这个函数接受4个参数【参考2】。
char* dtostrf(double _val,signed char _width, unsigned charprec, char* _s)
_val:要转换的float或者double值。
_width:转换后整数部分长度。
_prec:转换后小数部分长度。
_s:转换以后的结果放在_s中。
第二个问题:如何传输一个 float。 个人的建议是:按照byte 传输。这样避免了复杂的转换以及精度额损失。一个float 是4个字节的大小,我们直接把它们读取出来即可。
编写一个代码来实验:
float f1=1.234567;
float f2=1.234568;
byte *p;
byte  x1[]={0x4B,0x06,0x9E,0x3F};
byte  x2[]={0x53,0x06,0x9E,0x3F};
unsigned long x3=0x3F9E064B;
float *f;


void setup() {
  char s[20];
  Serial.begin(115200);
//我们将 f1 这个 float类型的数值转换为字符串类型,
//整数部分保留1位,小数部分保留6位
//可以从结果看到,可以正常输出1.234567
  dtostrf(f1,1,6,s);
  Serial.println(s);

//我们将 f1 这个 float类型的数值转换为字符串类型,
//整数部分保留1位,小数部分保留5位
//可以从结果看到,输出结果是 1.23456,最后的7被丢掉了
  dtostrf(f1,1,5,s);
  Serial.println(s);
//我们将 f1 这个 float类型的数值转换为字符串类型,
//整数部分保留1位,小数部分保留7位
//可以从结果看到,输出1.2345670 ,对于多出来的自动补零
  dtostrf(f1,1,7,s);
  Serial.println(s);

//我们将一个 float 拆开为4个bytes输出
  p=(byte *)&f1;
  Serial.print(*p,HEX);Serial.print(' ');
  Serial.print(*(p+1),HEX);Serial.print(' ');
  Serial.print(*(p+2),HEX);Serial.print(' ');
  Serial.print(*(p+3),HEX);Serial.println(' ');
  p=(byte *)&f2;
  Serial.print(*p,HEX);Serial.print(' ');
  Serial.print(*(p+1),HEX);Serial.print(' ');
  Serial.print(*(p+2),HEX);Serial.print(' ');
  Serial.print(*(p+3),HEX);Serial.println(' ');

//同样,我们可以将4个bytes合成一个 float
  f=(float * )&x1;
  dtostrf(*f,1,6,s);
  Serial.println(s);

  f=(float * )&x2;
  dtostrf(*f,1,6,s);
  Serial.println(s);

  f=(float * )&x3;
  dtostrf(*f,1,6,s);
  Serial.println(s);
}

void loop() {
  // put your main code here, to run repeatedly:
  //Serial.println("ggg");
}
运行结果:
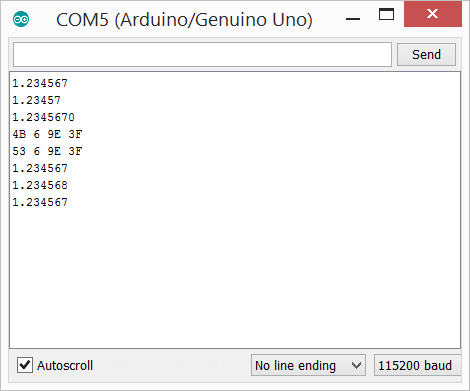
因为 float这种类型的定义是有统一标准的,所以上面的方法还可以将 arduino 的数值通过串口传递给PC上的应用程序而不发生误差。
参考:
1. http://blog.protoneer.co.nz/ardu … ually-works/Arduino Float to String (That actually works)
2. http://www.geek-workshop.com/thread-3383-1-1.html【LCD12864】发个很多朋友都能用的上的东西,int转char,用于12864显示数值~
条码是人类的伟大发明之一,特别是对于零售业主来说。你可以看到现在从大到小的商店,都会放着一台收银机或者电脑,一个条码枪。用扫描的方式能够马上取得售卖的价格。有了条码枪,记忆力已经不是售货员必须的要求了。而在此之前,人么或者需要记住复杂的零售价格,或者用贴标的方式给每一样商品都打上“价签”,显而易见的是如果要进行调价,对于营业人员将是灾难,更简单一些的则是或者是像小抄一样在柜台边上准备一个小本子,忘记价格的时候只能偷看。此外,诸如火车站汽车站旁边的店铺则是店主根据相面结果来决定要价的。
从原理上来说是这样的:USB Barcode Scanner使用的是 USB Keyboard 的 HID协议,条码上面的每一个字符都会像按键一样从USB端口输入到 PC中。
首先使用 USB HOST Shield来解析USB Barcode Scanner的HID协议,和解析USB 键盘协议一样,我们够获得每次输入的键盘的按键信息,每一次输入的字符会被拼接到字符串中,直到收到结束的符号。这个字符串就是完整的条码信息。之后,我们将这个信息显示在 1602 LCD上,同时使用蓝牙键盘模块把这个字符传输到电脑上。
实验用到的设备如下:
USB条码枪 x1
USB Host Shield x1
蓝牙 HID键盘模块 x1
扩展面包板 x1 (可选)
完整的代码:
#include "LiquidCrystal_I2C.h"
#include <hidboot.h>

LiquidCrystal_I2C lcd(0x27,16,2);  // set the LCD address to 0x27 for a 16 chars and 2 line display

char KeyPress[]=  {0x0C,0x00,0xA1,0x01,0x00,0x00,0x1E,0x00,0x00,0x00,0x00,0x00};
char KeyRelease[]={0x0C,0x00,0xA1,0x01,0x00,0x00,0x00,0x00,0x00,0x00,0x00,0x00};
String Barcode;

class KbdRptParser : public KeyboardReportParser
{
  protected:
    void OnKeyDown  (uint8_t mod, uint8_t key);
};

void SendKeyByBT()
{
    for (byte i=0;i<sizeof(KeyPress);i++)
    {
     Serial.write(KeyPress[i]);
    }
   for (byte i=0;i<sizeof(KeyRelease);i++)
    {
     Serial.write(KeyRelease[i]);
    }
}
void KbdRptParser::OnKeyDown(uint8_t mod, uint8_t key)
{
  uint8_t c = OemToAscii(mod, key);

  if (c)
  {
      KeyPress[6]=key;
      SendKeyByBT();

      //Serial.print("ASCII: ");
      //Serial.println((char)c);

      Barcode=Barcode+ (char) c;
      if ((c==19) || (Barcode.length()> 40)) {
          lcd.clear();
           lcd.setCursor(0,0);

          //这里是单独发送的,因为我测试发现 1.6.10 的IDE存在一个 bug
         //lcd.print(Barcode) 会丢失字符
          for (byte i=0;i<Barcode.length();i++)
            {
              lcd.print(Barcode[i]);
              if (i==15) { lcd.setCursor(0,1);}
              }
          //Serial.println(Barcode);
          Barcode="";
      }
  }

}

USB     Usb;
HIDBoot<HID_PROTOCOL_KEYBOARD>    HidKeyboard(&Usb);
uint32_t next_time;
KbdRptParser Prs;

void setup()
{
  Serial.begin(9600);
  lcd.init();                      // initialize the lcd

  // Print a message to the LCD.
  lcd.backlight();
  //mySerial.begin(9600);

  //Serial.println("Start");

  if (Usb.Init() == -1)
    Serial.println("OSC did not start.");

  delay( 200 );

  next_time = millis() + 5000;

  HidKeyboard.SetReportParser(0, (HIDReportParser*)&Prs);
}

void loop()
{
  Usb.Task();
}
[align=left]
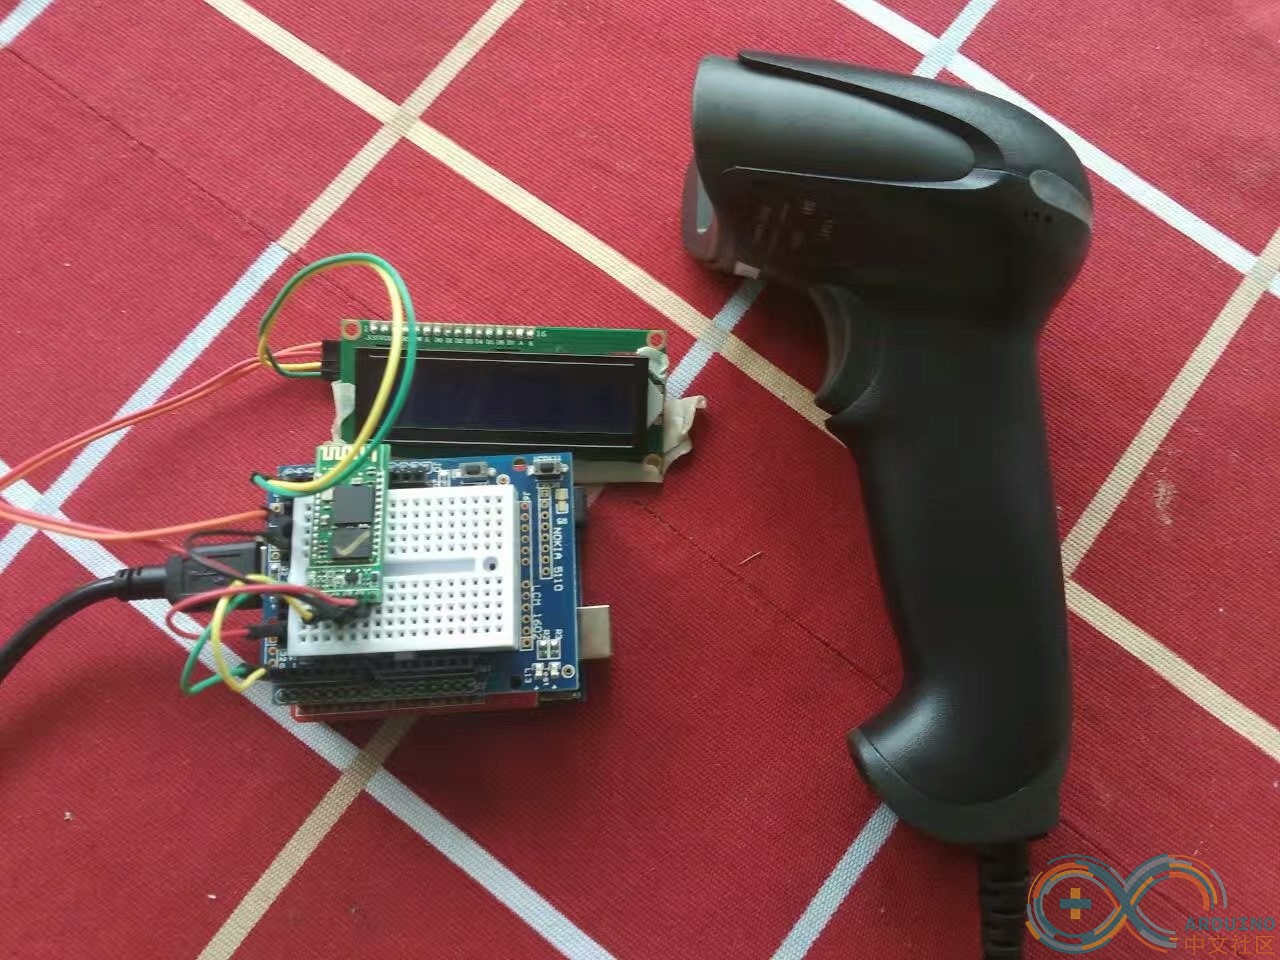
除了条形码之外,现在还有 RFID 之类的也能完成自动识别的工作,显而易见价格便宜是条形码最大的优点是。对于一般场合的应用,编码信息也足够用,因此在未来条形码还会有着巨大的生命力。
也许有一天,人们用条码来进行身份的识别和验证,就像下面这样:

完整代码下载
Barcodescaner
工作的视频
最近有朋友询问 Shell 下编写 NSF 批处理的问题. 后来经过研究,他使用的是 AMI 自带的 Shell,在批处理方面存在一些问题,没有办法正确解析 IF 语句。
我在模拟器中确认过,同样的版本(2.50) UDK2015 自带的 SHELL 不存在这样的问题。
最后,他从U盘启动我给他的 SHELL 同样也没有问题,因此判定是 AMI 自带的 Shell 有一些特别的地方。
如果你的批处理遇到类似的状况,不妨尝试一下 UDK 自带的 Shell.
有朋友留言我才想起来很早之前介绍过 zLib 的编译,但是没有编写一个完整的例子。这次补上这一块。
首先需要安装好zLib(现在都是在 UDK2015下面进行编译),我在 AppPkg.dsc 中加入下面的语句:
  CacheMaintenanceLib|MdePkg/Library/BaseCacheMaintenanceLib/BaseCacheMaintenanceLib.inf

  UefiHandleParsingLib|ShellPkg/Library/UefiHandleParsingLib/UefiHandleParsingLib.inf

  zLib|AppPkg/Applications/zsource/zlib.inf
###################################################################################################
#
# Components Section - list of the modules and components that will be processed by compilation
#                      tools and the EDK II tools to generate PE32/PE32+/Coff image files.
之后就可以直接使用了。
压缩很简单,用下面这个函数即可
int compress (Bytef *dest, uLongf *destLen, const Bytef *source, uLong sourceLen);
特别需要注意的是,压缩是在内存中进行的,所以需要开辟一段用来存放压缩结果的空间,这个空间的大小也就是上面的destLen。因此,在运行这个函数之前最好线运行一下预测压缩之后大小的函数:
uLong compressBound (uLong sourceLen);
压缩之后的结果不会超过这个函数返回值(一般情况下要小得多)
压缩很简单,下面介绍解压缩:
int uncompress (Bytef *dest, uLongf *destLen,const Bytef *source, uLong sourceLen);
和压缩函数非常类似,但是有一点特别注意的:这个函数用到的 destLen 是解压之后的大小,但是zLib没有提供预测解压之后大小的函数。据说原因是因为解压缩是压缩的“反函数”,因此,在压缩的时候应该已经知道解压后的大小。具体在使用的时候需要想办法自己定义结构体之类的将原始大小传递给解压函数以便开辟内存空间。譬如,在存放压缩的buffer前面加上4字节的大小之类的。
基本概念了解完就上代码,例子实现的功能是将 zlibtest.efi 压缩为test.lbz。然后再解压保存为 test.efi。
#include  <Uefi.h>
#include  <Library/UefiLib.h>
#include  <Library/ShellCEntryLib.h>
#include <Library/MemoryAllocationLib.h>

#include  <stdio.h>
#include  <stdlib.h>
#include  <wchar.h>

#include <Library/ShellLib.h>

#include  "zlib.h"

extern EFI_BOOT_SERVICES         *gBS;
extern EFI_SYSTEM_TABLE			 *gST;
extern EFI_RUNTIME_SERVICES 	 *gRT;

int
EFIAPI
main (
  IN int Argc,
  IN CHAR16 **Argv
  )
{
	EFI_FILE_HANDLE   FileHandle;
	RETURN_STATUS     Status;
	EFI_FILE_INFO     *FileInfo = NULL;
	UINT32  			SourceSize;
	UINT32  			preSize;
	CHAR8  *source=NULL;
	CHAR8  *dest=NULL;
//Read a source file
	//Open the file given by the parameter
	Status =
		ShellOpenFileByName(
				L"zlibtest.efi",
				(SHELL_FILE_HANDLE *)&FileHandle,
                EFI_FILE_MODE_READ ,
				0);
	if(Status != RETURN_SUCCESS) {
        Print(L"OpenFile failed!\n");
		return EFI_SUCCESS;
      }

	//Get file size
	FileInfo =
		ShellGetFileInfo((SHELL_FILE_HANDLE)FileHandle);

	//Allocate a memory buffer
	source =
		AllocateZeroPool((UINTN) FileInfo-> FileSize);
	if (source == NULL) {
	  Print(L"Allocate source memory error!\n");
      return (SHELL_OUT_OF_RESOURCES);
	}

	SourceSize = (UINT32) (FileInfo-> FileSize & 0xFFFFFFFF);

	//Load the whole file to the buffer
	Status = ShellReadFile(FileHandle,&SourceSize,source);
	if (EFI_ERROR(Status)) {
		Print(L"Read file error [%r]\n",Status);
		ShellCloseFile(&FileHandle);
		return (EFI_SUCCESS);
	}
	ShellCloseFile(&FileHandle);
//Compress
	preSize = compressBound((UINT32)SourceSize);
	Print(L"Source file size   : %d\n",SourceSize);
	Print(L"Compress Bound Size: %d\n",preSize);

	dest = AllocateZeroPool(preSize);
	if (dest == NULL) {
	  Print(L"Allocate dest memory error!\n");
      return (SHELL_OUT_OF_RESOURCES);
	}

	//Output
	Print(L"Compressing.........\n");
	Status=compress(dest,&preSize,source,SourceSize);
	if (Status != Z_OK) {
	  Print(L"Compress error!\n");
      return (SHELL_OUT_OF_RESOURCES);
	}
	Print(L"Compressing complete!\n");
	Print(L"Compressed size: %d\n",preSize);

//Save compressed result to a file
	//Create a new file
	Status = ShellOpenFileByName(L"test.lbz",
                            (SHELL_FILE_HANDLE *)&FileHandle,
                            EFI_FILE_MODE_READ |
	 					    EFI_FILE_MODE_WRITE|
							EFI_FILE_MODE_CREATE,
							0);
	if(Status != RETURN_SUCCESS) {
			Print(L"CreatFile failed [%r]!\n",Status);
			return EFI_SUCCESS;
	}

	Status = ShellWriteFile(FileHandle,
					&preSize,
					dest
				);

	//Close the source file
	ShellCloseFile(&FileHandle);

//This program is just a demo for showing how to use zlib.
//Uncompress test
	Status=uncompress(source,&SourceSize,dest,preSize);
	if (Status != Z_OK) {
	  Print(L"Decompress error!\n");
      return (SHELL_OUT_OF_RESOURCES);
	}

	//Output
	Print(L"decompress Size: %d\n",SourceSize);

	//Create a new file
	Status = ShellOpenFileByName(L"test.efi",
                            (SHELL_FILE_HANDLE *)&FileHandle,
                            EFI_FILE_MODE_READ |
	 					    EFI_FILE_MODE_WRITE|
							EFI_FILE_MODE_CREATE,
							0);
	if(Status != RETURN_SUCCESS) {
			Print(L"CreatFile failed [%r]!\n",Status);
			return EFI_SUCCESS;
	}

	Status = ShellWriteFile(FileHandle,
					&SourceSize,
					source
				);

	//Close the source file
	ShellCloseFile(&FileHandle);

	FreePool(dest);
	FreePool(source);
  return EFI_SUCCESS;
}
运行结果:
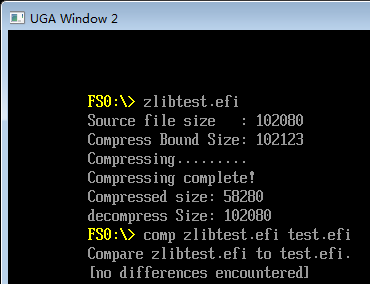
我们直接比较压缩前和解压后的结果,是相同的。
完整的代码下载:
参考:
1. http://www.cppblog.com/woaidongmao/archive/2009/09/07/95495.html zlib用法简单说明
最近编写程序,需要用到 CHAR16 的大小写转换,忽然惊奇的发现远比CHAR8的转化复杂,没有可以直接使用的函数。研究了一番,猜测产生这样问题的原因是 CHAR16 是定义给 Unicode 使用的。而Unicode 需要支持多种语言格式,比方说:’a’的大写是’A’,‘一’的大写就是‘壹’了,所以处理上也是复杂的。
从 UEFI Spec 来看,标准的做法要求使用EFI_UNICODE_COLLATION_PROTOCOL 。对应的头文件在 \MdePkg\Include\Protocol\UnicodeCollation.h 中。有下面几个功能:
///
/// The EFI_UNICODE_COLLATION_PROTOCOL is used to perform case-insensitive
/// comparisons of strings.
///
struct _EFI_UNICODE_COLLATION_PROTOCOL {
  EFI_UNICODE_COLLATION_STRICOLL    StriColl;
  EFI_UNICODE_COLLATION_METAIMATCH  MetaiMatch;
  EFI_UNICODE_COLLATION_STRLWR      StrLwr;
  EFI_UNICODE_COLLATION_STRUPR      StrUpr;

  //
  // for supporting fat volumes
  //
  EFI_UNICODE_COLLATION_FATTOSTR    FatToStr;
  EFI_UNICODE_COLLATION_STRTOFAT    StrToFat;

  ///
  /// A Null-terminated ASCII string array that contains one or more language codes.
  /// When this field is used for UnicodeCollation2, it is specified in RFC 4646 format.
  /// When it is used for UnicodeCollation, it is specified in ISO 639-2 format.
  ///
  CHAR8                             *SupportedLanguages;
};
StriColl 进行大小写敏感的字符串比较
MetaiMatch 判断字符串是否匹配一个带有通配符的模版
StrLwr 字符串转为小写
StrUpr 字符串转为大写
FatToStr 将8.3格式的OEM字符集的FAT文件名转为字符串
StrToFat 将字符串转为OEM定义的字符集
*SupportedLanguages ASCII给出的语言的列表
上述只是简单的介绍,我也并没有仔细验证,更详细的请阅读UEFI Spec Protocols – String Services 章节。
除了,上面介绍的方法,如果你确定字符串中只有 ASCII , 那么还可以直接处理字符串中的 ASCII ,下面的实例演示了上面的2种做法:
#include  <Uefi.h>
#include  <Library/UefiLib.h>
#include  <Library/ShellCEntryLib.h>

#include <Protocol/UnicodeCollation.h>

extern EFI_BOOT_SERVICES         *gBS;
extern EFI_SYSTEM_TABLE			 *gST;
extern EFI_RUNTIME_SERVICES 	 *gRT;

EFI_UNICODE_COLLATION_PROTOCOL   *mUnicodeCollation = NULL;

VOID
EFIAPI
lowercase (
  IN OUT CHAR16	*Str
  )
{
	UINT32	i;
	CHAR8	*p;
	p=(CHAR8 *)Str;
	for (i=0;i<StrSize(Str);i++) {
		//Print(L"%d ",*p);
		if ((*p>='A')&&(*p<='Z')) {
			*p=*p+32;
		}
		p++;
	}

}
int
EFIAPI
main (
  IN int Argc,
  IN CHAR16 **Argv
  )
{
  EFI_STATUS	Status;
  CHAR16		*s1=L"Www.Lab-z.Com 1243";
  CHAR16		*s2=L"Www.Lab-z.Com 1243";

  if (mUnicodeCollation == NULL) {
		Status = gBS->LocateProtocol(
			&gEfiUnicodeCollation2ProtocolGuid,
			NULL,
			(VOID**)&mUnicodeCollation);

		if (EFI_ERROR(Status)) {
			Print(L"Can't find UnicodeCollation2 Protocol!\n");
			return EFI_SUCCESS;
		}
  }

  mUnicodeCollation->StrUpr(
    mUnicodeCollation,
    s1);
  Print(L"%s\n",s1);

  lowercase (s2);
  Print(L"%s\n",s2);
  return EFI_SUCCESS;
}
运行结果:
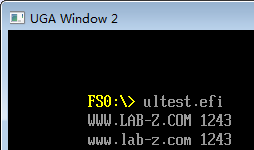
完整的代码下载
很多时候,我们的程序需要和用户进行简单的交互,当然可以设计菜单之类的,但是从代码的角度来说依然很复杂,我们并不希望为了获得一个确认而大费周章。这时候,可以直接使用 Shell 提供的ShellPromptForResponse 函数。
函数原型在ShellLib.h 中:
/**
  Prompt the user and return the resultant answer to the requestor.

  This function will display the requested question on the shell prompt and then
  wait for an apropriate answer to be input from the console.

  If the SHELL_PROMPT_REQUEST_TYPE is SHELL_PROMPT_REQUEST_TYPE_YESNO, ShellPromptResponseTypeQuitContinue
  or SHELL_PROMPT_REQUEST_TYPE_YESNOCANCEL then *Response is of type SHELL_PROMPT_RESPONSE.

  If the SHELL_PROMPT_REQUEST_TYPE is ShellPromptResponseTypeFreeform then *Response is of type
  CHAR16*.

  In either case *Response must be callee freed if Response was not NULL;

  @param Type                     What type of question is asked.  This is used to filter the input
                                  to prevent invalid answers to question.
  @param Prompt                   The pointer to a string prompt used to request input.
  @param Response                 The pointer to Response, which will be populated upon return.

  @retval EFI_SUCCESS             The operation was successful.
  @retval EFI_UNSUPPORTED         The operation is not supported as requested.
  @retval EFI_INVALID_PARAMETER   A parameter was invalid.
  @return other                   The operation failed.
**/
EFI_STATUS
EFIAPI
ShellPromptForResponse (
  IN SHELL_PROMPT_REQUEST_TYPE   Type,
  IN CHAR16         *Prompt OPTIONAL,
  IN OUT VOID       **Response OPTIONAL
  );
简单的说这个函数提供了3种用法:
1. 使用ShellPromptResponseTypeFreeform 参数,接收全部输入的字符串;
2. 使用ShellPromptResponseTypeYesNo 这样,用户输入 y 表示 Yes, n 表示 No
3. 使用ShellPromptResponseTypeEnterContinue 进行按键等待的
#include  <Uefi.h>
#include  <Library/UefiLib.h>
#include  <Library/ShellCEntryLib.h>

#include  "ShellLib.h"

extern EFI_BOOT_SERVICES         *gBS;
extern EFI_SYSTEM_TABLE			 *gST;
extern EFI_RUNTIME_SERVICES 	 *gRT;

SHELL_PROMPT_RESPONSE
EFIAPI
Resp()
{

}

int
EFIAPI
main (
  IN int Argc,
  IN CHAR16 **Argv
  )
{
	CHAR16 *InputStr = NULL;

	ShellPromptForResponse(
			ShellPromptResponseTypeFreeform,
			L"Please input->",
			(VOID**)&InputStr);
	Print(L"Get input by freeform %s\n",InputStr);

	ShellPromptForResponse(
			ShellPromptResponseTypeEnterContinue,
			L"Press Enter to continue...",
			NULL);

	ShellPromptForResponse(
			ShellPromptResponseTypeAnyKeyContinue,
			L"Press any key to continue...",
			NULL);

	SHELL_PROMPT_RESPONSE *Resp=NULL;
	ShellPromptForResponse(ShellPromptResponseTypeYesNo, L"Type 'y' or 'n'->",(VOID**)&Resp);
    switch (*(SHELL_PROMPT_RESPONSE*)Resp) {
          case ShellPromptResponseNo:
            Print(L"Choose No\n");
            break;
          case ShellPromptResponseYes:
            Print(L"Choose Yes\n");
            break;
		  default:
			break;
	}


	return EFI_SUCCESS;
}
运行结果:
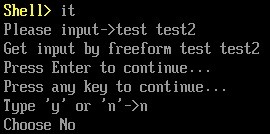
可以看到,这个函数还可以用来实现回车键继续或者任意键继续的功能。
关于这个函数,具体的实现代码可以在 \ShellPkg\Library\UefiShellLib\UefiShellLib.c 中看到,有兴趣的朋友可以深入研究一下。
完整的代码下载
InputTest