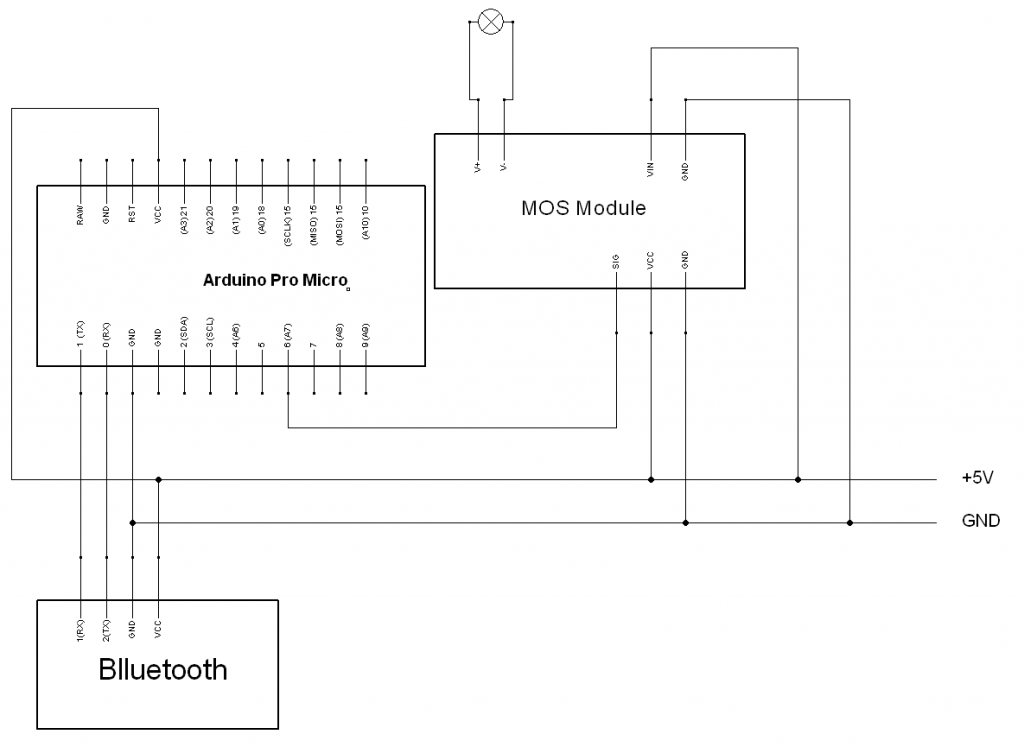
这里实现用 Windows x86 平板电脑控制小灯泡亮度。
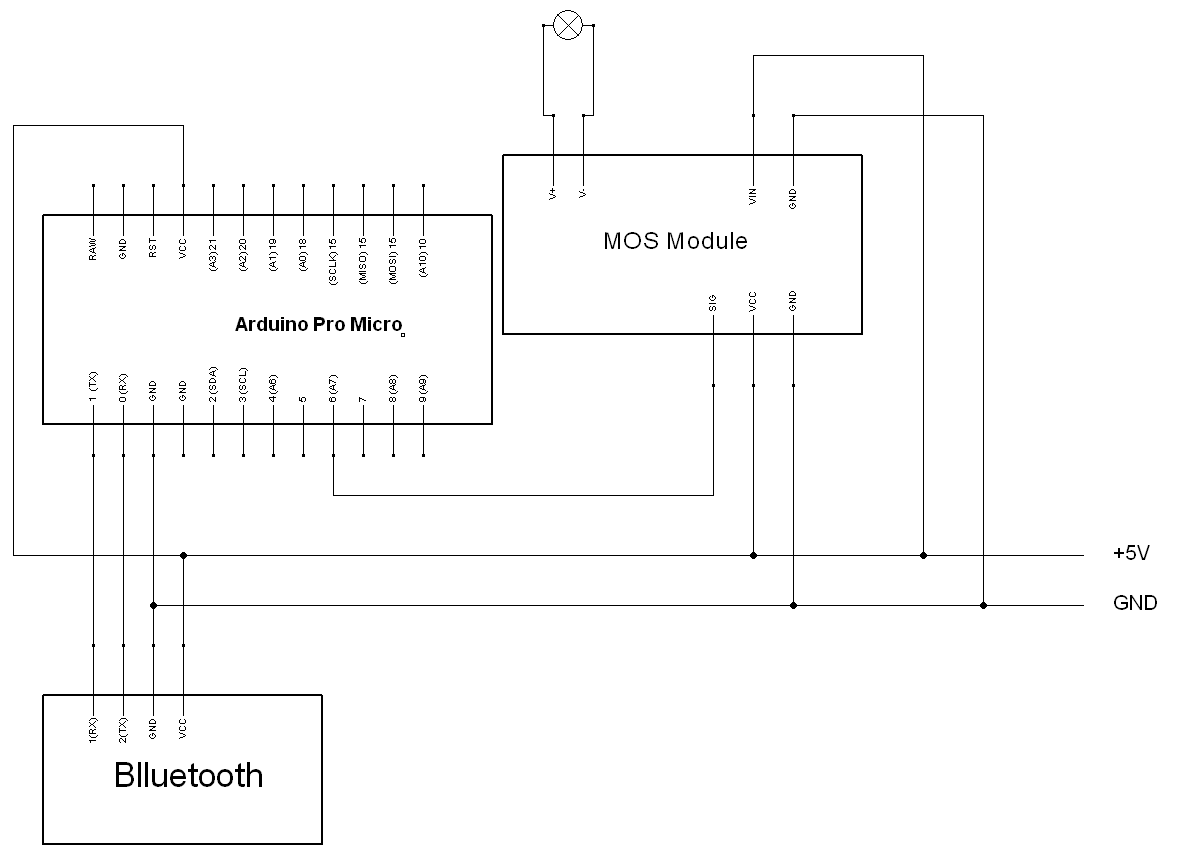
硬件方面在我们最初实验设备【参考1】的基础上增加一个蓝牙模块(这里建议使用蓝牙的朋友选用 HC06系列的,和HC05的不同,这个系列只有Slave的功能,但是个人感觉HC06更容易搜索连接上,我用HC05的时候每次都需要重新搜索配对设备,但是HC06上不用),用来和Windows平板进行通讯。
代码方面,Arduino使用的程序非常简单,将串口收到的char当作PWM值直接输出。程序使用了2个串口,一个是通常的USB,同PC进行通讯,主要是为了方便Debug;真正工作的是另外一个进行蓝牙通讯的串口。
int  n=255;
void setup()
{
    Serial.begin(9600);
    Serial1.begin(9600);
    pinMode(6,OUTPUT);      //该端口需要选择有#号标识的数字口
}

void loop()
{
  char  c;
    while (Serial.available() > 0)
    {
        c=Serial.read();
        analogWrite(6,c);
        Serial.println(c);
    }
    while (Serial1.available() > 0)
    {
        c=Serial1.read();
        analogWrite(6,c);
        Serial.println(c);
    }
}
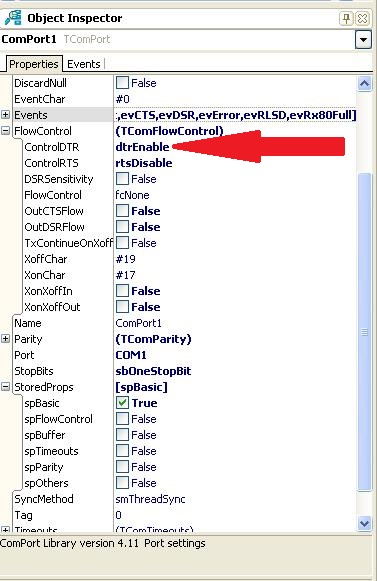
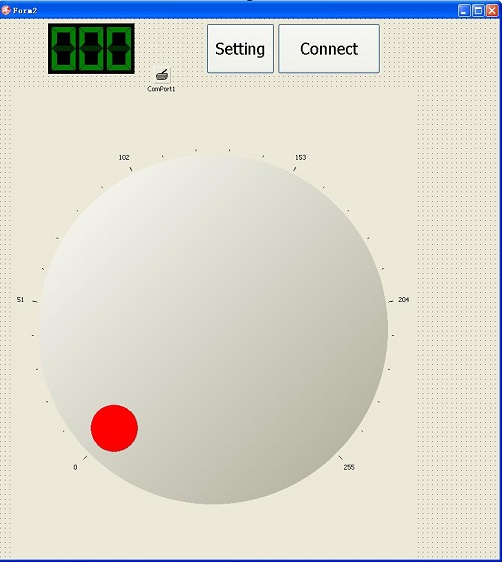
上位机使用的是Delphi 2010,使用控件很简单即可完成编程。
unit Unit2;

interface

uses
  Windows, Messages, SysUtils, Variants, Classes, Graphics, Controls, Forms,
  Dialogs, iComponent, iVCLComponent, iCustomComponent, iPositionComponent,
  iScaleComponent, iKnob, iSevenSegmentDisplay, iSevenSegmentBinary,
  iSevenSegmentInteger, StdCtrls, CPortCtl, CPort, Buttons;

type
  TForm2 = class(TForm)
    iKnob1: TiKnob;
    iSevenSegmentInteger1: TiSevenSegmentInteger;
    ComPort1: TComPort;
    Button1: TButton;
    Button2: TButton;
    procedure iKnob1PositionChange(Sender: TObject);
    procedure FormActivate(Sender: TObject);
    procedure Button1Click(Sender: TObject);
    procedure Button2Click(Sender: TObject);
  private
    { Private declarations }
  public
    { Public declarations }
  end;

var
  Form2: TForm2;

implementation

{$R *.dfm}

procedure TForm2.Button1Click(Sender: TObject);
begin
  ComPort1.ShowSetupDialog;
end;

procedure TForm2.Button2Click(Sender: TObject);
begin
  if ComPort1.Connected then
    begin
      ComPort1.Close;
      Button2.Caption:='Connect';
    end
  else
    begin
      ComPort1.Open;
      ComPort1.WriteStr(chr(0));
      Button2.Caption:='Disconnect';
    end
end;

procedure TForm2.FormActivate(Sender: TObject);
begin
  iKnob1.Width:=Form2.Width;
end;

procedure TForm2.iKnob1PositionChange(Sender: TObject);
var
  c:byte;
begin
  c:=trunc(iKnob1.Position);
  iSevenSegmentInteger1.Value:=c;
  if Comport1.Connected then
    begin
      ComPort1.Write(&c,1);
    end;
end;

end.
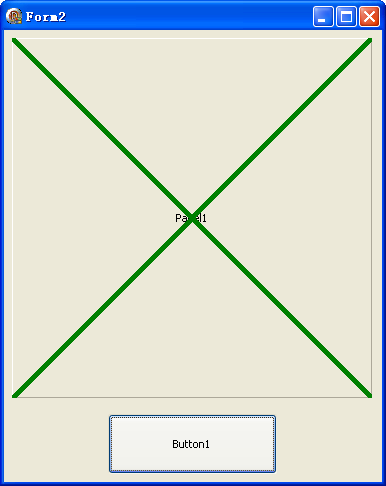
界面
上位机完整代码下载
knobtest
工作的视频:
http://www.tudou.com/programs/view/yE4EHhUFcvU/?resourceId=414535982_06_02_99
最后说点其他的:除了Apple和各式各样的 Anrdoid平板电脑,x86的Windows平板也在崛起。
相比之下,使用Windows平板编程有如下优点:
1. 编程简单。工具方面Delphi VB VC 都是非常成熟的工具,能在普通PC上运行的程序,即可顺利移植到Windows平板上(甚至可以说‘移植’这个词不合适,因为不用任何改动直接放上去即可);
2. 发布简单。从时效性上来说,不需要发布到什么市场,也不需要什么审核,各种方法让对方拿到即可运行;
3. 周边设备多多,比如:各种摇杆方向盘,价格也比Apple专用的低很多;
4. 程序运行非常稳定,除非程序有错误,否则根本不会出现那种莫名其妙的“闪退”;
此外,从我的实践的角度来说,Windows 平板目前还有如下的缺点:
1. Windows本质上是给有鼠标的机器运行的,而不是触摸类的设备。这两者在精度上差别很大,传统的Window的各种控件,默认的调用者也都是鼠标,如果直接用触摸操作起来很困难,也容易误操作。因此,我用普通台式机做平板程序的感受是:你一定要把你的用户当成视力有困难的人,能调大的菜单或者按钮一定要做到最大…….
2. 目前比较缺少Windows x86平板方面的中文资料,在使用板载的各种传感器时,缺少资料
参考:
1. http://www.lab-z.com/mos%E6%8E%A7%E5%88%B6%E5%B0%8F%E7%81%AF%E6%B3%A1%E7%9A%84%E5%AE%9E%E9%AA%8C/ MOS控制小灯泡的实验