这里介绍一下常用的处理字符串的函数。这篇介绍 StrCpy/StrnCpy StrSize StrLen StrCmp/StrnCmp StrCat/StrnCat 。这些函数都是给 Unicode16 字符串设计的( CHAR16 定义的, 或者 L“www.lab-z.com” 这样定义的)。同样还有一组带有 Ascii 前缀的函数是给普通的字符串使用的。
函数定义原型可以在 \MdePkg\Include\Library\BaseLib.h 这个文件中找到
1.StrCpy (D<-S) 作用:将 Source 定义的字符串拷贝到 Destination 定义的字符串中(覆盖之)
//
// String Services
//

/**
  Copies one Null-terminated Unicode string to another Null-terminated Unicode
  string and returns the new Unicode string.

  This function copies the contents of the Unicode string Source to the Unicode
  string Destination, and returns Destination. If Source and Destination
  overlap, then the results are undefined.

  If Destination is NULL, then ASSERT().
  If Destination is not aligned on a 16-bit boundary, then ASSERT().
  If Source is NULL, then ASSERT().
  If Source is not aligned on a 16-bit boundary, then ASSERT().
  If Source and Destination overlap, then ASSERT().
  If PcdMaximumUnicodeStringLength is not zero, and Source contains more than
  PcdMaximumUnicodeStringLength Unicode characters not including the
  Null-terminator, then ASSERT().

  @param  Destination The pointer to a Null-terminated Unicode string.
  @param  Source      The pointer to a Null-terminated Unicode string.

  @return Destination.

**/
CHAR16 *
EFIAPI
StrCpy (
  OUT     CHAR16                    *Destination,
  IN      CONST CHAR16              *Source
  );
实例:
#include <Uefi.h>
#include <Library/UefiLib.h>
#include <Library/ShellCEntryLib.h>
extern EFI_BOOT_SERVICES *gBS;
extern EFI_SYSTEM_TABLE *gST;
extern EFI_RUNTIME_SERVICES *gRT;
int
EFIAPI
main (
IN int Argc,
IN CHAR16 **Argv
)
{
CHAR16 *s1=L"WWW.";
CHAR16 *s2=L".LAB-Z.COM";
CHAR16 *Result;
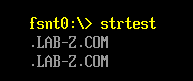
Result=StrCpy(s1,s2);
Print(L"%s\n",s1);
Print(L"%s\n",Result);
return EFI_SUCCESS;
}
换一种字符串定义方式
#include  <Uefi.h>
#include  <Library/UefiLib.h>
#include  <Library/ShellCEntryLib.h>


extern EFI_BOOT_SERVICES         *gBS;
extern EFI_SYSTEM_TABLE			 *gST;
extern EFI_RUNTIME_SERVICES 	 *gRT;

int
EFIAPI
main (
  IN int Argc,
  IN CHAR16 **Argv
  )
{

  CHAR16 s1[20]=L"WWW.";
  CHAR16 s2[20]=L".LAB-Z.COM";
  CHAR16 *Result;

  Result=StrCpy(s1,s2);
  Print(L"%s\n",s1);
  Print(L"%s\n",Result);

  return EFI_SUCCESS;
}
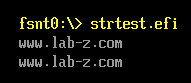
运行结果和上面的相同。
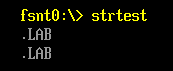
2.StrnCpy 作用:将 Source 定义的字符串中,前n个拷贝到 Destination 定义的字符串中(覆盖之)
/**
  Copies up to a specified length from one Null-terminated Unicode string to
  another Null-terminated Unicode string and returns the new Unicode string.

  This function copies the contents of the Unicode string Source to the Unicode
  string Destination, and returns Destination. At most, Length Unicode
  characters are copied from Source to Destination. If Length is 0, then
  Destination is returned unmodified. If Length is greater that the number of
  Unicode characters in Source, then Destination is padded with Null Unicode
  characters. If Source and Destination overlap, then the results are
  undefined.

  If Length > 0 and Destination is NULL, then ASSERT().
  If Length > 0 and Destination is not aligned on a 16-bit boundary, then ASSERT().
  If Length > 0 and Source is NULL, then ASSERT().
  If Length > 0 and Source is not aligned on a 16-bit boundary, then ASSERT().
  If Source and Destination overlap, then ASSERT().
  If PcdMaximumUnicodeStringLength is not zero, and Length is greater than
  PcdMaximumUnicodeStringLength, then ASSERT().
  If PcdMaximumUnicodeStringLength is not zero, and Source contains more than
  PcdMaximumUnicodeStringLength Unicode characters, not including the Null-terminator,
  then ASSERT().

  @param  Destination The pointer to a Null-terminated Unicode string.
  @param  Source      The pointer to a Null-terminated Unicode string.
  @param  Length      The maximum number of Unicode characters to copy.

  @return Destination.

**/
CHAR16 *
EFIAPI
StrnCpy (
  OUT     CHAR16                    *Destination,
  IN      CONST CHAR16              *Source,
  IN      UINTN                     Length
  );
实例:
#include  <Uefi.h>
#include  <Library/UefiLib.h>
#include  <Library/ShellCEntryLib.h>


extern EFI_BOOT_SERVICES         *gBS;
extern EFI_SYSTEM_TABLE			 *gST;
extern EFI_RUNTIME_SERVICES 	 *gRT;

int
EFIAPI
main (
  IN int Argc,
  IN CHAR16 **Argv
  )
{
  CHAR16 *s1=L"WWW.";
  CHAR16 *s2=L".LAB-Z.COM";
  CHAR16 *Result;

  Result=StrnCpy(s1,s2,4);
  Print(L"%s\n",s1);
  Print(L"%s\n",Result);

  return EFI_SUCCESS;
}
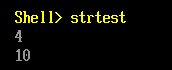
3.StrLen 作用:返回字符串中字符的个数,注意:数量不包括结尾的 NULL。
/**
  Returns the length of a Null-terminated Unicode string.

  This function returns the number of Unicode characters in the Null-terminated
  Unicode string specified by String.

  If String is NULL, then ASSERT().
  If String is not aligned on a 16-bit boundary, then ASSERT().
  If PcdMaximumUnicodeStringLength is not zero, and String contains more than
  PcdMaximumUnicodeStringLength Unicode characters not including the
  Null-terminator, then ASSERT().

  @param  String  Pointer to a Null-terminated Unicode string.

  @return The length of String.

**/
UINTN
EFIAPI
StrLen (
  IN      CONST CHAR16              *String
  );
实例:
#include  <Uefi.h>
#include  <Library/UefiLib.h>
#include  <Library/ShellCEntryLib.h>


extern EFI_BOOT_SERVICES         *gBS;
extern EFI_SYSTEM_TABLE			 *gST;
extern EFI_RUNTIME_SERVICES 	 *gRT;

int
EFIAPI
main (
  IN int Argc,
  IN CHAR16 **Argv
  )
{
  CHAR16 *s1=L"WWW.";
  CHAR16 s2[20]=L".LAB-Z.COM";
  UINTN Result;

  Result=StrLen(s1);
  Print(L"%d\n",Result);

  Result=StrLen(s2);
  Print(L"%d\n",Result);

  return EFI_SUCCESS;
}
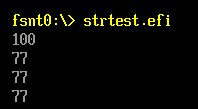
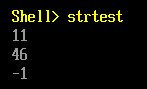
运行结果
4. StrSize 作用:返回字符串占用的内存字节数,注意:包括 NULL。
/**
  Returns the size of a Null-terminated Unicode string in bytes, including the
  Null terminator.

  This function returns the size, in bytes, of the Null-terminated Unicode string
  specified by String.

  If String is NULL, then ASSERT().
  If String is not aligned on a 16-bit boundary, then ASSERT().
  If PcdMaximumUnicodeStringLength is not zero, and String contains more than
  PcdMaximumUnicodeStringLength Unicode characters not including the
  Null-terminator, then ASSERT().

  @param  String  The pointer to a Null-terminated Unicode string.

  @return The size of String.

**/
UINTN
EFIAPI
StrSize (
  IN      CONST CHAR16              *String
  );
实例:
#include  <Uefi.h>
#include  <Library/UefiLib.h>
#include  <Library/ShellCEntryLib.h>


extern EFI_BOOT_SERVICES         *gBS;
extern EFI_SYSTEM_TABLE		 *gST;
extern EFI_RUNTIME_SERVICES 	 *gRT;

int
EFIAPI
main (
  IN int Argc,
  IN CHAR16 **Argv
  )
{
  CHAR16 *s1=L"WWW";
  CHAR16 s2[40]=L"LAB-Z.COM";
  UINTN Result;

  Result=StrSize(s1);
  Print(L"%d\n",Result);

  Result=StrSize(s2);
  Print(L"%d\n",Result);

  return EFI_SUCCESS;
}
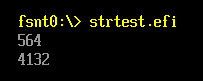
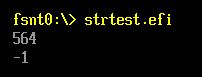
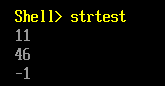
运行结果
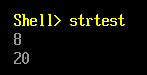
定义的字符串实际上是: “www\0” ,每个字符都是 CHAR16, 算下来需要占用 8个字节。
5. StrCmp 作用:比较字符串是否相同。相同的话返回 0
/**
  Compares two Null-terminated Unicode strings, and returns the difference
  between the first mismatched Unicode characters.

  This function compares the Null-terminated Unicode string FirstString to the
  Null-terminated Unicode string SecondString. If FirstString is identical to
  SecondString, then 0 is returned. Otherwise, the value returned is the first
  mismatched Unicode character in SecondString subtracted from the first
  mismatched Unicode character in FirstString.

  If FirstString is NULL, then ASSERT().
  If FirstString is not aligned on a 16-bit boundary, then ASSERT().
  If SecondString is NULL, then ASSERT().
  If SecondString is not aligned on a 16-bit boundary, then ASSERT().
  If PcdMaximumUnicodeStringLength is not zero, and FirstString contains more
  than PcdMaximumUnicodeStringLength Unicode characters not including the
  Null-terminator, then ASSERT().
  If PcdMaximumUnicodeStringLength is not zero, and SecondString contains more
  than PcdMaximumUnicodeStringLength Unicode characters, not including the
  Null-terminator, then ASSERT().

  @param  FirstString   The pointer to a Null-terminated Unicode string.
  @param  SecondString  The pointer to a Null-terminated Unicode string.

  @retval 0      FirstString is identical to SecondString.
  @return others FirstString is not identical to SecondString.

**/
INTN
EFIAPI
StrCmp (
  IN      CONST CHAR16              *FirstString,
  IN      CONST CHAR16              *SecondString
  );
实例代码:
#include  <Uefi.h>
#include  <Library/UefiLib.h>
#include  <Library/ShellCEntryLib.h>


extern EFI_BOOT_SERVICES         *gBS;
extern EFI_SYSTEM_TABLE			 *gST;
extern EFI_RUNTIME_SERVICES 	 *gRT;

int
EFIAPI
main (
  IN int Argc,
  IN CHAR16 **Argv
  )
{
  CHAR16 *s1=L"WWW";
  CHAR16 s2[40]=L"LAB-Z.COM";
  CHAR16 s3[40]=L"LAB-Z";
  CHAR16 s4[40]=L"MAB-Z";
  UINTN Result;

  Result=StrCmp(s1,s2);
  Print(L"%d\n",Result);

  Result=StrCmp(s2,s3);
  Print(L"%d\n",Result);

  Result=StrCmp(s3,s4);
  Print(L"%d\n",Result);

  return EFI_SUCCESS;
}
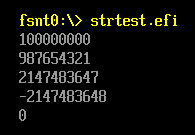
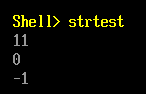
运行结果:
6. StrnCmp 作用:和上面的比较函数类似,只是这个函数只比较指定的前n个字符
/**
  Compares up to a specified length the contents of two Null-terminated Unicode strings,
  and returns the difference between the first mismatched Unicode characters.

  This function compares the Null-terminated Unicode string FirstString to the
  Null-terminated Unicode string SecondString. At most, Length Unicode
  characters will be compared. If Length is 0, then 0 is returned. If
  FirstString is identical to SecondString, then 0 is returned. Otherwise, the
  value returned is the first mismatched Unicode character in SecondString
  subtracted from the first mismatched Unicode character in FirstString.

  If Length > 0 and FirstString is NULL, then ASSERT().
  If Length > 0 and FirstString is not aligned on a 16-bit boundary, then ASSERT().
  If Length > 0 and SecondString is NULL, then ASSERT().
  If Length > 0 and SecondString is not aligned on a 16-bit boundary, then ASSERT().
  If PcdMaximumUnicodeStringLength is not zero, and Length is greater than
  PcdMaximumUnicodeStringLength, then ASSERT().
  If PcdMaximumUnicodeStringLength is not zero, and FirstString contains more than
  PcdMaximumUnicodeStringLength Unicode characters, not including the Null-terminator,
  then ASSERT().
  If PcdMaximumUnicodeStringLength is not zero, and SecondString contains more than
  PcdMaximumUnicodeStringLength Unicode characters, not including the Null-terminator,
  then ASSERT().

  @param  FirstString   The pointer to a Null-terminated Unicode string.
  @param  SecondString  The pointer to a Null-terminated Unicode string.
  @param  Length        The maximum number of Unicode characters to compare.

  @retval 0      FirstString is identical to SecondString.
  @return others FirstString is not identical to SecondString.

**/
INTN
EFIAPI
StrnCmp (
  IN      CONST CHAR16              *FirstString,
  IN      CONST CHAR16              *SecondString,
  IN      UINTN                     Length
  );
实例:
#include  <Uefi.h>
#include  <Library/UefiLib.h>
#include  <Library/ShellCEntryLib.h>


extern EFI_BOOT_SERVICES         *gBS;
extern EFI_SYSTEM_TABLE			 *gST;
extern EFI_RUNTIME_SERVICES 	 *gRT;

int
EFIAPI
main (
  IN int Argc,
  IN CHAR16 **Argv
  )
{
  CHAR16 *s1=L"WWW";
  CHAR16 s2[40]=L"LAB-Z.COM";
  CHAR16 s3[40]=L"LAB-Z";
  CHAR16 s4[40]=L"MAB-Z";

  Result=StrnCmp(s1,s2,7);
  Print(L"%d\n",Result);

  Result=StrnCmp(s2,s3,5);
  Print(L"%d\n",Result);

  Result=StrnCmp(s3,s4,5);
  Print(L"%d\n",Result);

  return EFI_SUCCESS;
}
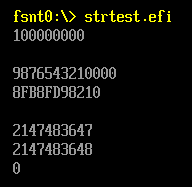
运行结果
7. StrCat 作用:将 Source 字符串的内容拼接到 Destination 字符串上。
/**
  Concatenates one Null-terminated Unicode string to another Null-terminated
  Unicode string, and returns the concatenated Unicode string.

  This function concatenates two Null-terminated Unicode strings. The contents
  of Null-terminated Unicode string Source are concatenated to the end of
  Null-terminated Unicode string Destination. The Null-terminated concatenated
  Unicode String is returned. If Source and Destination overlap, then the
  results are undefined.

  If Destination is NULL, then ASSERT().
  If Destination is not aligned on a 16-bit boundary, then ASSERT().
  If Source is NULL, then ASSERT().
  If Source is not aligned on a 16-bit boundary, then ASSERT().
  If Source and Destination overlap, then ASSERT().
  If PcdMaximumUnicodeStringLength is not zero, and Destination contains more
  than PcdMaximumUnicodeStringLength Unicode characters, not including the
  Null-terminator, then ASSERT().
  If PcdMaximumUnicodeStringLength is not zero, and Source contains more than
  PcdMaximumUnicodeStringLength Unicode characters, not including the
  Null-terminator, then ASSERT().
  If PcdMaximumUnicodeStringLength is not zero, and concatenating Destination
  and Source results in a Unicode string with more than
  PcdMaximumUnicodeStringLength Unicode characters, not including the
  Null-terminator, then ASSERT().

  @param  Destination The pointer to a Null-terminated Unicode string.
  @param  Source      The pointer to a Null-terminated Unicode string.

  @return Destination.

**/
CHAR16 *
EFIAPI
StrCat (
  IN OUT  CHAR16                    *Destination,
  IN      CONST CHAR16              *Source
  );
实例:
#include  <Uefi.h>
#include  <Library/UefiLib.h>
#include  <Library/ShellCEntryLib.h>


extern EFI_BOOT_SERVICES         *gBS;
extern EFI_SYSTEM_TABLE			 *gST;
extern EFI_RUNTIME_SERVICES 	 *gRT;

int
EFIAPI
main (
  IN int Argc,
  IN CHAR16 **Argv
  )
{
  CHAR16 *s1=L"WWW.";
  CHAR16 s2[40]=L"LAB-Z.COM";
  CHAR16 *Result;

  Result=StrCat(s1,s2);
  Print(L"%s\n",Result);

  return EFI_SUCCESS;
}
运行结果
8.StrnCat 作用:将 Source 字符串前面n个字符的内容拼接到 Destination 字符串上。
/**
  Concatenates up to a specified length one Null-terminated Unicode to the end
  of another Null-terminated Unicode string, and returns the concatenated
  Unicode string.

  This function concatenates two Null-terminated Unicode strings. The contents
  of Null-terminated Unicode string Source are concatenated to the end of
  Null-terminated Unicode string Destination, and Destination is returned. At
  most, Length Unicode characters are concatenated from Source to the end of
  Destination, and Destination is always Null-terminated. If Length is 0, then
  Destination is returned unmodified. If Source and Destination overlap, then
  the results are undefined.

  If Destination is NULL, then ASSERT().
  If Length > 0 and Destination is not aligned on a 16-bit boundary, then ASSERT().
  If Length > 0 and Source is NULL, then ASSERT().
  If Length > 0 and Source is not aligned on a 16-bit boundary, then ASSERT().
  If Source and Destination overlap, then ASSERT().
  If PcdMaximumUnicodeStringLength is not zero, and Length is greater than
  PcdMaximumUnicodeStringLength, then ASSERT().
  If PcdMaximumUnicodeStringLength is not zero, and Destination contains more
  than PcdMaximumUnicodeStringLength Unicode characters, not including the
  Null-terminator, then ASSERT().
  If PcdMaximumUnicodeStringLength is not zero, and Source contains more than
  PcdMaximumUnicodeStringLength Unicode characters, not including the
  Null-terminator, then ASSERT().
  If PcdMaximumUnicodeStringLength is not zero, and concatenating Destination
  and Source results in a Unicode string with more than PcdMaximumUnicodeStringLength
  Unicode characters, not including the Null-terminator, then ASSERT().

  @param  Destination The pointer to a Null-terminated Unicode string.
  @param  Source      The pointer to a Null-terminated Unicode string.
  @param  Length      The maximum number of Unicode characters to concatenate from
                      Source.

  @return Destination.

**/
CHAR16 *
EFIAPI
StrnCat (
  IN OUT  CHAR16                    *Destination,
  IN      CONST CHAR16              *Source,
  IN      UINTN                     Length
  );
实例:
#include  <Uefi.h>
#include  <Library/UefiLib.h>
#include  <Library/ShellCEntryLib.h>


extern EFI_BOOT_SERVICES         *gBS;
extern EFI_SYSTEM_TABLE			 *gST;
extern EFI_RUNTIME_SERVICES 	 *gRT;

int
EFIAPI
main (
  IN int Argc,
  IN CHAR16 **Argv
  )
{
  CHAR16 *s1=L"WWW.";
  CHAR16 s2[40]=L"LAB-Z.COM";
  CHAR16 *Result;

  Result=StrnCat(s1,s2,3);
  Print(L"%s\n",Result);

  return EFI_SUCCESS;
}
运行结果

本文参考 《UEFI 原理与编程》。