之前提到过,使用 LoadImage 和 StartImage 无法加载 CLib Build出来的 EFI Application。一种变通的方法是通过 ShellLib 下面的 ShellExcute 来调用其他的 EFI Application。
具体定义在 \ShellPkg\Library\UefiShellLib\UefiShellLib.c
**
  Cause the shell to parse and execute a command line.

  This function creates a nested instance of the shell and executes the specified
  command (CommandLine) with the specified environment (Environment). Upon return,
  the status code returned by the specified command is placed in StatusCode.
  If Environment is NULL, then the current environment is used and all changes made
  by the commands executed will be reflected in the current environment. If the
  Environment is non-NULL, then the changes made will be discarded.
  The CommandLine is executed from the current working directory on the current
  device.

  The EnvironmentVariables pararemeter is ignored in a pre-UEFI Shell 2.0
  environment.  The values pointed to by the parameters will be unchanged by the
  ShellExecute() function.  The Output parameter has no effect in a
  UEFI Shell 2.0 environment.

  @param[in] ParentHandle         The parent image starting the operation.
  @param[in] CommandLine          The pointer to a NULL terminated command line.
  @param[in] Output               True to display debug output.  False to hide it.
  @param[in] EnvironmentVariables Optional pointer to array of environment variables
                                  in the form "x=y".  If NULL, the current set is used.
  @param[out] Status              The status of the run command line.

  @retval EFI_SUCCESS             The operation completed sucessfully.  Status
                                  contains the status code returned.
  @retval EFI_INVALID_PARAMETER   A parameter contains an invalid value.
  @retval EFI_OUT_OF_RESOURCES    Out of resources.
  @retval EFI_UNSUPPORTED         The operation is not allowed.
**/
EFI_STATUS
EFIAPI
ShellExecute (
  IN EFI_HANDLE                 *ParentHandle,
  IN CHAR16                     *CommandLine OPTIONAL,
  IN BOOLEAN                    Output OPTIONAL,
  IN CHAR16                     **EnvironmentVariables OPTIONAL,
  OUT EFI_STATUS                *Status OPTIONAL
  )
{
  EFI_STATUS                CmdStatus;
  //
  // Check for UEFI Shell 2.0 protocols
  //
  if (gEfiShellProtocol != NULL) {
    //
    // Call UEFI Shell 2.0 version (not using Output parameter)
    //
    return (gEfiShellProtocol->Execute(ParentHandle,
                                      CommandLine,
                                      EnvironmentVariables,
                                      Status));
  }

  //
  // Check for EFI shell
  //
  if (mEfiShellEnvironment2 != NULL) {
    //
    // Call EFI Shell version.
    // Due to oddity in the EFI shell we want to dereference the ParentHandle here
    //
    CmdStatus = (mEfiShellEnvironment2->Execute(*ParentHandle,
                                          CommandLine,
                                          Output));
    //
    // No Status output parameter so just use the returned status
    //
    if (Status != NULL) {
      *Status = CmdStatus;
    }
    //
    // If there was an error, we can't tell if it was from the command or from
    // the Execute() function, so we'll just assume the shell ran successfully
    // and the error came from the command.
    //
    return EFI_SUCCESS;
  }

  return (EFI_UNSUPPORTED);
}
调用参数如下:
ParentHandle 执行操作的父进程的Handle
CommandLine 要执行的命令行
Output 是否输出 Debug 信息(这里我没有搞明白,如果有清楚的朋友望不吝赐教)
EnvironmentVariables 环境变量
因为已经在头文件中定义过,所以我们可以直接调用。
比如用下面的方式可以执行 ls 命令:
Shell command
  CHAR16	  *S=L"ls";
  OpStat = ShellExecute( &MyHandle, S, FALSE, NULL, &CmdStat);
我们再编写一个简单的程序输出当前收到的命令行参数
#include  <Uefi.h>
#include  <Library/UefiLib.h>
#include  <Library/ShellCEntryLib.h>

int
EFIAPI
main (
  IN int Argc,
  IN char **Argv
  )
{
	int	i;

	for (i=0;i<Argc; i++)	{
		Print(L"%S\n",Argv[i]);
	}

  return EFI_SUCCESS;
}
[Defines]
  INF_VERSION                    = 0x00010006
  BASE_NAME                      = Hello1
  FILE_GUID                      = 4ea97c46-7491-4dfd-0048-747010f3ce51
  MODULE_TYPE                    = UEFI_APPLICATION
  VERSION_STRING                 = 0.1
  ENTRY_POINT                    = ShellCEntryLib

#
#  VALID_ARCHITECTURES           = IA32 X64 IPF
#

[Sources]
  Hello1.c

[Packages]
  StdLib/StdLib.dec
  MdePkg/MdePkg.dec
  ShellPkg/ShellPkg.dec


[LibraryClasses]
  LibC
  LibStdio
  ShellCEntryLib
  ShellLib
  BaseLib
  BaseMemoryLib
  UefiLib


[Protocols]


[BuildOptions]
运行结果
我们使用 ShellExecute 的代码
#include  <Uefi.h>
#include  <Library/UefiLib.h>
#include  <Library/ShellCEntryLib.h>

#include <Library/ShellLib.h>

extern EFI_BOOT_SERVICES           	 *gBS;
extern EFI_SYSTEM_TABLE				 *gST;
extern EFI_RUNTIME_SERVICES 		 *gRT;

extern EFI_SHELL_PROTOCOL            *gEfiShellProtocol;
extern EFI_SHELL_ENVIRONMENT2 		 *mEfiShellEnvironment2;
extern EFI_HANDLE 					 gImageHandle;

int
EFIAPI
main (
  IN int Argc,
  IN char **Argv
  )
{
  EFI_STATUS  CmdStat;
  EFI_STATUS  OpStat;
  EFI_HANDLE  MyHandle = gImageHandle;
  CHAR16	  *S=L"hello1.efi a1 b2 c3";

  OpStat = ShellExecute( &MyHandle, S, FALSE, NULL, &CmdStat);

  return EFI_SUCCESS;
}
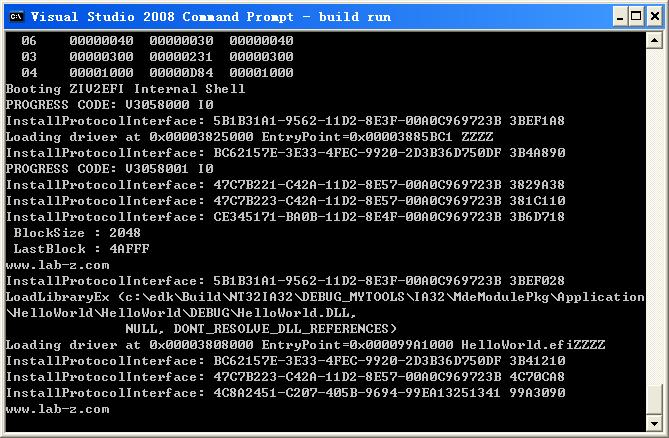
最后运行结果
可以看到,能够调用hello1.efi 并且正确的传递了参数。
本文提到的完整代码下载:
shellexecdemo